
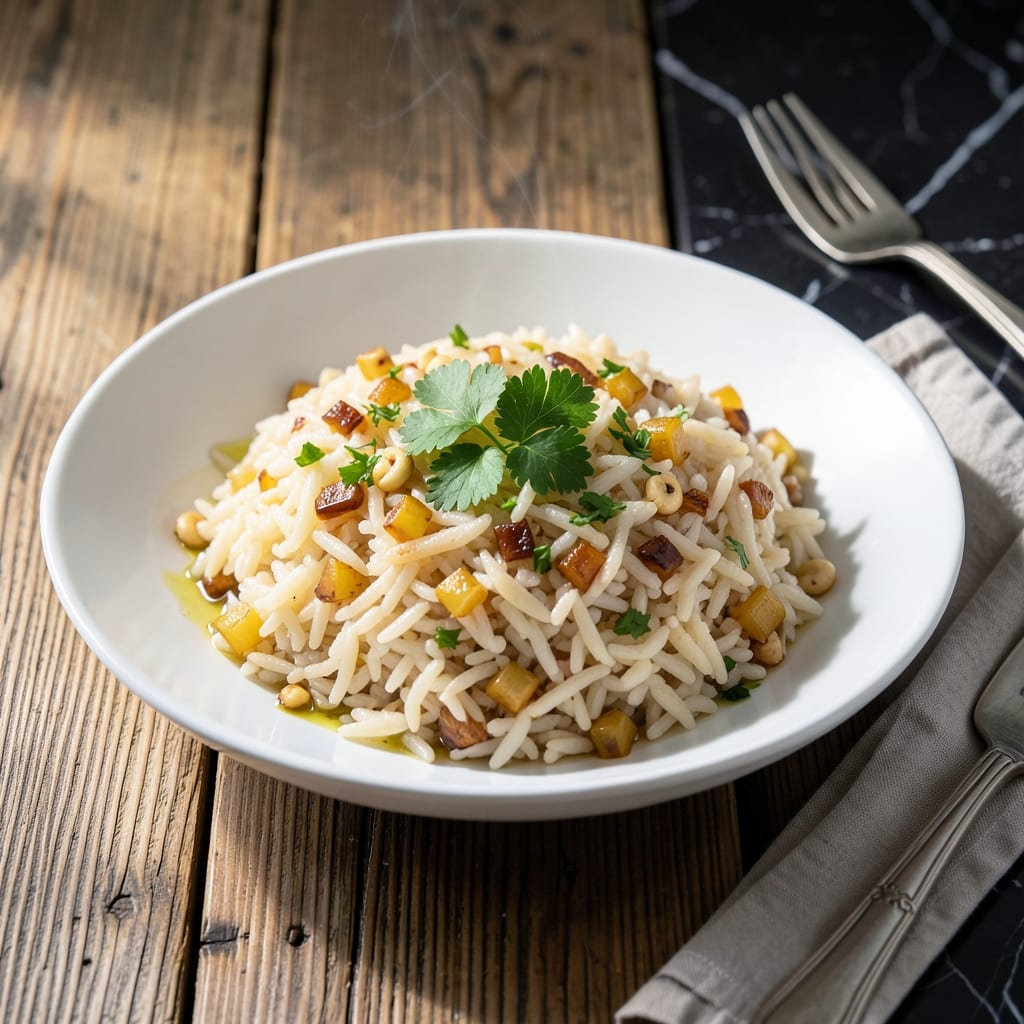
This rice pilaf delivers fluffy grains and herbed aroma without excess salt, proving flavor doesn’t require sodium. A simple technique transforms basic ingredients into a side dish that stands out on any table.
The method relies on toasting the rice first, which brings out its natural nuttiness. Low-sodium broth and fresh herbs add depth, while a touch of lemon zest brightens each bite. It’s a foolproof way to enjoy a classic dish with better-for-you ingredients.
What you get is perfectly cooked rice with a light, fragrant quality that complements any main course. The grains stay separate and tender, never mushy, with a subtle herbal note in every forkful.
Ready in under 30 minutes, this pilaf is ideal for weeknight dinners or special occasions. Here’s how to make it.
Ingredients for Low Sodium Rice Pilaf
A handful of pantry staples and fresh herbs create this aromatic, low-sodium side dish.
| Ingredient | Amount | Notes |
|---|---|---|
| Long-Grain White Rice 🌾 | 1 ½ cups | Rinsed until water runs clear |
| Low-Sodium Chicken Broth 🥣 | 3 cups | Or vegetable broth for vegetarian |
| Unsalted Butter 🧈 | 2 tbsp | Or olive oil for dairy-free |
| Yellow Onion 🧅 | 1 whole | Finely diced |
| Garlic Cloves 🧄 | 3 cloves | Minced |
| Fresh Parsley 🌿 | ¼ cup | Chopped, plus extra for garnish |
| Fresh Thyme 🍃 | 1 tbsp | Chopped, or 1 tsp dried |
| Lemon Zest 🍋 | 1 tsp | From 1 medium lemon |
| Lemon Juice 🍋 | 1 tbsp | Freshly squeezed |
| Bay Leaf 🍃 | 1 whole | Removed before serving |
| Black Pepper 🌶️ | ½ tsp | Freshly ground preferred |
| Ground Turmeric 🌿 | ¼ tsp | For color and earthiness |
The rice quality is paramount here. Basmati or jasmine yield the fluffiest grains—avoid instant rice. For broth, Swanson’s Low-Sodium or Pacific Foods are reliable brands with clean flavor. Unsalted butter is essential for controlling sodium; Plugrá or Kerrygold are excellent choices. Fresh herbs (the good stuff, not the dried kind) make a noticeable difference in aroma.
No chicken broth? Vegetable broth at a 1:1 ratio works perfectly. Out of fresh thyme? Dried thyme at one-third the amount is acceptable. For a nutty depth, swap in brown rice, but add 10 minutes to cooking time. The lemon zest can be omitted in a pinch, but the dish benefits from its bright note.
Store cooked pilaf in an airtight container—it keeps for 4-5 days in the fridge. Reheat with a splash of broth to revive moisture. Freezing isn’t recommended as it can make the rice mushy. Always rinse the rice first (worth the extra minute).
Why You’ll Love This Recipe
- One Pot Wonder: I love that everything cooks together in one pot—no extra pans, no fuss. Just rice, broth, and aromatics doing their thing.
- Garlic-Butter Richness: The unsalted butter and garlic cloves infuse every grain with a deep, savory flavor that’s anything but bland.
- Meal Prep Hero: This keeps beautifully in the fridge, so I make a big batch for lunches all week. Honestly, it tastes even better the next day.
- Budget-Friendly Staple: Long-grain rice and low-sodium broth stretch far without breaking the bank. Between us, it’s my go-to when I need to feed a crowd for less.
Step-by-Step Instructions for Low Sodium Rice Pilaf
Master this technique for perfectly fluffy grains with vibrant herbed aroma every time.
Step 1: Toast the Rice for Nutty Depth
Rinse the 1.5 cups long-grain white rice until the water runs clear to remove excess starch. In a heavy-bottomed saucepan, melt the 2 tbsp unsalted butter over medium heat. Add the rinsed and drained rice, stirring frequently.
Toast for 2-3 minutes until the grains turn slightly translucent and emit a subtle nutty aroma. This step enhances the rice’s natural flavor and prevents it from becoming mushy during cooking. Watch closely to avoid browning.
Step 2: Sauté Aromatics Until Fragrant
Add the finely diced yellow onion to the pan with the toasted rice. Cook for 3-4 minutes until the onion softens and becomes translucent. The onion should release its natural sweetness without taking on color.
Stir in the minced garlic cloves, 1 tbsp fresh thyme, 1 tsp lemon zest, and 0.25 tsp ground turmeric. Cook for an additional 30-45 seconds until the garlic is fragrant but not browned. This builds the aromatic foundation of the pilaf.
Step 3: Simmer with Broth and Herbs
Pour in the 3 cups low-sodium chicken broth, then add the 1 whole bay leaf and 0.5 tsp black pepper. Bring the mixture to a rolling boil, then immediately reduce the heat to low.
Cover the saucepan with a tight-fitting lid and let it simmer undisturbed for 15-18 minutes. The liquid should be fully absorbed, and the rice should appear tender with tiny steam holes on the surface.
Step 4: Rest and Finish with Bright Flavors
Remove the saucepan from heat and let it rest, covered, for 5-10 minutes. This allows the rice to steam and become perfectly fluffy. Discard the bay leaf before proceeding.
Gently fluff the rice with a fork, then stir in the 1 tbsp lemon juice and 0.25 cup fresh parsley. The lemon juice brightens the dish, while the parsley adds a fresh herbal note. Taste and adjust seasoning if needed.
Step 5: Serve Immediately for Best Texture
Transfer the pilaf to a serving dish and garnish with additional fresh parsley if desired. The rice should be light, separate, and infused with the aromatic herbs and citrus notes.
Serve immediately while hot, as the texture is best fresh. This pilaf pairs beautifully with grilled proteins or roasted vegetables, offering a flavorful yet low-sodium complement to any meal.
Pro Tips For Making Low Sodium Rice Pilaf
- Toast the Rice: Cook the rice in the butter for 2-3 minutes until lightly golden before adding liquid—this deepens the flavor without needing extra salt.
- Sauté Onions Slow: Let the yellow onions cook on medium-low for 8-10 minutes until soft and translucent; rushing this step leaves them harsh and underdeveloped.
- Use Room-Temp Broth: I learned this the hard way—adding cold low-sodium chicken broth straight from the fridge slows the cooking and can make the rice gummy.
- Rest 10 Minutes: After the liquid’s absorbed, turn off the heat, cover, and let it sit—this lets the grains firm up and absorb any remaining moisture.
Make-Ahead Tips for This Dish
Prep Ahead Strategy
You can toast the rice and sauté the aromatics up to 2 days in advance. Store the mixture in an airtight container in the fridge. This pre-toasted base saves 10 minutes of active cooking time. 💡
Broth Boost Tip
For even deeper flavor, prepare your broth the day before and let it cool with the bay leaf and thyme steeping overnight. Strain before using. This infuses extra herbal notes without adding sodium.
Herb Prep Shortcut
Wash and chop all herbs when you bring them home from the store. Store in damp paper towels inside a sealed container—they’ll keep fresh for 5-7 days. This means no last-minute chopping when you’re ready to cook.
Freezing Guidance
While I don’t recommend freezing cooked pilaf, you can freeze the toasted rice mixture before adding liquid. Portion into 1-cup servings in freezer bags for up to 1 month. Thaw before cooking with fresh broth.
Reheating Method
Add 2-3 tbsp low-sodium broth to each cup of cold pilaf before reheating. Cover and warm over low heat for 5-7 minutes, stirring occasionally. The extra moisture revives the grains beautifully. 🔥
Portion Control
Cook the full recipe, then divide into 1-cup portions in airtight containers. This makes grab-and-go sides for 4 lunches. The flavors hold well, and the rice stays separate when reheated properly.
Nutrition Facts
Frequently Asked Questions
Can I use brown rice instead of white?
Yes, but increase the broth to 3.5 cups and simmer for 35-40 minutes. Brown rice needs more liquid and time to soften.
Why does the rice need rinsing?
Rinsing removes excess starch, which prevents the grains from becoming gummy. It also eliminates any residual sodium or impurities.
What if I don’t have fresh herbs?
Use dried herbs at one-third the amount. For example, 1 tsp dried thyme replaces 1 tbsp fresh. The flavor will be slightly more concentrated.
How do I keep the rice from sticking?
Use a heavy-bottomed pot and avoid stirring after adding broth. The toasted rice creates a natural barrier to prevent sticking.

- Lump Rice Recipe Sri Lanka: Traditional Island-Style Texture - November 4, 2026
- Laos Sticky Rice Recipe: Traditional Steamed Perfection - November 4, 2026
- Magic Rice Recipe: One-Pot Aromatic Wonder - November 4, 2026