
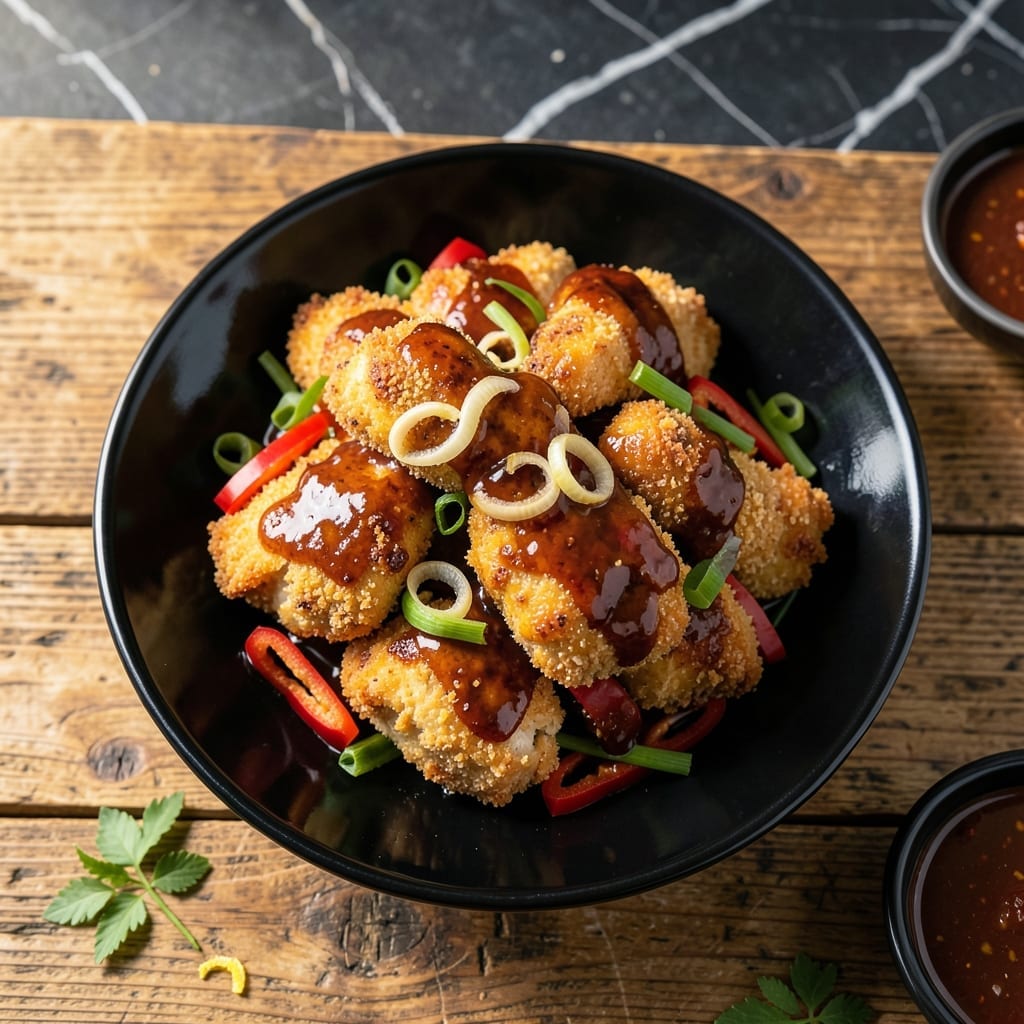
This Indo-Chinese classic brings bold flavors to your kitchen with its signature sweet, tangy, and slightly spicy sauce. The dish combines tender chicken with a vibrant sauce that’s become a global favorite.
I’ve refined this recipe to capture the authentic taste of takeout while keeping it approachable for home cooks. The key is balancing the sauce’s sweetness with a touch of heat and umami depth.
You’ll achieve restaurant-quality results with crispy chicken pieces coated in a glossy, flavorful sauce. The dish works as a main course or paired with fried rice.
Serve it hot for the best experience, garnished with green onions for freshness.
Ingredients for Manchurian Chicken
Bold flavors start with these simple ingredients for a takeout favorite at home.
| Ingredient | Amount | Notes |
|---|---|---|
| Boneless Chicken Breast 🍗 | 1 ½ lb | Cut into 1-inch pieces |
| Cornstarch 🌾 | ½ cup | For coating chicken |
| All-Purpose Flour 🌾 | ¼ cup | For crispy texture |
| Vegetable Oil 🫒 | 1 cup | For deep frying |
| Garlic Cloves 🧄 | 4 cloves | Minced finely |
| Fresh Ginger 🌿 | 1 tbsp | Grated or minced |
| Green Onions 🧅 | 4 whole | Chopped, white and green parts separated |
| Soy Sauce 💧 | 3 tbsp | Low-sodium preferred |
| Ketchup 🍅 | ½ cup | For sweetness and color |
| Chili Sauce 🌶️ | 2 tbsp | For tangy heat |
| White Vinegar 💧 | 1 tbsp | For acidity balance |
| Granulated Sugar 🍚 | 1 tbsp | Adjust to taste |
| Red Bell Pepper 🌶️ | 1 whole | Diced for crunch |
| Green Bell Pepper 🌶️ | 1 whole | Diced for color |
| Salt 🧂 | 1 tsp | Adjust as needed |
The chicken is the star here. Boneless, skinless breasts stay tender and crisp up perfectly—avoid thighs as they can get chewy. I grab mine from Whole Foods or Costco (the organic ones are great). For the coating, cornstarch is non-negotiable—it gives that signature crispy texture. Most Asian grocery stores carry the right kind of chili sauce, but Huy Fong works in a pinch.
No chili sauce? Sriracha plus a teaspoon of sugar gets you close. Fresh ginger and garlic are ideal, but powdered at half the amount works if you’re out. Want more heat? Add a pinch of cayenne or sliced green chilies. The bell peppers can be swapped for carrots or cabbage (whatever’s in the crisper). For a gluten-free version, tamari instead of soy sauce does the trick.
This tastes best fresh, but leftovers keep 3-4 days in the fridge. Reheat in a pan, not the microwave—keeps the chicken crispy. The sauce thickens as it cools, so stir in a splash of water when reheating. Freezes for up to 1 month (sauce only, not the chicken).
Why You’ll Love This Recipe
- One Pan Wonder: I just toss chicken in cornstarch and flour, fry it up, and let the garlic do its magic. One bowl, one pan, minimal mess.
- Crave-Worthy Crunch: That cornstarch coating fries up so crispy, and the garlic gives it this addictive kick. I could eat the whole batch myself.
- Weeknight Hero: Between us, this is my Tuesday night lifesaver—quick enough for a school night but fancy enough for guests.
- Budget Friendly: Boneless chicken breast stretches far, and the pantry staples keep costs low. I’ll be real: it’s cheaper than takeout and twice as good.
Step-by-Step Instructions for Manchurian Chicken
Follow this classic method for crispy chicken tossed in a tangy, sweet-savory sauce.
Step 1: Coat and Fry the Chicken
Cut the 1.5 lb Boneless Chicken Breast into 1-inch pieces and pat dry with paper towels. In a bowl, combine the 0.5 cup Cornstarch, 0.25 cup All-Purpose Flour, and 1 tsp Salt. Dredge each piece of chicken in the mixture, pressing gently to adhere.
Heat the 1 cup Vegetable Oil in a deep skillet over medium-high heat until it reaches 350°F. Fry the chicken in batches for 4-5 minutes until golden brown and crispy. Drain on a wire rack or paper towels to keep it crisp.
Step 2: Sauté the Aromatics
In a separate large pan, heat a splash of the same Vegetable Oil over medium heat. Add the 4 cloves Garlic Cloves and 1 tbsp Fresh Ginger, minced, and sauté for 30 seconds until fragrant.
Add the diced 1 whole Red Bell Pepper and 1 whole Green Bell Pepper, cooking for 3-4 minutes until slightly softened but still crisp. Stir in the chopped white parts of the 4 whole Green Onions, reserving the green tops for garnish.
Step 3: Make the Sauce
In a small bowl, whisk together the 3 tbsp Soy Sauce, 0.5 cup Ketchup, 2 tbsp Chili Sauce, 1 tbsp White Vinegar, and 1 tbsp Granulated Sugar. Pour this mixture into the pan with the vegetables.
Simmer for 2-3 minutes until the sauce thickens slightly and coats the back of a spoon. Taste and adjust sweetness or tanginess with a pinch more Granulated Sugar or White Vinegar if needed.
Step 4: Toss and Serve
Add the crispy chicken to the sauce and toss gently to coat every piece evenly. Cook for an additional 1-2 minutes over medium-low heat to let the flavors meld.
Garnish with the reserved green onion tops and serve immediately over rice. The chicken should stay crispy even after tossing, with a glossy, sticky sauce clinging to each bite.
Pro Tips For Making Manchurian Chicken
- Double Fry the Chicken: Fry the coated chicken pieces once at 350°F until light golden, then again at 400°F for 2 minutes—this gives that extra crispy texture manchurian chicken needs.
- Chill the Coated Chicken: After dredging in the cornstarch and flour mix, let the chicken rest in the fridge for 15 minutes—it keeps the coating from sliding off during frying.
- Skip the Overcrowding: I learned this the hard way—fry in small batches or the oil temp drops and you’ll end up with soggy, greasy chicken instead of crispy.
- Use Fresh Garlic: Sounds obvious, but old garlic cloves lose their punch—freshly minced garlic in the sauce makes a real difference for that bold manchurian flavor.
Best Sauces and Condiments for This Dish
Classic Dipping Sauces
I love serving this with a side of sweet chili sauce for extra tangy heat—Mae Ploy brand is my go-to. It adds a sticky, vibrant layer that complements the dish beautifully. A small bowl of 2 tbsp with a squeeze of lime does the trick. 🌶️
Spicy Mayo Twist
Mix ¼ cup mayonnaise with 1 tbsp sriracha and 1 tsp honey for a creamy, spicy dip. It balances the bold flavors of the sauce with a cooling contrast. I always keep Kewpie mayo on hand for this.
Fresh Cucumber Raita
A cooling yogurt-based raita with grated cucumber, mint, and a pinch of cumin cuts through the richness. Use ½ cup plain yogurt, ¼ cup grated cucumber, and 1 tbsp chopped mint for a refreshing side.
Pickled Vegetables
Quick-pickled red onions or carrots add a bright, crunchy contrast. Thinly slice 1 small red onion, soak in ½ cup rice vinegar and 1 tsp sugar for 30 minutes. The acidity lifts every bite. ✨
Extra Chili Oil
Drizzle with chili crisp oil for added texture and heat. I recommend Lao Gan Ma or Fly By Jing brands. Just 1 tsp per serving enhances the dish without overpowering it.
Lime Wedges
Serve with fresh lime wedges for a citrusy kick. A squeeze of lime right before eating brightens all the flavors. I always have 2-3 limes ready for garnish.
Nutrition Facts
Frequently Asked Questions
Can I use chicken thighs instead of breasts?
Yes, but use boneless, skinless thighs and cut them into 1-inch pieces. They’ll stay juicier but may need an extra 1-2 minutes frying to crisp up properly.
How do I make it less spicy?
Reduce the chili sauce to 1 tablespoon or replace it with 1 teaspoon sriracha. Add an extra 1 tablespoon sugar to balance the flavors.
Can I bake the chicken instead of frying?
Toss coated pieces with 1 tablespoon oil and bake at 400°F for 15-20 minutes, flipping halfway. It won’t be as crispy but works in a pinch.
How long does it keep in the fridge?
Store leftovers in an airtight container for up to 3-4 days. Reheat in a skillet with a splash of water to maintain texture.

- Jollof Rice Sauce Recipe: West African Tomato and Spice Infusion - September 25, 2026
- Japanese Rice Soup Recipe: Umami-Rich Comfort in a Bowl - September 25, 2026
- Homemade Cream Of Rice Recipe: Silk-Smooth Breakfast in Minutes - September 25, 2026