
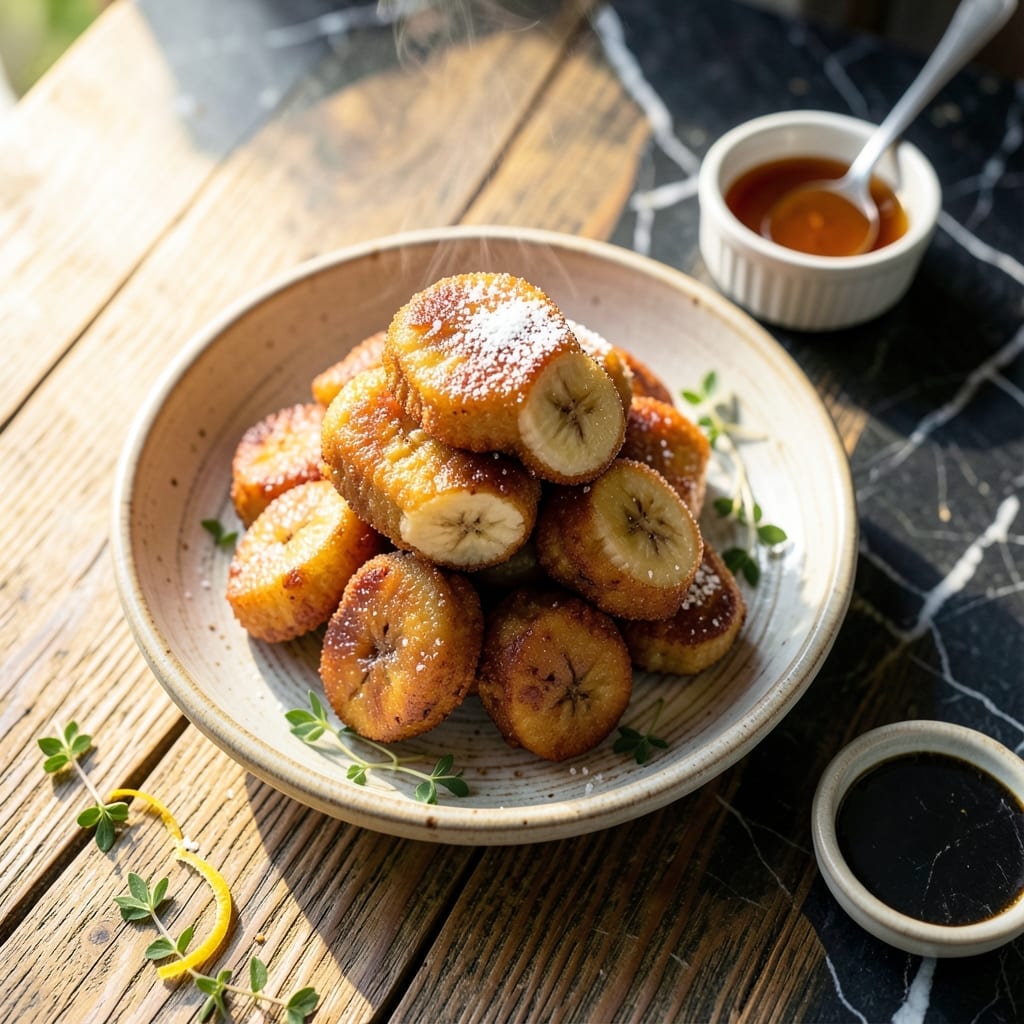
These banana fritters redefine what a simple dessert can be, with their crispy exterior giving way to a surprisingly chewy center. The secret lies in using glutinous rice flour, which creates that signature texture you won’t find in standard versions.
I developed this method after testing countless variations, and the combination of ripe bananas, light batter, and proper frying temperature makes all the difference. The rice flour adds a subtle sweetness while ensuring the fritters hold their shape.
What you’ll get is golden, crispy fritters that stay soft inside, with a delicate banana flavor that shines through. They’re perfect for snack time or as a sweet ending to any meal.
Serve them warm for the best experience. Here’s how to make these irresistible treats.
Ingredients for Maruya Recipe with Glutinous Rice Flour
Ripe bananas and glutinous rice flour create these golden, crispy treats with chewy centers.
| Ingredient | Amount | Notes |
|---|---|---|
| Ripe Bananas 🍌 | 4 whole | Saba or Cardaba variety preferred |
| Glutinous Rice Flour 🌾 | 1 ½ cups | Also known as sweet rice flour |
| All-Purpose Flour 🌾 | ½ cup | For light batter structure |
| Granulated Sugar 🍚 | ¼ cup | Adjust to taste preference |
| Large Eggs 🥚 | 2 whole | Beaten for batter binding |
| Milk 🥛 | ½ cup | Whole milk for richness |
| Vanilla Extract 💧 | 1 tsp | Pure extract preferred |
| Baking Powder 🧂 | 1 tsp | For light, airy texture |
| Salt 🧂 | ¼ tsp | Balances sweetness |
| Vegetable Oil 🫒 | 2 cups | For deep frying |
| Ground Cinnamon 🌿 | ½ tsp | Optional, for dusting |
| Powdered Sugar 🍚 | ¼ cup | Optional, for dusting |
The bananas are key—use ones with lots of brown speckles (the riper, the better). Filipino markets often carry Saba bananas, which are traditional for maruya. Glutinous rice flour is non-negotiable for that chewy center—look for it in the Asian aisle at Whole Foods or H Mart. Don’t confuse it with regular rice flour, which won’t give you the right texture.
No Saba bananas? Plantains or very ripe Cavendish work in a pinch. For a gluten-free version, swap all-purpose for cornstarch at half the amount. Out of eggs? Flax eggs (1 tbsp ground flax + 3 tbsp water per egg) are a solid backup. The cinnamon and powdered sugar are optional but worth the extra minute for that bakery-style finish.
Fry in batches to keep the oil hot and the fritters crispy. Leftovers? They’re best fresh but will keep in an airtight container for 2 days. Reheat in a toaster oven to revive the crunch. The batter can sit for 10 minutes while the oil heats up—no rush.
Why You’ll Love This Recipe
- One Bowl Wonder: I just mash the bananas, mix in the flours and eggs, and we’re done—no fancy tools, no fuss.
- Chewy Heaven: The glutinous rice flour gives that irresistible stretchy bite with every crisp-edged piece.
- Snack or Dessert: Honestly, I serve these as an afternoon pick-me-up or a quick dessert after dinner.
- Budget Hero: Ripe bananas and pantry staples mean I can make a batch for pennies and still have leftovers.
Step-by-Step Instructions for Maruya with Glutinous Rice Flour
This method guarantees crispy edges with soft, chewy banana centers every time.
Step 1: Prepare the Batter Base
In a large mixing bowl, mash the 4 whole Ripe Bananas until mostly smooth with a few small chunks remaining. I like this texture because it gives you bursts of banana flavor in every bite.
Add the 0.25 cup Granulated Sugar, 2 whole Large Eggs, 0.5 cup Milk, and 1 tsp Vanilla Extract. Whisk vigorously until the mixture is completely smooth and slightly frothy. This ensures all the wet ingredients are fully incorporated before adding the dry ones.
Step 2: Combine Dry Ingredients for Structure
In a separate bowl, sift together the 1.5 cups Glutinous Rice Flour, 0.5 cup All-Purpose Flour, 1 tsp Baking Powder, and 0.25 tsp Salt. Sifting prevents lumps and distributes the leavening agent evenly for consistent texture.
Gradually add the dry mixture to the banana mixture, whisking just until combined. The batter should be thick but pourable—like pancake batter. Don’t overmix, as this can make your maruya dense instead of light and airy.
Step 3: Heat Oil and Fry to Golden Perfection
Pour the 2 cups Vegetable Oil into a deep skillet and heat over medium-high heat until it reaches 350°F. To test without a thermometer, drop a pinch of batter into the oil—if it sizzles immediately and rises to the surface, it’s ready.
Carefully drop 2-tablespoon portions of batter into the hot oil, leaving space between each. Fry in batches to avoid crowding the pan. Cook for 2-3 minutes per side until deep golden brown and crispy. The edges will turn golden first, so flip when you see that color developing.
Step 4: Drain and Dust with Sweet Finish
Using a slotted spoon, transfer the fried maruya to a paper towel-lined plate to drain excess oil. Let them cool for 2-3 minutes—this helps them crisp up further as they cool.
For the final touch, combine the 0.25 cup Powdered Sugar and 0.5 tsp Ground Cinnamon in a small bowl. Dust the warm maruya generously with this mixture. Serve immediately while still crispy and warm.
Pro Tips For Making Maruya Recipe With Glutinous Rice Flour
- Mash Bananas Well: I learned this the hard way—lumpy banana bits ruin the texture. Use a fork or potato masher until completely smooth before mixing with the flours.
- Rest the Batter: After combining all ingredients, let the batter sit for 10-15 minutes. The glutinous rice flour hydrates better, giving you that perfect chewy texture.
- Skip Overmixing: Stir just until the dry ingredients disappear—overworking the batter makes maruya tough instead of tender. A few lumps are fine.
- Use Ripe Bananas: The blacker the peel, the sweeter and more flavorful your maruya will be. Sounds weird, but it works: underripe bananas give bland, starchy results.
Make-Ahead Tips for This Dish
Batter Prep Ahead
Mix your wet and dry ingredients separately the night before and store them covered in the fridge. In the morning, combine and let the batter rest for 10-15 minutes while your oil heats. This actually improves the texture as the rice flour hydrates overnight. ❄️
Banana Prep
Peel and mash your bananas up to 24 hours ahead and store in an airtight container in the fridge. The cold bananas will slightly thicken your batter, which helps create that perfect crispy exterior. Just bring them to room temperature before mixing.
Oil Temperature
If frying later, pre-measure your 2 cups vegetable oil and store it in a cool, dark place. When ready to cook, the oil will heat more evenly if it’s been at room temperature. I always use my candy thermometer to monitor the 350°F target precisely.
Frying in Batches
Keep your batter chilled between batches to maintain consistency. I place my mixing bowl in a larger bowl of ice water. This prevents the batter from getting too warm and producing greasy fritters. The cold batter also helps maintain that crispy texture.
Dusting Station
Pre-mix your powdered sugar and cinnamon dusting in a small container. This stays fresh for weeks and saves time when serving. I use a fine-mesh sieve for an even, professional-looking dusting that guests always notice. 💫
Nutrition Facts
Frequently Asked Questions
Can I use regular rice flour instead?
No, regular rice flour won’t give you the same chewy texture. Glutinous rice flour is essential for that signature sticky, mochi-like center. Substituting will result in a drier, crumblier fritter.
What if my bananas aren’t very ripe?
Underripe bananas lack sweetness and moisture. Add 1-2 tablespoons extra sugar to compensate, and mash them finely to avoid tough bits. For best results, use bananas with plenty of brown speckles.
How do I keep them crispy after frying?
Drain on a wire rack instead of paper towels to prevent steam buildup. Keep finished batches warm in a 200°F oven on a rack. Avoid stacking them until completely cooled.
Can I bake these instead of frying?
Baking won’t achieve the same crispiness but works in a pinch. Use 400°F for 12-15 minutes, flipping halfway. Brush with oil first for better browning.

- Mujadara Rice and Lentils Recipe: Earthy Spiced Lentils With Caramelized Onions - November 1, 2026
- Naija Fried Rice Recipe: Street-Style Spice With Veggie Crunch - November 1, 2026
- Mushy Rice Recipe: Fluffy Grains Transformed in Minutes - November 1, 2026