
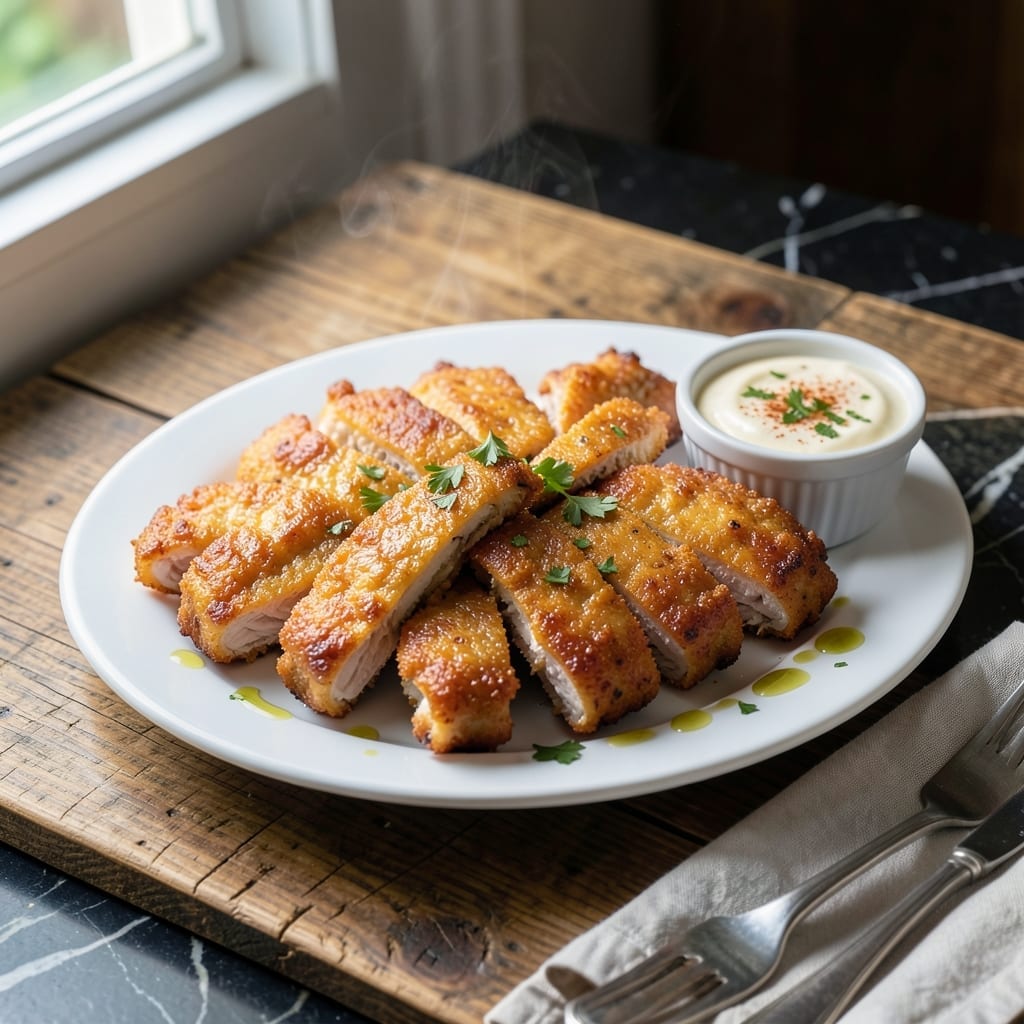
I spent years trying to nail that McDonald’s chicken taste at home, and this recipe finally cracks the code. The secret is in the seasoning blend and cooking method that creates that signature crispy coating.
This version uses simple ingredients you already have, with a foolproof technique for achieving restaurant-quality results in your own kitchen. No deep fryer required—just a skillet and 15 minutes of your time.
You’ll get golden, crispy chicken that’s juicy inside with that familiar fast-food flavor. It’s the kind of meal that satisfies cravings without the drive-thru wait.
Serve it on a bun with your favorite toppings or plate it up with fries and coleslaw for the full experience. Here’s how to make it right every time.
Ingredients for Mcdo Chicken
Pantry staples meet a few key spices to recreate that iconic crispy chicken at home.
| Ingredient | Amount | Notes |
|---|---|---|
| Boneless Skinless Chicken Breasts 🍗 | 1 ½ lb | Cut into strips or tenders |
| All-Purpose Flour 🌾 | 1 cup | For crispy coating base |
| Cornstarch 🌽 | ¼ cup | For extra crunch |
| Large Eggs 🥚 | 2 whole | Beaten for egg wash |
| Buttermilk 🥛 | 1 cup | For tenderizing chicken |
| Vegetable Oil 🫒 | ½ cup | For frying, high smoke point |
| Salt 🧂 | 1 ½ tsp | Divided for seasoning |
| Black Pepper 🌶️ | 1 tsp | Freshly ground preferred |
| Garlic Powder 🧄 | 1 tsp | For savory depth |
| Onion Powder 🧅 | 1 tsp | Balances seasoning blend |
| Paprika 🌶️ | 1 tsp | Sweet or smoked variety |
| Dried Thyme 🍃 | ½ tsp | For subtle herbal note |
| Dried Oregano 🍃 | ½ tsp | Classic fast-food flavor |
| Ground Mustard 🟡 | ½ tsp | Adds tangy kick |
The chicken is everything here. Boneless, skinless breasts cut into uniform strips ensure even cooking and maximum crispiness. I grab mine from Costco for bulk savings, but any grocery store will do. The buttermilk is non-negotiable—it tenderizes the meat and helps the coating cling (the full-fat version is worth it). For the flour, all-purpose is standard, but I’ve used self-rising in a pinch with great results.
No buttermilk? Whole milk plus 1 tbsp vinegar or lemon juice works in a pinch. Swap cornstarch for arrowroot powder if that’s what you’ve got. The spices can be adjusted—add a pinch of cayenne if you like heat, or skip the mustard if you’re not a fan. For extra crunch, some recipes call for crushed cornflakes in the coating (I’ve tried it—surprisingly good).
The seasoned chicken keeps in the fridge for 24 hours before cooking. Leftovers? They’ll last 3-4 days refrigerated, but honestly, they’re best fresh. Reheat in the oven at 375°F for 10-15 minutes to revive the crispiness.
Why You’ll Love This Recipe
- No-Fuss Coating: I just mix flour, cornstarch, buttermilk, and eggs—no fancy steps, just dip and fry.
- Crispy Outside, Juicy Inside: That buttermilk soak keeps the chicken tender while the cornstarch gives it a serious crunch.
- Weeknight Winner: Honestly, it’s my go-to for quick dinners when the kids demand something familiar.
- Budget-Friendly Feast: Boneless chicken breasts stretch far, and the pantry staples keep costs low.
Step-by-Step Instructions for Fast-Food Chicken
Here’s how I achieve that signature crispy coating with juicy meat every single time.
Step 1: Season and Tenderize the Chicken
Cut the 1.5 lb Boneless Skinless Chicken Breasts into uniform strips or tenders for even cooking. I aim for pieces about 1-inch thick—this ensures they cook through without drying out.
In a large bowl, whisk together the 1 cup Buttermilk, 1 tsp Salt, 1 tsp Black Pepper, 1 tsp Garlic Powder, 1 tsp Onion Powder, 0.5 tsp Dried Thyme, and 0.5 tsp Dried Oregano. Add the chicken pieces and turn to coat completely.
Let the chicken marinate in the buttermilk mixture for at least 30 minutes at room temperature. The buttermilk tenderizes the meat while the seasonings penetrate deeply for maximum flavor. For even better results, refrigerate for up to 4 hours.
Step 2: Create the Crispy Coating
In a shallow dish, combine the 1 cup All-Purpose Flour, 0.25 cup Cornstarch, remaining 0.5 tsp Salt, 1 tsp Paprika, and 0.5 tsp Ground Mustard. This blend creates the perfect balance of crunch and flavor that mimics the fast-food classic.
In a separate shallow bowl, beat the 2 whole Large Eggs until well combined. The two-step dredging process is what gives this chicken its signature texture.
Remove chicken pieces from the buttermilk, letting excess drip off. First dredge each piece in the flour mixture, pressing firmly to adhere. Then dip in the beaten eggs, and finally coat again in the flour mixture. This double dredge ensures a thick, crispy crust.
Step 3: Fry to Golden Perfection
Heat the 0.5 cup Vegetable Oil in a large, heavy-bottomed skillet over medium-high heat until it reaches 350°F. To test without a thermometer, drop a pinch of flour into the oil—it should sizzle immediately and float to the top.
Working in batches to avoid crowding the pan, carefully add the coated chicken pieces. Fry for 3-4 minutes per side until deep golden brown and crispy. The coating should be uniform and the internal temperature of the chicken should reach 165°F.
As each piece finishes, transfer it to a wire rack set over a paper towel-lined plate. This allows air circulation to maintain crispiness while draining excess oil. Don’t stack the pieces or they’ll steam and lose their crunch.
Step 4: Rest and Serve Immediately
Let the chicken rest for 5 minutes before serving. This brief rest allows the juices to redistribute throughout the meat, ensuring each bite is moist and flavorful. The coating will also set slightly, making it more stable when bitten into.
Serve while still hot and crispy. The exterior should have an audible crunch when bitten, with a golden-brown color throughout. The interior should be tender and juicy, with the subtle tang of buttermilk complementing the savory, well-seasoned coating.
Pro Tips For Making Mcdo Chicken
- Pound the Breasts: Use a meat mallet or rolling pin to even out the chicken to ½-inch thickness—I learned this the hard way after too many dry, overcooked edges.
- Double Dredge: Dip the chicken in flour, then buttermilk, then flour again with a little cornstarch mixed in. Sounds extra, but it makes that shatteringly crisp crust.
- Rest Before Frying: Let the dredged chicken sit for 10 minutes before frying—my grandmother swore by this, and it keeps the coating from sliding off in the oil.
- Hot Oil Test: Drop a pinch of flour into the oil first; if it sizzles immediately, it’s ready. After burning three batches, I finally figured out that guesswork doesn’t cut it.
Make-Ahead Tips for This Dish
Prep Ahead Coating
Mix your dry coating ingredients up to 2 days ahead and store in an airtight container. The flour, cornstarch, and spices blend better after sitting. I keep mine in a mason jar for easy shaking before use. 💡
Marinate Overnight
For maximum flavor, let your chicken soak in the buttermilk mixture for up to 12 hours in the fridge. The acid tenderizes the meat while the seasonings work their magic. Just
Double Batch Strategy
Double the recipe and freeze half the uncooked, coated chicken on a parchment-lined tray. Once frozen solid, transfer to a freezer bag for up to 1 month. Fry from frozen, adding 2-3 minutes to the cooking time.
Crispiness Revival
To revive leftovers, spread pieces on a wire rack in a 400°F oven for 8-10 minutes. This method restores most of the original crunch. Avoid microwaving—it’ll turn the coating soggy. ❄️
Seasoning Shortcut
Pre-mix all your seasonings in bulk and store in small jars. I make enough for 4 batches at a time. Label them with the recipe name—I use chalkboard labels for a kitchen-friendly look.
Oil Management
Strain and reuse your frying oil 1-2 times if it’s still clear and odor-free. Store in a cool, dark place between uses. I keep mine in the original bottle with a funnel for easy pouring.
Nutrition Facts
Frequently Asked Questions
Can I use chicken thighs instead of breasts?
Yes! Thighs stay juicier and are more forgiving with cooking times. Use boneless, skinless thighs cut into similar sizes. They may need an extra 1-2 minutes per side to reach 165°F.
How do I keep the coating from falling off?
Press firmly when dredging and let the egg wash drip off slightly before the final flour coat. Also, don’t move the pieces for the first 2 minutes of frying. This helps the crust set properly.
What oil works best for frying?
Any neutral oil with a high smoke point works. Vegetable, canola, or peanut oil are ideal. Avoid olive oil as it can burn at the required 350°F temperature.
Can I bake instead of fry?
Yes, bake at 400°F for 20-25 minutes, flipping halfway. Use a wire rack on a baking sheet for airflow. The texture won’t be identical but still delicious.

- Jollof Rice Sauce Recipe: West African Tomato and Spice Infusion - September 25, 2026
- Japanese Rice Soup Recipe: Umami-Rich Comfort in a Bowl - September 25, 2026
- Homemade Cream Of Rice Recipe: Silk-Smooth Breakfast in Minutes - September 25, 2026