
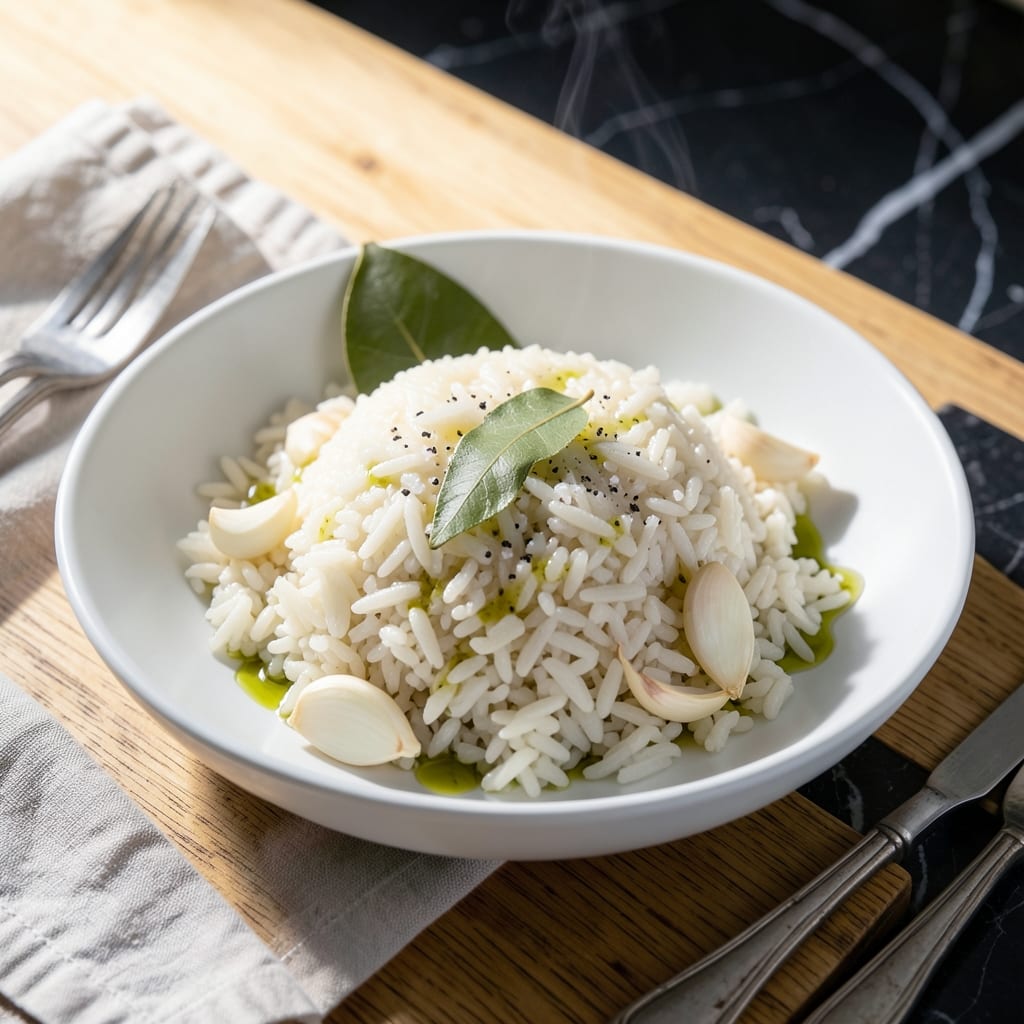
Achieving perfectly cooked medium grain white rice requires precision and patience. This method delivers consistently fluffy grains with just the right amount of stickiness every time.
The key lies in the proper water-to-rice ratio and controlled cooking time. I’ve refined this technique through countless batches to ensure reliable results without mushiness or undercooked centers.
What you’ll get is rice that holds its shape while offering a tender, slightly chewy texture. The grains cling together just enough for easy serving, whether as a base or side dish.
Master this fundamental and you’ll have a reliable staple for countless meals. The process is straightforward but demands attention to detail for the best outcome.
Ingredients for Medium Grain White Rice
Precision starts with quality rice, water, and a few simple flavor enhancers for perfect results.
| Ingredient | Amount | Notes |
|---|---|---|
| Medium Grain White Rice 🍚 | 2 cups | Rinsed until water runs clear |
| Water 💧 | 3 ½ cups | Filtered preferred for best texture |
| Kosher Salt 🧂 | ½ tsp | Diamond Crystal preferred for consistency |
| Extra-Virgin Olive Oil 🫒 | 1 tbsp | Optional for aroma and richness |
| Bay Leaf 🍃 | 1 whole | Optional for subtle depth of flavor |
| Fresh Garlic Cloves 🧄 | 2 cloves | Minced, optional for aromatic rice |
| Fresh Cilantro 🌿 | ¼ cup | Chopped, for garnish if desired |
| Lemon Zest 🍋 | 1 tsp | Optional for bright finishing note |
The rice quality is paramount here. Short-grain varieties like Arborio or Calrose work beautifully for medium grain texture. Look for unbroken grains without excessive starch dust—Lundberg or Nishiki brands are excellent. Avoid pre-rinsed or instant rice, as they lack the starch needed for that perfect stickiness. Store uncooked rice in an airtight container in a cool, dark place for up to 1 year.
No medium grain rice? Long-grain jasmine or basmati can work but will be less sticky—reduce water by 1/4 cup. For extra flavor, vegetable broth can replace water at a 1:1 ratio. The bay leaf and garlic are optional but add subtle depth. If using garlic, freshly minced is best; powdered works in a pinch at one-quarter the amount. Cilantro can be swapped for parsley or omitted entirely.
Cooked rice keeps well in the fridge for 4-5 days in a sealed container. For longer storage, freeze in portions for up to 6 months. Reheat with a splash of water or steam to restore moisture. The rice absorbs flavors beautifully, making it ideal for fried rice or grain bowls the next day.
Why You’ll Love This Recipe
- One Pot Wonder: I just dump rice, water, salt, and a bay leaf in a pot—no fancy steps, no stress.
- Rich & Simple: The olive oil and bay leaf give it this subtle depth that makes plain rice taste anything but.
- Meal Prep Hero: I make a big batch Sunday and it pairs with everything from stir-fry to roasted chicken all week.
- Budget Stretch: A pound of medium grain rice costs pennies and feeds my family for days. Honestly, it’s my wallet’s best friend.
Step-by-Step Instructions for Medium Grain White Rice
Here’s the method. Straightforward, tested, works every time.
Step 1: Rinse and Prepare the Rice
Place the 2 cups Medium Grain White Rice in a fine-mesh strainer and rinse under cold water until the water runs completely clear. This removes excess starch, which prevents the grains from becoming gummy and ensures that perfect fluffy-yet-sticky texture we’re after.
While rinsing, I gently agitate the rice with my fingers to help release the starch. Don’t skip this step—it typically takes 3-4 rinses to achieve truly clear water. Once rinsed, let the rice drain completely in the strainer while you prepare the cooking liquid.
Step 2: Combine Ingredients and Bring to a Boil
In a medium saucepan with a tight-fitting lid, combine the drained 2 cups Medium Grain White Rice, 3.5 cups Water, 0.5 tsp Kosher Salt, 1 tbsp Extra-Virgin Olive Oil, and 1 whole Bay Leaf. If using, add the 2 cloves Fresh Garlic Cloves now for aromatic depth.
Bring the mixture to a rolling boil over high heat. Watch for the moment when the surface is covered with actively breaking bubbles—that’s your signal the water is fully heated through. This usually takes 5-7 minutes depending on your stove. Stir once during heating to distribute the rice evenly, but avoid excessive stirring.
Step 3: Simmer Until Tender
Once boiling, immediately reduce the heat to low, cover the saucepan with the lid, and maintain a gentle simmer. You should see just a few bubbles breaking the surface and hear a quiet, steady simmer—not a vigorous boil.
Cook the rice undisturbed for 18-20 minutes. Resist the urge to peek or stir during this time. The steam trapped inside is what cooks the rice evenly and that perfect stickiness. You’ll know it’s nearing completion when you see the liquid has been absorbed and small steam vents appear in the rice surface.
Step 4: Rest and Fluff
After 20 minutes, remove the pan from heat and let it sit covered for an additional 10 minutes. This resting period allows the steam to finish cooking the rice and the grains to absorb any remaining moisture, ensuring even texture throughout.
Discard the Bay Leaf and the garlic cloves if used. Gently fluff the rice with a fork, separating the grains while maintaining their structure. The rice should be tender with a slight chew, and the grains should stick together slightly when pressed but separate easily when fluffed.
Garnish with 0.25 cup Fresh Cilantro and 1 tsp Lemon Zest if desired for a bright, fresh finish. Serve immediately while the rice is at its peak texture.
Pro Tips For Making Medium Grain White Rice
- Rinse the Rice: I learned this the hard way—skipping the rinse leaves your rice gummy from excess starch, so swirl it in cold water until it runs clear.
- Use a 1:1.5 Ratio: For medium grain, 1 part rice to 1.5 parts water is the sweet spot—any more and you’ll get mush, any less and it’ll stay crunchy.
- Add Salt to Water: Sounds obvious, but I used to forget—stir in ½ teaspoon kosher salt per cup of water before boiling to season the grains evenly.
- Rest Off Heat: After simmering, turn off the heat and let it sit covered for 10 minutes—this steams the rice to perfect tenderness without burning the bottom.
Essential Equipment for medium grain white rice
Quality Rice Cooker
A reliable rice cooker is my top recommendation for foolproof results. I use the Zojirushi NS-TSC10—it maintains precise temperature control and automatically switches to keep-warm mode. This model handles 1-5 cups of uncooked rice perfectly.
Heavy Bottom Saucepan
For stovetop cooking, choose a medium saucepan with a heavy bottom—All-Clad Stainless or enamel-coated cast iron are my go-tos. The heavy base prevents hot spots that can burn rice. Ensure it has a tight-fitting lid to trap steam effectively.
Fine Mesh Strainer
Rinsing rice properly requires a fine-mesh strainer. The OXO Good Grips version has a comfortable handle and fine holes that won’t let grains escape. I rinse my rice 3-4 times until the water runs completely clear. 💧
Wooden Rice Paddle
A wooden rice paddle or silicone spatula is essential for fluffing cooked rice without crushing the grains. The flat surface prevents mashing, and wood won’t scratch your cookware. I find the Japanese-style paddles work best for medium grain varieties.
Instant Read Thermometer
While not essential, a thermometer helps ensure perfect doneness. I check that the internal temperature reaches 212°F during cooking. The ThermoWorks Instant Read gives accurate readings in 3 seconds and is durable enough for daily use.
Glass Measuring Cups
Precise water-to-rice ratios are critical. I use Pyrex glass measuring cups for accuracy—the clear markings let me measure 3.5 cups of water exactly. Avoid plastic cups that can warp over time, affecting measurements.
Nutrition Facts
Frequently Asked Questions
Why rinse the rice before cooking?
Rinsing removes excess starch that can make grains gummy. It ensures fluffier results with just the right stickiness. 3-4 rinses until water runs clear works best.
Can I use a rice cooker instead?
Use the same 1:1.75 rice-to-water ratio. Most cookers automatically handle timing and temperature. Just press start and let it work its magic.
How do I fix undercooked rice?
Add 2-3 tablespoons water, cover, and cook for 5 more minutes on low. Avoid stirring to prevent mushiness. The steam will finish the job.
What if my rice turns out mushy?
Next time, reduce water by 1/4 cup or rinse more thoroughly. Let it rest 10 minutes after cooking to absorb excess moisture.

- Mujadara Rice and Lentils Recipe: Earthy Spiced Lentils With Caramelized Onions - November 1, 2026
- Naija Fried Rice Recipe: Street-Style Spice With Veggie Crunch - November 1, 2026
- Mushy Rice Recipe: Fluffy Grains Transformed in Minutes - November 1, 2026