
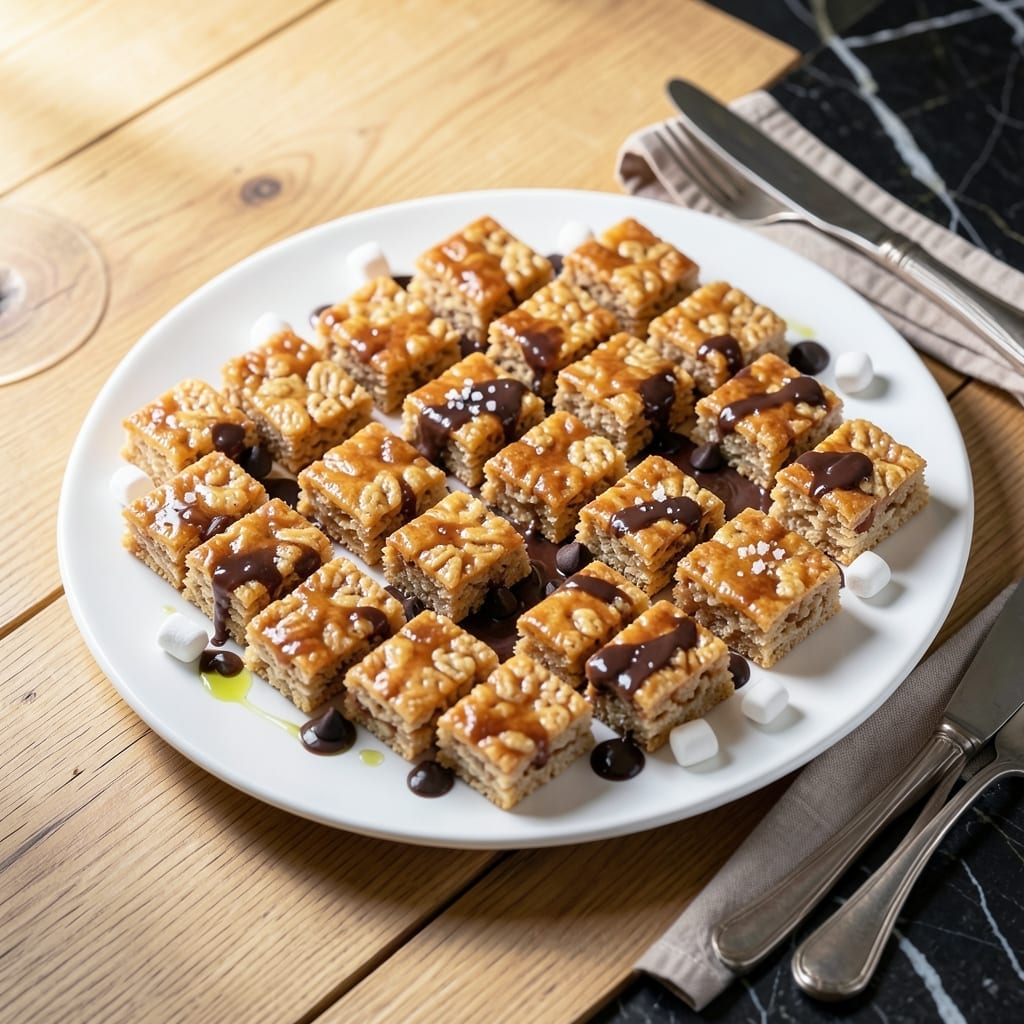
There’s a special satisfaction in creating perfectly portioned treats that deliver big flavor in small packages. This method transforms classic Rice Krispie treats into bite-sized delights with the same buttery, crunchy appeal we all love.
The secret lies in precise timing and proper marshmallow melting. I’ve tested this approach countless times to ensure each mini treat holds its shape while maintaining that signature crispy texture. No specialized equipment is required—just a pot, a spoon, and a little patience.
What emerges are golden, compact squares with a perfect balance of gooey marshmallow and crisp cereal. They’re ideal for lunchboxes, party platters, or whenever you crave a no-fuss sweet treat without the commitment of a full batch.
Customize them with chocolate drizzle, colored sprinkles, or a pinch of sea salt for extra flair. Here’s how to make them exactly right every time.
Ingredients for Mini Rice Krispie Treats
Just a few pantry staples turn into these golden, crispy, bite-sized delights everyone loves.
| Ingredient | Amount | Notes |
|---|---|---|
| Rice Krispies Cereal 🥣 | 6 cups | Fresh for maximum crunch |
| Mini Marshmallows 🍬 | 10 oz | Or 40 large marshmallows |
| Unsalted Butter 🧈 | 4 tbsp | For melting with marshmallows |
| Sea Salt 🧂 | ¼ tsp | Fine grain for balance |
| Vanilla Extract 🌿 | 1 tsp | Pure for best flavor |
| Semisweet Chocolate Chips 🍫 | ½ cup | Optional for drizzling |
| Rainbow Sprinkles 🎉 | ¼ cup | Optional for decoration |
| Flaky Sea Salt ✨ | 0.125 tsp | Optional for topping |
The cereal is key here. Kellogg’s Rice Krispies have the right snap—store brand works too, but test the freshness first (stale cereal makes sad treats). Jet-Puffed mini marshmallows melt faster and more evenly than large ones. For the butter, I always use Land O’Lakes unsalted—it’s got the right fat content for that perfect gooey texture. Vanilla is optional but adds depth; McCormick pure extract is my go-to.
Out of mini marshmallows? Large ones work at a 1:1 volume ratio, just cut the melting time. No vanilla? A pinch of cinnamon adds warmth. Want chocolate flavor? Add 1 tbsp cocoa powder with the marshmallows. Walgreens or CVS carry the mini marshmallows if your regular store’s out. For a salted caramel vibe, use salted butter and skip the added salt.
These keep at room temp in an airtight container for up to 3 days. They’ll soften slightly but still taste great. Freeze for longer storage—thaw 10 minutes before serving. Press them into a lined pan for clean cutting, or roll into balls for no-bake energy bite vibes.
Why You’ll Love This Recipe
- No-Fuss Fun: I melt butter and marshmallows in one pot, stir in cereal, and we’re done—no fancy steps, no special tools.
- Buttery Vanilla Bite: The unsalted butter and vanilla extract turn simple cereal into something crave-worthy, with a hint of sea salt balancing the sweetness.
- Party Ready: I shape them into mini squares for lunchboxes, bake sales, or a quick dessert platter—everyone grabs one.
- Budget Friendly: A box of cereal and a bag of mini marshmallows feed a crowd for pennies, and leftovers keep for days in an airtight container.
Step-by-Step Instructions for Mini Rice Krispie Treats
Here’s the method for achieving perfect texture and flavor in every bite-sized treat.
Step 1: Melt Butter and Prepare Marshmallow Base
In a large saucepan over low heat, melt the 4 tbsp unsalted butter completely. I keep the heat gentle to prevent browning—the butter should melt slowly until it’s just liquid with no solid pieces remaining.
Once melted, add the 10 oz mini marshmallows and the 0.25 tsp sea salt. Stir constantly with a silicone spatula, scraping the bottom and sides of the pan. The marshmallows will begin to soften and melt within 2-3 minutes. You’ll know it’s ready when the mixture is completely smooth with no visible marshmallow lumps.
Remove from heat and immediately stir in the 1 tsp vanilla extract. This adds depth to the flavor and balances the sweetness perfectly. The mixture will be thick and glossy—this is exactly what you want for the perfect binding consistency.
Step 2: Incorporate Rice Krispies Cereal
Add all 6 cups Rice Krispies Cereal to the marshmallow mixture at once. Working quickly (the mixture sets as it cools), fold everything together with the spatula using a gentle pressing motion rather than stirring.
You’ll notice the cereal begins to crisp and snap as it coats with the marshmallow mixture—that’s the signature sound of Rice Krispies doing their thing. Keep folding until every piece is evenly coated and there are no dry spots. The mixture should hold together when pressed but still be slightly sticky to the touch.
This step takes about 1-2 minutes of folding. If the mixture starts to cool and become difficult to work with, place the pan back over very low heat for 10-15 seconds to soften it slightly, but don’t let it get too hot or it will become overly sticky.
Step 3: Press and Shape the Treats
Line an 8×8-inch baking pan with parchment paper, leaving an overhang on the sides for easy removal. Transfer the Rice Krispies mixture to the pan and press it down gently with the spatula or your fingers (lightly greased with butter to prevent sticking).
For mini treats, I press the mixture to an even 1-inch thickness throughout the pan. Don’t press too hard—you want the treats to hold together but maintain that characteristic light, airy texture. The mixture should fill the pan completely with no gaps.
Let the mixture cool at room temperature for 10 minutes to set slightly before cutting. This brief rest makes it much easier to cut clean squares without the treats falling apart or sticking to the knife.
Step 4: Cut and Add Finishing Touches
Using a sharp knife, cut the mixture into 1-inch squares for perfect mini treats. I find that dipping the knife in hot water and wiping it clean between cuts helps create the cleanest edges.
While the treats are still slightly warm, melt the 0.5 cup semisweet chocolate chips in the microwave in 20-second intervals, stirring between each, until smooth. Drizzle this over the treats using a fork or spoon, creating a decorative pattern.
Immediately sprinkle with the 0.25 cup rainbow sprinkles and a pinch of 0.125 tsp flaky sea salt while the chocolate is still wet. This adds both visual appeal and a delightful contrast of flavors—sweet, salty, and crunchy in every bite.
Step 5: Set and Serve
Allow the treats to cool completely at room temperature for 30 minutes until the chocolate is firm. This setting time ensures they hold their shape when picked up and have that perfect combination of crispy and chewy textures.
Once set, lift the treats from the pan using the parchment paper overhang and transfer to a serving plate. These mini Rice Krispies treats are best enjoyed the same day they’re made when the cereal is at its crispiest. Store any leftovers in an airtight container at room temperature for up to 2 days.
Pro Tips For Making Mini Rice Krispie Treats
- Melt Butter Slowly: Use low heat when melting the butter—high heat can cause the marshmallows to seize up or burn. I learned this the hard way after ruining a batch with impatient heating.
- Use Fresh Marshmallows: Older marshmallows get dry and tough, so check the bag’s date. Fresh mini marshmallows melt smoother and bind the cereal better.
- Press Lightly: Resist the urge to pack the mixture too tightly into the pan—it makes the treats dense instead of crispy. A gentle press keeps them airy.
- Add Salt Last: Sprinkle the sea salt on top after shaping, not in the mix. It gives a better flavor pop and prevents the salt from dissolving into the melted marshmallow.
Best Sauces and Condiments for This Recipe
Chocolate Drizzle
Melt ½ cup semisweet chocolate chips in 20-second microwave bursts, stirring between each. Drizzle over treats while warm for a glossy finish. I use Ghirardelli chips—they melt smoothly and have rich flavor. 🍫
Caramel Sauce
Warm ¼ cup store-bought caramel sauce for 15 seconds in the microwave. Drizzle lightly over the top for a buttery contrast. Smucker’s brand works perfectly and is widely available.
Peanut Butter Glaze
Whisk 3 tbsp creamy peanut butter with 2 tbsp powdered sugar and 1 tbsp milk. The glaze should be thin enough to drizzle but thick enough to cling. I prefer Jif Natural for its smooth texture.
Fruit Compote
Simmer ½ cup raspberry jam with 1 tsp lemon juice for 2 minutes to create a tangy topping. Bonnie & Pop jam has the right balance of sweetness and fruit flavor.
Salted Caramel
Combine caramel sauce with a pinch of flaky sea salt for sweet-salty depth. The contrast elevates the buttery base beautifully. I sprinkle Maldon salt for its delicate crunch. ✨
White Chocolate
Melt ⅓ cup white chocolate chips and drizzle for a vanilla-forward finish. Guittard chips melt evenly and have a creamy texture. Add crushed freeze-dried strawberries for color and flavor.
Nutrition Facts
Frequently Asked Questions
Can I use regular marshmallows instead of mini?
Yes, substitute 40 large marshmallows for the mini ones. They’ll take slightly longer to melt, about 3-4 minutes over low heat. Stir constantly for smooth results.
How do I keep them from sticking to the pan?
Line your pan with parchment paper and lightly grease it with butter. Press the mixture gently—don’t compact too firmly. This ensures easy removal and clean cuts.
Can I make these without butter?
Yes, substitute 4 tbsp coconut oil for a dairy-free version. The texture will be slightly different but still delicious. Let the oil cool slightly before mixing.
How long do they stay fresh?
Store in an airtight container at room temperature for up to 2 days. For longer storage, freeze for up to 1 month and thaw before serving.

- Peri Peri Rice Recipe: Spicy Portuguese One-Pot Harmony - November 6, 2026
- Mexican Flavoured Rice Recipe: Authentic Spice-Infused One-Pot Meal - November 6, 2026
- Lao Gan Ma Fried Rice Recipe: Spicy Wok-Tossed Perfection - November 6, 2026