
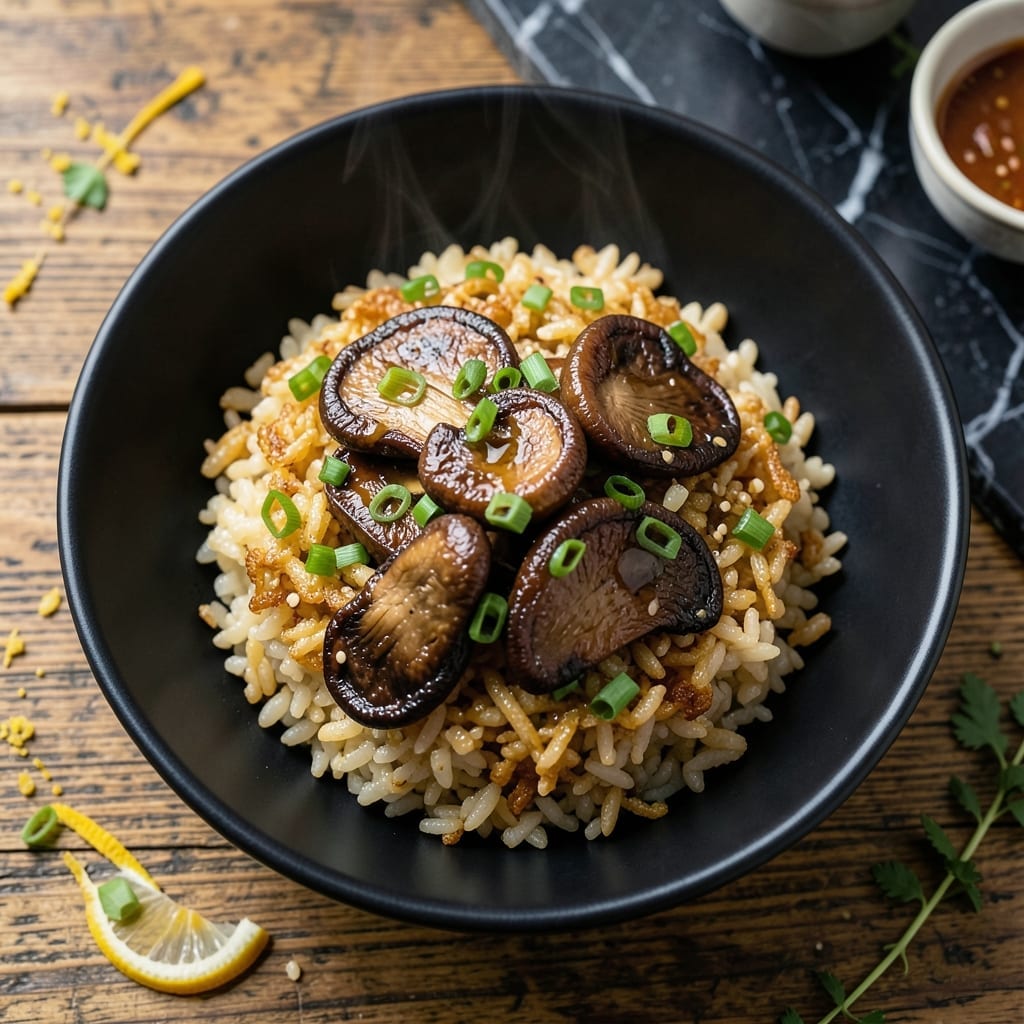
This dish transforms simple ingredients into a vegetarian masterpiece with golden crisp edges and rich umami depth. The technique involves pan-frying cooked rice until it develops a shatteringly crispy crust.
Miso and mushrooms create layers of savory complexity, while the contrast between the crispy base and tender toppings makes every bite unforgettable. The result is restaurant-quality comfort food made entirely in one pan.
Ingredients for Miso Mushroom Crispy Rice
Transform everyday rice into a vegetarian masterpiece with golden crisp edges and umami depth.
| Ingredient | Amount | Notes |
|---|---|---|
| Cooked Short-Grain Rice 🍚 | 4 cups | Day-old, chilled preferred |
| White Miso Paste 🥣 | 3 tbsp | Fermented, unpasteurized preferred |
| Shiitake Mushrooms 🍄 | 8 oz | Fresh, stems removed, sliced |
| Scallions 🧅 | 4 whole | Thinly sliced, green parts separated |
| Soy Sauce 🫒 | 2 tbsp | Low-sodium for control |
| Sesame Oil 🫒 | 1 tbsp | Toasted for depth |
| Garlic Cloves 🧄 | 3 cloves | Minced for even distribution |
| Fresh Ginger 🌿 | 1 tbsp | Peeled, finely grated |
| Neutral Oil 🫒 | 3 tbsp | High smoke point for frying |
| Large Eggs 🥚 | 2 whole | Beaten for binding rice |
| Rice Vinegar 🍶 | 1 tbsp | For acidity balance |
| Sesame Seeds 🌰 | 1 tbsp | Toasted for garnish |
| Salt 🧂 | ½ tsp | Diamond Crystal preferred |
| Black Pepper 🌶️ | ¼ tsp | Freshly ground preferred |
The rice is critical here. Day-old, chilled short-grain rice (sushi rice works perfectly) develops the best crispy crust. Whole Foods and most Asian markets carry quality short-grain varieties. For the miso, white miso paste provides the right balance of saltiness and sweetness—avoid red miso as it can overpower. Fresh shiitake mushrooms are ideal, but cremini mushrooms work in a pinch.
No white miso? Yellow miso at equal amount works, though it’s slightly stronger. Swap shiitake for oyster or portobello mushrooms (avoid button mushrooms—they lack depth). The eggs bind the rice for crisping; omit for a vegan version (add 1 tbsp cornstarch instead). For the neutral oil, avocado or grapeseed oil handles the high heat beautifully.
Store miso paste in the fridge in an airtight container for up to 1 year. Fresh ginger and garlic keep for 1 week in the fridge. The crispy rice is best served immediately, but leftovers reheat well in a pan for 2-3 days.
Why You’ll Love This Recipe
- I’ll be real: it’s even better the next day, and the ingredients are cheap enough to make twice a week.
- One Pan Wonder: I love that this comes together in a single skillet—no fancy equipment, just crispy rice, miso, and mushrooms sizzling away.
- Umami Bomb: Honestly, that first bite of white miso and shiitakes hits with this deep, savory richness that’s hard to beat.
- Weeknight Hero: It’s my go-to for busy evenings—ready in 20 minutes and my kids even fight over the crispy bits.
Step-by-Step Instructions for Miso Mushroom Crispy Rice
Achieve perfect golden crisp edges with this methodical approach to layered umami flavors.
Step 1: Sauté Aromatics and Mushrooms
Heat 3 tbsp neutral oil in a large skillet over medium-high heat until it shimmers. Add the 8 oz shiitake mushrooms and cook for 5-6 minutes until they release their moisture and develop a golden brown color.
Stir in the 3 cloves garlic cloves and 1 tbsp fresh ginger, cooking for 30 seconds until fragrant. This builds the aromatic base that defines the dish. Remove from heat and transfer to a bowl, leaving the oil in the pan.
Step 2: Prepare and Cook the Rice Mixture
In a large bowl, combine the 4 cups cooked short-grain rice with the 2 whole large eggs, 3 tbsp white miso paste, 2 tbsp soy sauce, 1 tbsp rice vinegar, 0.5 tsp salt, and 0.25 tsp black pepper. Mix thoroughly until the rice is evenly coated and clumps together.
Return the skillet to medium heat and add the rice mixture, pressing it firmly into the pan. Cook undisturbed for 6-7 minutes until the bottom develops a deep golden crust—this is the signature crispy layer you’re after.
Step 3: Flip and Finish the Crispy Rice
Carefully flip the rice in sections using a spatula, breaking it into large pieces if necessary. Drizzle the 1 tbsp sesame oil over the rice and cook for another 4-5 minutes until the second side develops an equally crispy, golden brown crust.
Return the sautéed mushrooms to the pan, stirring gently to distribute them throughout the rice. Cook for an additional 2 minutes to heat everything through and allow the flavors to meld together.
Step 4: Garnish and Serve Immediately
Transfer the crispy rice to a serving platter and top with the 4 whole scallions (both white and green parts) and 1 tbsp sesame seeds. The contrast between the crispy edges, tender rice, and umami-rich mushrooms should be evident in every bite.
Serve while hot—the crispiness is best fresh from the pan. Each portion should have a generous amount of the golden-brown crust that forms the signature texture of this dish.
Pro Tips For Making Miso Mushroom Crispy Rice
- Chill the Rice: Use day-old, cold short-grain rice—fresh rice is too moist and won’t crisp up properly. I learned this the hard way after my first few batches turned into mushy disappointment.
- Dry the Mushrooms: Pat shiitake mushrooms completely dry before cooking, or they’ll steam instead of brown. Sounds tedious, but it actually changes the outcome.
- Skip the Overcrowding: Spread the rice in a single, thin layer in the pan—crowding it traps steam and prevents crispiness. My grandmother swore by this, and she was right.
- Bloom the Miso: Cook the white miso paste in a little oil for 30 seconds before adding liquids to deepen its flavor. I was skeptical until I tried it, but now it’s non-negotiable.
Creative Variations of miso mushroom crispy rice
Spicy Miso Twist
Mix 1 tsp gochujang into the 3 tbsp white miso paste for a Korean-inspired kick. The heat balances the umami beautifully. I add ½ tsp sriracha to the eggs for extra spice. 🌶️
Breakfast Style
Turn this into a morning dish by adding ½ cup crumbled feta and 2 tbsp chopped chives to the rice mixture. Top with a fried egg for that perfect runny yolk contrast.
Nutty Crunch
Stir ¼ cup chopped roasted cashews into the rice before cooking for added texture. The nuts toast beautifully against the crispy edges. I use Trader Joe’s for quality.
Vegan Adaptation
Replace eggs with 1 tbsp cornstarch and 2 tbsp water to bind the rice. Use tamari instead of soy sauce for gluten-free. The crisp still forms perfectly.
Seafood Upgrade
Add ½ lb cooked shrimp or scallops with the mushrooms for a surf-and-turf variation. Sear them first in the same pan for 2 minutes per side. 💛
Cheesy Indulgence
Sprinkle ½ cup shredded mozzarella over the rice during the final 2 minutes of cooking. The cheese melts into the crispy layer, creating irresistible pull-apart strands.
Nutrition Facts
Frequently Asked Questions
Can I use fresh rice instead of day-old?
Fresh rice won’t crisp as well because it has too much moisture. For best results, use chilled, day-old rice or spread freshly cooked rice on a tray and refrigerate for 1-2 hours to dry it out.
Why did my rice not get crispy?
Press the rice firmly into the pan and avoid stirring while cooking. Use medium heat and let it cook undisturbed for 6-7 minutes per side. A heavy skillet or cast iron works best.
Can I make this without eggs?
Yes! For a vegan version, replace the eggs with 1 tbsp cornstarch mixed with 2 tbsp water. This binds the rice just as well and still achieves that perfect crisp.

- Mujadara Rice and Lentils Recipe: Earthy Spiced Lentils With Caramelized Onions - November 1, 2026
- Naija Fried Rice Recipe: Street-Style Spice With Veggie Crunch - November 1, 2026
- Mushy Rice Recipe: Fluffy Grains Transformed in Minutes - November 1, 2026