
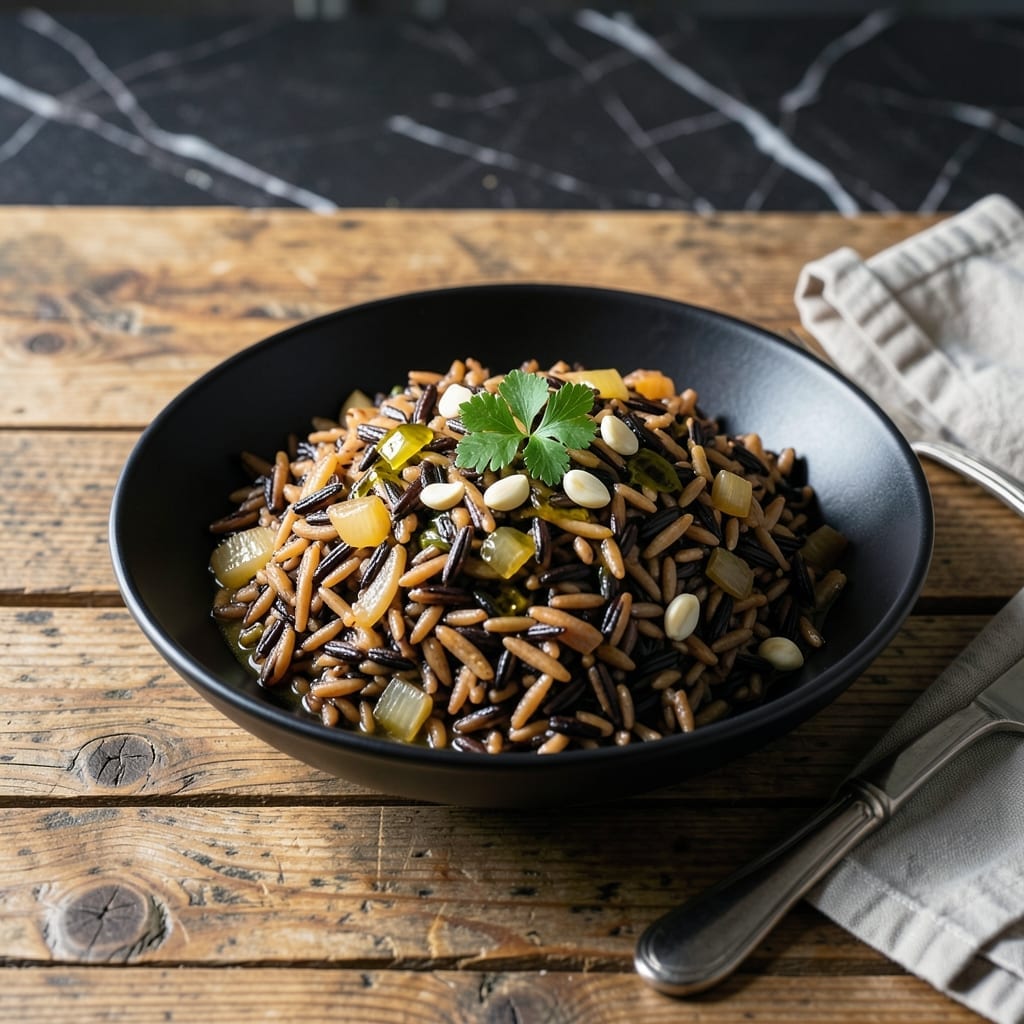
This mixed wild rice dish delivers on its promise of perfect texture every time. I’ve refined the cooking method to ensure each grain stays distinct yet tender.
The blend of wild and long-grain rice creates a nutty depth that elevates any meal. A simple ratio and precise timing guarantee consistent results without fuss.
What you’ll get is a side dish with a satisfying chew, earthy flavor, and visual appeal. It pairs beautifully with roasted meats or stands alone as a hearty vegetarian option.
Ready in under an hour, this recipe is both practical and impressive. Here’s how to achieve that ideal balance of bite and fluffiness.
Ingredients for Mixed Wild Rice
Two types of rice plus aromatic vegetables create this satisfying side with earthy depth.
| Ingredient | Amount | Notes |
|---|---|---|
| Wild Rice 🌾 | 1 cup | Rinsed thoroughly before cooking |
| Long-Grain Brown Rice 🌾 | 1 cup | Rinsed until water runs clear |
| Vegetable Broth 🥣 | 4 cups | Low-sodium preferred for control |
| Olive Oil 🫒 | 2 tbsp | Extra-virgin for depth |
| Yellow Onion 🧅 | 1 whole | Finely diced for even distribution |
| Garlic Cloves 🧄 | 3 cloves | Minced for maximal flavor |
| Celery Stalks 🌿 | 2 whole | Small dice, strings removed |
| Dried Thyme 🌿 | 1 tsp | Rubbed between fingers to release oils |
| Dried Rosemary 🌿 | 1 tsp | Crushed lightly before adding |
| Bay Leaf 🍃 | 1 whole | Removed before serving |
| Salt 🧂 | 1 tsp | Adjust to taste at finish |
| Black Pepper 🌶️ | ½ tsp | Freshly cracked for best flavor |
| Slivered Almonds 🥜 | ¼ cup | Toasted for garnish |
| Fresh Parsley 🌿 | ¼ cup | Chopped for fresh finish |
The rice quality is paramount here. Lundberg or Near East produce reliable wild rice with consistent texture. Seek out long-grain brown rice with intact bran layers for optimal chew. The vegetable broth should be robust—Imagine Foods or Pacific brands offer good depth without additives. Freshness matters; old rice absorbs liquid unevenly and results in mushy grains.
Short on time? Parboiled brown rice cooks faster but lacks the same nutty character. No wild rice? Black rice or farro can substitute for color and texture. For the aromatics, leeks work instead of onions (use white parts only), and shallots add a milder note. The herbs can be replaced with one-third the amount of fresh—just add them at the end.
Cooked rice keeps well for 4-5 days refrigerated in an airtight container. The flavors actually improve as it sits. For longer storage, freeze in portions for up to 3 months. Reheat with a splash of water or broth to restore moisture.
Why You’ll Love This Recipe
- Set and Forget: The wild and brown rice cook together in one pot with broth—I just let it simmer while I do other things.
- Deep, Earthy Flavor: Here’s what sold me—the nutty wild rice and sweet onion in olive oil create this rich, comforting taste that’s hard to resist.
- Meal Prep Hero: I make a big batch on Sunday and it keeps beautifully for lunches all week.
- Budget Stretcher: Honestly, a little goes a long way—this mix of rice and broth feeds my family for days without breaking the bank.
Step-by-Step Instructions for Mixed Wild Rice
Here’s the method to achieve perfectly cooked grains with distinct textures and rich, layered flavor.
Step 1: Rinse and Toast the Rice Blend
Place the 1 cup Wild Rice and 1 cup Long-Grain Brown Rice in a fine-mesh strainer. Rinse under cold water, agitating with your hand, until the water runs completely clear. This removes excess starch that could make the final dish gummy.
Heat the 2 tbsp Olive Oil in a large pot with a tight-fitting lid over medium heat. Add the drained rice and toast for 3-4 minutes, stirring frequently, until the grains are lightly golden and emit a nutty aroma. This step enhances the natural earthy flavors of the rice.
Step 2: Sauté the Aromatic Base
Add the finely diced 1 whole Yellow Onion to the pot and cook for 4-5 minutes until softened and translucent. Stir in the minced 3 cloves Garlic Cloves, small-diced 2 whole Celery Stalks, 1 tsp Dried Thyme, and 1 tsp Dried Rosemary. Cook for 1-2 minutes until the garlic is fragrant.
Be careful not to let the garlic brown—it should smell sweet and aromatic, not bitter. The celery should begin to soften slightly but retain some texture. This base builds the foundation of flavor for your dish.
Step 3: Simmer with Broth and Herbs
Pour in the 4 cups Vegetable Broth, then add the 1 whole Bay Leaf, 1 tsp Salt, and 0.5 tsp Black Pepper. Stir well to distribute the rice and aromatics evenly. Bring the mixture to a boil over high heat.
Once boiling, reduce the heat to low, cover the pot with the lid, and let it simmer for 45-50 minutes. The rice is done when the grains are tender but still retain a slight bite, and most of the liquid has been absorbed. Avoid lifting the lid during cooking, as this releases steam and can affect the cooking time.
Step 4: Rest and Finish with Garnish
Remove the pot from the heat and let it sit, covered, for 10 minutes. This resting period allows the rice to steam and become fully tender. Discard the Bay Leaf before serving.
While the rice rests, toast the 0.25 cup Slivered Almonds in a dry skillet over medium heat for 2-3 minutes until golden brown and fragrant. Stir in the chopped 0.25 cup Fresh Parsley just before serving to preserve its bright, fresh flavor. Fluff the rice with a fork and top with the almonds and parsley.
Pro Tips For Making Mixed Wild Rice
- Toast the Rice: Heat the wild and brown rice in olive oil for 2-3 minutes before adding liquid—this deepens the nutty flavor and prevents mushy texture.
- Use Double the Broth: Wild rice absorbs more liquid than brown rice, so use 2 cups broth per 1 cup of mixed rice to guarantee even cooking.
- Check at 30 Minutes: Brown rice cooks faster than wild rice, so start testing for doneness at 30 minutes and remove it if soft to avoid overcooking.
- Sauté Onions Longer: Cook the yellow onions until golden, about 5-7 minutes, to build a sweet, caramelized base for the rice.
Storing and Reheating This Recipe
Refrigerator Storage
Let your creation cool for no more than 2 hours before transferring to airtight containers. I use glass containers with snap-tight lids to maintain freshness. Store at 40°F or below for up to 5 days. The flavors deepen as it rests. ❄️
Freezer Storage
This dish freezes beautifully for up to 3 months without texture loss. Portion into freezer bags, squeeze out excess air, and leave 1 inch headspace for expansion. Flat storage saves space and speeds thawing.
Stovetop Reheating
My preferred method: Warm in a pot with 2 tbsp water or broth over medium-low heat for 5-7 minutes, stirring occasionally. Add a pat of butter for extra richness. The grains plump up beautifully. 🔥
Microwave Reheating
Place individual portions in a microwave-safe dish, sprinkle with 1 tbsp water, and cover with a damp paper towel. Heat on 70% power for 2-3 minutes, stir, then continue in 30-second bursts until hot.
Reviving Leftovers
If the rice seems dry after storage, stir in 1-2 tbsp warm broth and let it sit covered for 5 minutes. The grains will absorb the moisture. Toast fresh almonds for garnish to restore the crunch.
Nutrition Facts
Frequently Asked Questions
Can I use pre-cooked rice for this?
Not recommended. Pre-cooked rice lacks the firm texture needed and often turns mushy when reheated. Start with uncooked grains for best results.
Why toast the rice first?
Toasting enhances the nutty flavor and helps prevent sticking. It also gives the grains a slight firmness that holds up during cooking.
How do I prevent mushy rice?
Avoid lifting the lid while simmering, and use the exact 4 cups broth for 2 cups rice. Rinse thoroughly to remove excess starch.
Can I substitute chicken broth?
Yes, chicken broth works well for a richer flavor. Use low-sodium to control saltiness, and follow the same 45-50 minutes cook time.

- Mujadara Rice and Lentils Recipe: Earthy Spiced Lentils With Caramelized Onions - November 1, 2026
- Naija Fried Rice Recipe: Street-Style Spice With Veggie Crunch - November 1, 2026
- Mushy Rice Recipe: Fluffy Grains Transformed in Minutes - November 1, 2026