
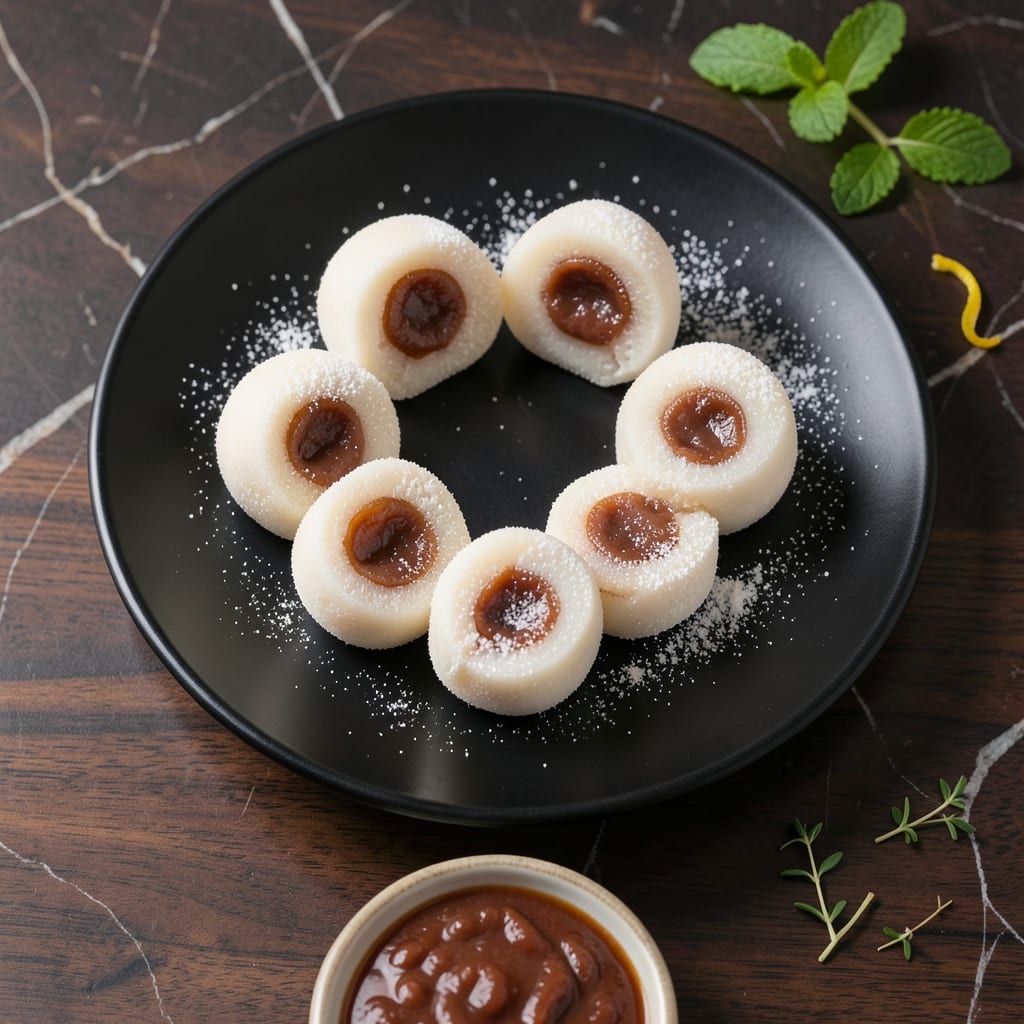
There’s an art to crafting perfect mochi that’s both delicate and satisfying. This traditional Japanese treat transforms simple glutinous rice flour into chewy, pillowy bites with a sweet red bean center.
The process requires precision with steam and kneading to achieve that signature stretchy texture. I’ve refined this method to ensure consistent results, even for first-time makers.
What emerges are smooth, translucent mochi with a tender exterior and soft filling. The contrast between the mild rice flavor and sweet bean paste makes each bite memorable.
Serve these at gatherings or enjoy as a special treat. The technique is simpler than it appears with the right guidance.
Ingredients for Mochi Recipe Using Glutinous Rice Flour
Simple ingredients transform into these delicate, chewy Japanese treats with sweet centers.
| Ingredient | Amount | Notes |
|---|---|---|
| Glutinous Rice Flour 🌾 | 1 ½ cups | Mochiko brand preferred for texture |
| Granulated Sugar 🧂 | ½ cup | Fine grain for even dissolution |
| Water 💧 | 1 ¼ cups | Filtered for best results |
| Sweet Red Bean Paste 🫘 | 1 cup | Store-bought or homemade anko |
| Cornstarch 🌾 | ½ cup | For dusting and prevention of sticking |
| Potato Starch 🥔 | ¼ cup | Optional for extra elasticity |
| Salt 🧂 | ¼ tsp | Enhances flavor balance |
| Matcha Powder 🍵 | 1 tsp | Optional for green tea variation |
| Cocoa Powder 🍫 | 1 tbsp | Optional for chocolate mochi |
| Coconut Milk 🥥 | ¼ cup | Full-fat for richness in fillings |
The glutinous rice flour is non-negotiable—Mochiko brand from Asian markets or Amazon gives the best texture. Avoid substitutes like regular rice flour or tapioca starch, as they won’t deliver the signature stretch. The sweet red bean paste, or anko, is widely available in cans at Japanese grocery stores (look for Kikkoman or Shiratama brands). Freshly opened bags of flour work best, as older stock can absorb moisture.
No anko? Sweetened mashed adzuki beans work in a pinch, or try lotus seed paste for a different twist. For colored variations, matcha or cocoa powder can be kneaded into the dough—start with small amounts to avoid bitterness. The cornstarch is just for dusting, so arrowroot powder works equally well. If your dough feels too sticky, resist adding more flour—lightly oil your hands instead.
Finished mochi keeps at room temperature for 2-3 days in an airtight container (separate layers with parchment). Freeze for up to 1 month—thaw at room temperature before serving. Dust with extra cornstarch if they start to stick. Always work on a clean, dry surface to prevent tearing.
Why You’ll Love This Recipe
- One Bowl Wonder: I just mix the glutinous rice flour, sugar, and water in a single bowl—no fancy gadgets, no mess.
- Chewy Sweet Bliss: That first bite of soft, stretchy mochi with the sweet red bean paste inside? Pure joy.
- Gift-Worthy Treat: I bring these to potlucks and they disappear first—everyone thinks I slaved over them.
- Budget Stretch: A bag of glutinous rice flour makes dozens, and they keep well for days. Honestly, my wallet loves this recipe.
Step-by-Step Instructions for Mochi Using Glutinous Rice Flour
Master this technique and you will achieve perfectly chewy mochi with a professional finish every time.
Step 1: Steam the Glutinous Rice Flour Mixture
In a microwave-safe bowl, whisk together the 1.5 cups Glutinous Rice Flour, 0.5 cup Granulated Sugar, 0.25 tsp Salt, and 1.25 cups Water until completely smooth and lump-free. The batter should resemble thin pancake batter, with the sugar fully dissolved.
Cover the bowl with plastic wrap, leaving a small vent for steam to escape. Microwave on high power for 2 minutes, then stir vigorously with a wet spatula. Return to the microwave for another 1-2 minutes until the mixture becomes translucent and stretches when pulled. This visual transformation signals the starch has fully gelatinized.
Step 2: Knead the Dough to Develop Elasticity
Dust a clean work surface generously with 0.5 cup Cornstarch—this prevents sticking as you work. Transfer the hot mixture onto the dusted surface. I recommend using a silicone spatula initially, as the dough will be extremely sticky and hot. Allow it to cool for 1-2 minutes until safe to handle.
Knead the dough for 5-7 minutes until smooth and elastic. If using, incorporate the 0.25 cup Potato Starch during kneading for enhanced chewiness. The dough should become glossy and slightly springy to the touch, indicating proper development. Dust with additional cornstarch as needed to maintain control.
Step 3: Incorporate Flavor Variations and Divide
For flavored variations, divide the dough into portions. Knead 1 tsp Matcha Powder into one portion for green tea mochi, or 1 tbsp Cocoa Powder and 0.25 cup Coconut Milk into another for chocolate mochi. Work each addition thoroughly until the color is uniform and no streaks remain.
Divide each colored or plain portion into 12-16 equal pieces. Roll each piece into a ball, then flatten into a 3-inch circle with your palms. The edges should be slightly thinner than the center to prevent tearing when filling.
Step 4: Fill and Seal the Mochi
Place 1 tablespoon Sweet Red Bean Paste in the center of each dough circle. Pinch the edges together to seal completely, then roll the filled mochi gently between your palms to create a smooth, round shape. Ensure there are no thin spots where the filling might escape during cooking.
The sealed mochi should have a uniform surface with no visible seams. If the dough sticks to your hands, dust them lightly with cornstarch. Work quickly, as the dough will begin to dry out if left exposed to air for too long.
Step 5: Rest and Serve
Arrange the filled mochi on a parchment-lined tray and dust lightly with cornstarch. Let them rest at room temperature for 10-15 minutes—this allows the dough to relax and the flavors to meld. The surface should appear slightly matte rather than sticky.
Serve at room temperature for the ideal chewy texture. The mochi should have a delicate, slightly resistant bite that gives way to the sweet, smooth filling. Store any leftovers in an airtight container with parchment between layers to prevent sticking.
Pro Tips For Making Mochi Recipe Using Glutinous Rice Flour
- Steam, Don’t Boil: Use a steamer basket over simmering water—never let the dough touch the water, or it’ll turn gummy instead of chewy. I learned this the hard way after ruining two batches with direct heat.
- Sift the Flour: Always sift your glutinous rice flour before mixing—it breaks up clumps and guarantees a smoother, more elastic dough. My grandmother swore by this, and she was right.
- Dust Generously: Coat your work surface and hands with cornstarch before shaping, and re-dust as needed. Sounds tedious, but it’s the only way to stop the mochi from sticking like glue.
- Warm the Paste: If your sweet red bean paste is cold, microwave it for 10-15 seconds to soften before filling. It spreads easier and won’t crack the mochi skin—I was skeptical until I tried it.
Health Benefits of This Recipe
Digestive Wellness
Glutinous rice flour is naturally easy to digest, making these treats gentle on sensitive stomachs. The slow-digesting carbs provide steady energy without blood sugar spikes, ideal for a mid-afternoon pick-me-up. I find they satisfy sweet cravings without heaviness. 💪
Gluten-Free Goodness
Despite its name, glutinous rice flour contains no gluten, making this recipe perfect for those with celiac disease or gluten sensitivity. The Mochiko brand used here is certified gluten-free, so you can enjoy these chewy delights worry-free.
Low Fat Indulgence
Each piece contains minimal fat, with most calories coming from complex carbs. The sweet red bean paste adds fiber and protein, balancing the treat’s nutritional profile. I love that I can enjoy these without the guilt of heavier desserts.
Energy Boost
The combination of rice flour and bean paste provides a balanced energy source. A single serving offers 120-150 calories with sustained release, perfect for active lifestyles. They’re my go-to for a pre-workout energy boost. ✨
Antioxidant Benefits
Red bean paste is rich in antioxidants like anthocyanins, which combat oxidative stress. If you use matcha powder in your variation, you’ll add catechins for an extra health kick. These compounds support long-term cellular health.
Portion Control
The small size of each mochi naturally encourages mindful eating. At about 1 inch in diameter, they’re perfectly portioned for satisfying sweetness without overindulgence. I always feel satisfied after just 2-3 pieces.
Nutrition Facts
Frequently Asked Questions
Can I use regular rice flour instead?
No, regular rice flour won’t work. Only glutinous rice flour (like Mochiko) provides the essential stretchy texture. Substitutes will result in a crumbly or hard product.
Why did my mochi turn out hard?
Over-kneading or insufficient resting time are common causes. Knead just until smooth (5-7 minutes) and let rest 10-15 minutes before shaping to maintain softness.
How do I store homemade mochi?
Keep in an airtight container at room temperature for 2-3 days, with parchment between layers. For longer storage, freeze up to 1 month and thaw at room temperature.
Can I make mochi without a microwave?
Yes! Steam the batter in a bamboo steamer over boiling water for 20-25 minutes, stirring halfway through. The texture will be slightly different but still delicious.

- Peri Peri Rice Recipe: Spicy Portuguese One-Pot Harmony - November 6, 2026
- Mexican Flavoured Rice Recipe: Authentic Spice-Infused One-Pot Meal - November 6, 2026
- Lao Gan Ma Fried Rice Recipe: Spicy Wok-Tossed Perfection - November 6, 2026