
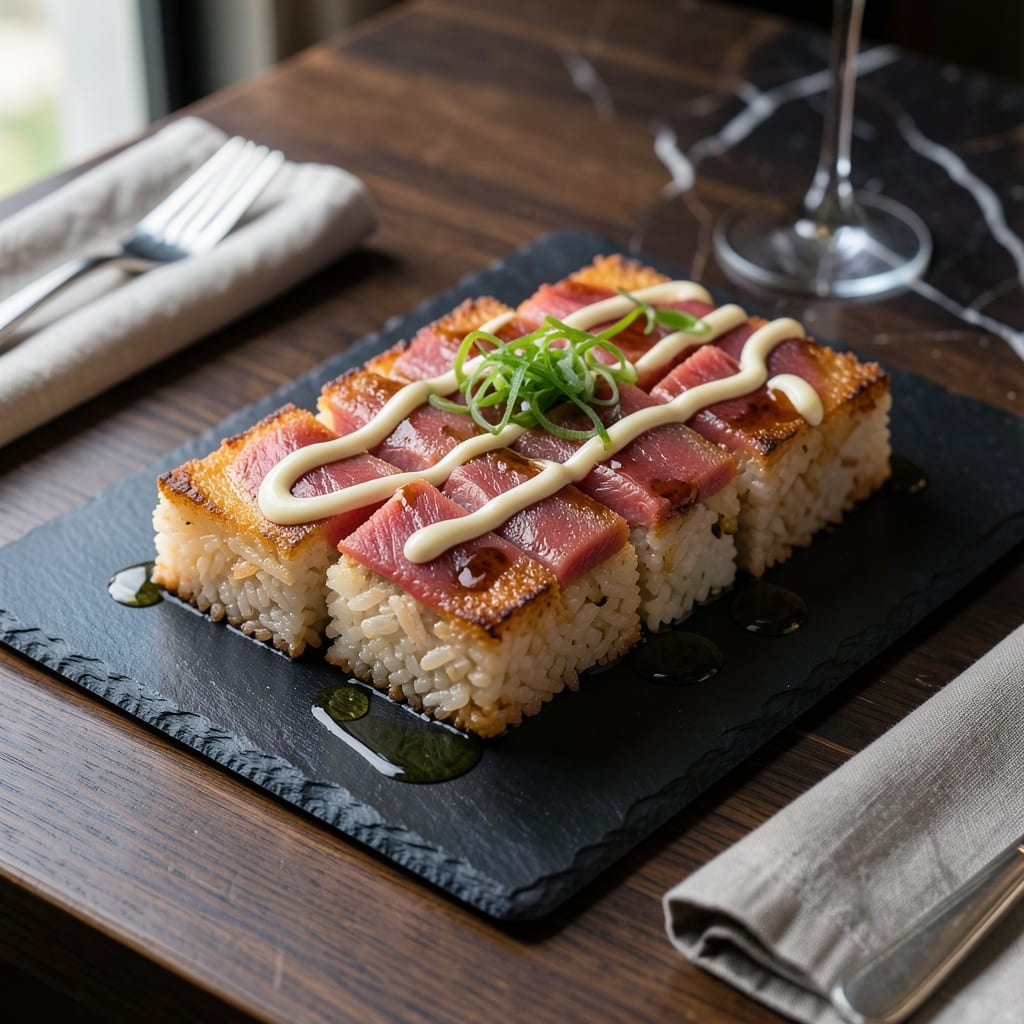
This Nobu-style crispy rice delivers the restaurant’s signature texture—golden, shatteringly crispy edges with a tender center. I’ve tested this method repeatedly to achieve that perfect contrast without burning.
The trick is using sushi rice that’s slightly overcooked, then pressing and chilling it before frying. This ensures even browning and that coveted crunch. The spicy tuna topping adds fresh, bold flavor that pairs perfectly with the rice.
You’ll end up with squares of rice that are crispy outside and soft inside, topped with a spicy, creamy tuna mixture. It’s the kind of dish that feels special but comes together with simple techniques.
Serve immediately for the best texture. Here’s how to make it at home.
Ingredients for Nobu Crispy Rice
Simple ingredients, restaurant-quality results. Crispy rice meets spicy tuna in every bite.
| Ingredient | Amount | Notes |
|---|---|---|
| Sushi Rice 🍚 | 2 cups | Short-grain, uncooked |
| Water 💧 | 2 ½ cups | For cooking rice |
| Rice Vinegar 🍶 | 2 tbsp | Seasoned variety preferred |
| Granulated Sugar 🍬 | 1 tsp | Dissolved in vinegar |
| Salt 🧂 | ½ tsp | Divided for rice and tuna |
| Fresh Sushi-Grade Tuna 🐟 | 1 lb | Finely diced for topping |
| Mayonnaise 🥫 | ½ cup | Japanese Kewpie preferred |
| Sriracha Sauce 🌶️ | 2 tbsp | Adjust for heat preference |
| Soy Sauce 🥢 | 1 tbsp | Low-sodium if available |
| Sesame Oil 🫒 | 1 tsp | Toasted for aroma |
| Vegetable Oil 🫒 | ½ cup | For frying rice squares |
| Green Onions 🧅 | 4 whole | Thinly sliced for garnish |
| Sesame Seeds 🌿 | 1 tsp | Toasted for garnish |
| Nori Sheets 🍣 | 2 sheets | Cut into thin strips |
The rice is everything here. Japanese short-grain sushi rice is non-negotiable—regular long-grain won’t give you that sticky texture needed to hold the squares together. I grab mine from H Mart or any Asian grocery (the bags with Japanese labels are usually the good stuff). For the tuna, sushi-grade is a must—ask your fishmonger or look for pre-packaged options at Whole Foods.
No sushi rice? Don’t bother—this won’t work with other types. Kewpie mayo is worth hunting down (it’s creamier and slightly sweeter), but regular mayo in a pinch. Sriracha can be swapped for gochujang at half the amount for a deeper, fermented heat. If you’re avoiding raw fish, seared ahi or cooked shrimp makes a great topping alternative.
The rice squares must be fried fresh—no making ahead. But the sushi rice can be cooked and pressed 1 day ahead (store wrapped tight in the fridge). Leftover tuna topping? Keeps 2 days refrigerated. Always toast your sesame seeds (dry pan, 2 minutes) for maximum flavor.
Why You’ll Love This Recipe
- One Pot Wonder: I just toss sushi rice, water, and a splash of rice vinegar in a pan—no fancy steps, just crispy perfection.
- Sweet-Salty Magic: That hint of sugar and salt in the vinegar mix? It caramelizes into a flavor that’s ridicuously good.
- Party or Pantry: I serve these as elegant bites for guests or stash them for a quick snack—totally versatile.
- Leftovers? Gone: Honestly, they disappear faster than I can make them, but the rice keeps well for a day if you hide it.
Step-by-Step Instructions for Nobu-Style Crispy Rice with Spicy Tuna
Here’s the method. Simple steps, restaurant-worthy results every time.
Step 1: Cook and Season the Sushi Rice
Rinse the 2 cups Sushi Rice under cold water until the water runs clear—this removes excess starch and prevents gummy rice. Drain well, then combine with the 2.5 cups Water in a rice cooker or pot. Cook until tender and the water is absorbed.
While the rice is still hot, gently fold in a mixture of the 2 tbsp Rice Vinegar, 1 tsp Granulated Sugar, and ¼ tsp Salt. Use a cutting motion with a rice paddle to avoid mashing the grains. The rice should be sticky but not mushy. Spread it evenly in a shallow dish and let it cool slightly.
Step 2: Prepare the Spicy Tuna Topping
Finely dice the 1 lb Fresh Sushi-Grade Tuna into small, even pieces. In a bowl, combine the tuna with 0.5 cup Mayonnaise, 2 tbsp Sriracha Sauce, 1 tbsp Soy Sauce, and 1 tsp Sesame Oil. Stir gently to coat the tuna without breaking it up too much.
Taste and adjust the heat level—add a little more Sriracha Sauce if you prefer it spicier. The mixture should be creamy with a vibrant red-orange color. Cover and refrigerate until ready to use.
Step 3: Form and Fry the Rice Squares
Line a baking dish with plastic wrap and spread the seasoned rice evenly, pressing down firmly to compact it. Chill in the refrigerator for at least 1 hour so the rice holds its shape. Once set, cut the rice into small squares or rectangles.
Heat the 0.5 cup Vegetable Oil in a skillet over medium-high heat until shimmering. Carefully add the rice squares, frying in batches to avoid crowding. Cook for 2-3 minutes per side until golden brown and crispy. Drain on paper towels to remove excess oil.
Step 4: Assemble with Garnishes
Place the crispy rice squares on a serving platter. Spoon a generous amount of the spicy tuna mixture on top of each square, letting it mound slightly. The contrast between the warm, crispy rice and the cool, creamy tuna is key.
Garnish with thinly sliced 4 whole Green Onions, 1 tsp Sesame Seeds, and thin strips of 2 sheets Nori Sheets. The green onions add freshness, while the nori and sesame seeds bring a nutty depth. Serve immediately while the rice is still crispy.
Pro Tips For Making Nobu Crispy Rice
- Chill the Rice: Spread the cooked sushi rice on a tray and refrigerate for at least 2 hours—I learned this the hard way after my first batch stayed soggy instead of crispy.
- Rinse Thoroughly: Wash the sushi rice 4-5 times until the water runs clear, or your crispy rice will taste chalky from excess starch.
- Press It Hard: Pack the rice tightly into the pan with a spatula, using more force than feels natural, to guarantee those golden, crunchy edges.
- Skip Fresh Rice: Use day-old leftover sushi rice if you have it—freshly cooked rice holds too much moisture to get that perfect crisp.
Dietary Considerations for These Flavors
Gluten-Free Status
This dish is naturally gluten-free as written, since sushi rice contains no gluten and the topping ingredients are all safe. Just double-check your soy sauce—I use Tamari (a gluten-free soy sauce) to be absolutely sure. Always verify labels for hidden additives. 💡
Dairy-Free & Egg-Free
The recipe contains no dairy or eggs, making it suitable for those avoiding these allergens. The mayonnaise in the tuna topping is typically egg-based, so use a vegan mayo like Just Mayo if needed. The crispy texture won’t be affected.
Pescatarian-Friendly
With its focus on sushi-grade tuna and plant-based sides, this fits perfectly into a pescatarian diet. The rice and garnishes provide balanced vegetarian elements, while the tuna adds protein. I often serve this to friends who avoid meat but still enjoy seafood.
Raw Fish Considerations
If you’re pregnant, immunocompromised, or prefer cooked seafood, swap the raw tuna for seared ahi or cooked shrimp. The texture changes slightly, but the flavor remains fantastic. Always source the freshest fish possible from trusted suppliers. ❄️
Low-Sodium Option
To reduce sodium, use low-sodium soy sauce and cut the added salt in the rice seasoning by half. The dish will still taste vibrant thanks to the rice vinegar and sesame oil. I find this version just as satisfying.
Nut Allergy Note
While the recipe itself is nut-free, check your sesame seeds and sesame oil for cross-contamination warnings if allergies are severe. Some brands process sesame in facilities that also handle nuts, so always read labels carefully.
Nutrition Facts
Frequently Asked Questions
Can I make this ahead of time?
You can prep the rice and tuna mixture a day in advance, but fry the rice squares just before serving. The crispy texture is best fresh from the pan. Store components separately in the fridge.
Why is my rice not crispy enough?
Press the rice firmly before chilling and use medium-high heat with enough oil. Overcrowding the pan steams instead of fries. Ensure rice is cold before frying for maximum crunch.
What can I substitute for sushi-grade tuna?
Try seared ahi, cooked shrimp, or even diced avocado for a vegetarian option. Each brings a different texture but pairs well with the crispy rice base.

- Rice A Roni Pork Fried Rice Recipe: Quick Wok-Style Meal with Savory Bites - September 25, 2026
- Mandhi Rice Recipe: Yemeni Spiced Lamb and Rice Feast - September 25, 2026
- Chuy’s Green Chili Rice Copycat Recipe: Spicy Southwest Flavor in Every Bite - September 25, 2026