
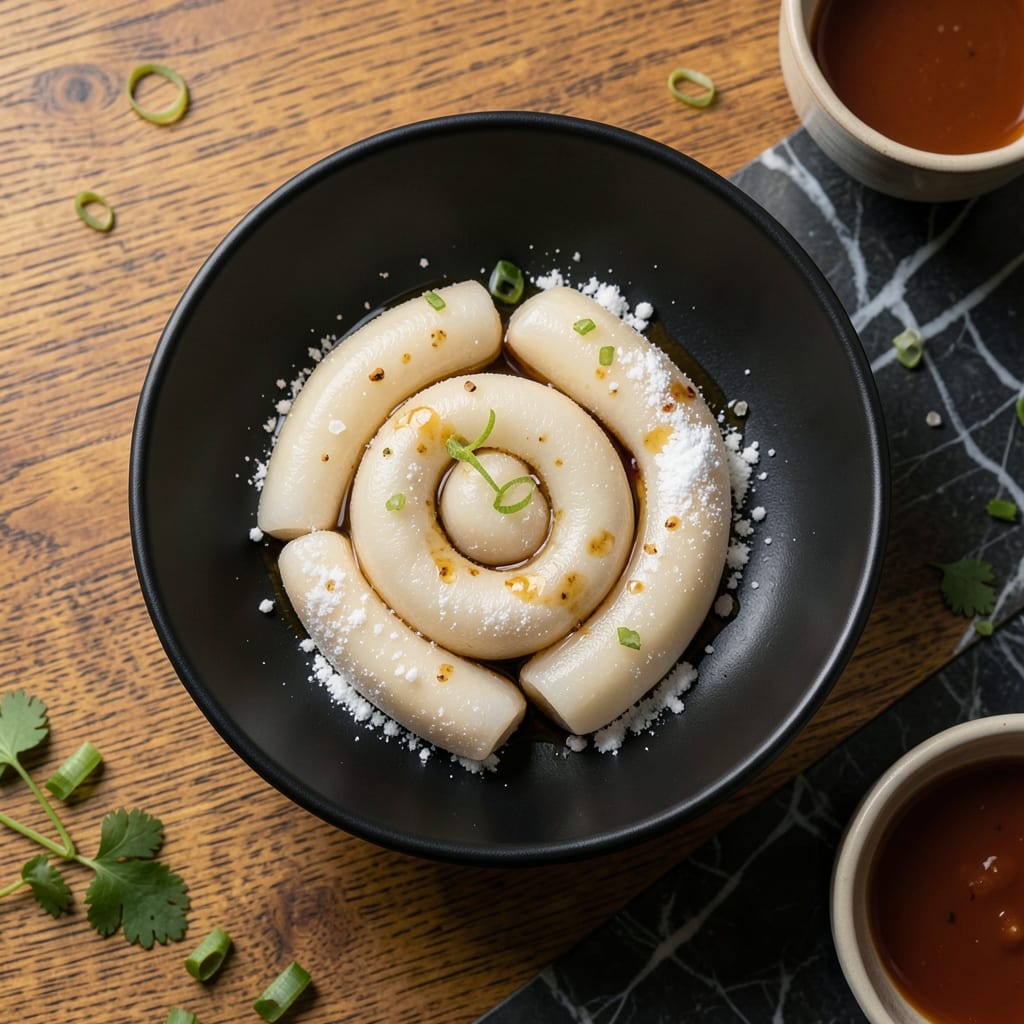
This recipe delivers the satisfying chew of traditional rice cakes without any spicy kick. The secret lies in using glutinous rice flour and maintaining the right moisture balance throughout the cooking process.
I developed this version for those who love the texture but prefer milder flavors. The dough comes together quickly with simple ingredients, then gets shaped and cooked to achieve that signature soft yet slightly sticky bite.
What you’ll get are tender, chewy rice cakes perfect for soups, stir-fries, or snacking. They hold their shape well and absorb flavors beautifully, making them versatile for various dishes.
No special equipment needed—just a steamer and about 30 minutes of your time. The result is consistently delicious, every time.
Ingredients for Not Spicy Rice Cake
Simple ingredients for chewy, mild rice cakes with perfect texture every time.
| Ingredient | Amount | Notes |
|---|---|---|
| Glutinous Rice Flour 🌾 | 2 cups | Also called sweet rice flour |
| Water 💧 | ¾ cup | Warm, divided for mixing |
| Salt 🧂 | ½ tsp | Fine sea salt preferred |
| Neutral Oil 🫒 | 1 tsp | For greasing steamer |
| Sesame Oil 🫒 | ½ tsp | Optional for brushing finished cakes |
| Cornstarch 🌾 | 2 tbsp | For dusting work surface |
| Sugar 🍬 | 1 tsp | Optional for slight sweetness |
| Garlic Powder 🧄 | ¼ tsp | Optional for mild savory note |
| Green Onions 🧅 | 2 whole | Thinly sliced for garnish |
The glutinous rice flour is non-negotiable—look for it at Asian markets or the international aisle. Brands like Bob’s Red Mill or Mochiko work well. Avoid regular rice flour; it won’t give you that signature chew. The water temperature matters (warm, not hot) to activate the flour properly. I’ve had best results with filtered water, but tap works too.
No glutinous rice flour? There’s no perfect substitute—this is the star. You can try tapioca starch at a 1:1 ratio, but texture will differ. Skip the sugar if you prefer savory-only cakes. The sesame oil is optional but adds a nice finish. Toasted sesame oil has stronger flavor than regular, so use sparingly.
Dough keeps covered in the fridge for 24 hours if you want to prep ahead. Cooked cakes store in an airtight container for 3-4 days—reheat by steaming or microwaving. For longer storage, freeze for up to 2 months with parchment between layers.
Why You’ll Love This Recipe
- No-Fuss Mix: I just stir glutinous rice flour, water, and a pinch of salt—no chopping, no fuss.
- Rich Simplicity: The sesame oil adds this warm, nutty depth that makes every bite feel special.
- Any-Meal Hero: Honestly, it’s great as a snack, side, or even a quick breakfast with a fried egg.
- Budget Stretch: A bag of rice flour makes a ton, and it keeps well for days.
Step-by-Step Instructions for Non-Spicy Rice Cakes
This method delivers perfectly chewy rice cakes with a mild, savory flavor that everyone will love.
Step 1: Prepare the Dough
In a large mixing bowl, combine the 2 cups Glutinous Rice Flour with the 0.5 tsp Salt, 1 tsp Sugar, and 0.25 tsp Garlic Powder. These dry ingredients establish the foundation of flavor without any heat, creating a balanced base.
Gradually add 0.75 cup Water while stirring with a wooden spoon or silicone spatula. The mixture will start thick and lumpy, then transform into a smooth, stretchy dough as the water hydrates the flour. You want a consistency similar to Play-Doh—firm but pliable.
Step 2: Knead Until Elastic
Turn the dough out onto a surface dusted with 2 tbsp Cornstarch. The cornstarch prevents sticking while allowing you to work the dough thoroughly. Knead for 8-10 minutes by hand, pushing the dough away with the heel of your palm, then folding it back over itself repeatedly.
This process develops the glutinous rice flour’s elasticity. You’ll notice the dough becomes smoother and more supple as you work it. If it starts to crack or feel dry, wet your hands with a bit of water and continue kneading—the moisture will incorporate evenly.
Step 3: Shape and Steam
Divide the dough into 16 equal portions and roll each into a smooth ball, then flatten slightly into discs about ½-inch thick. Place each piece on a square of parchment paper to prevent sticking during steaming.
Set up your steamer by bringing water to a boil in the base. Lightly grease the steamer rack with 1 tsp Neutral Oil to prevent the cakes from adhering. Arrange the rice cakes in a single layer, leaving 1 inch between each for expansion. Cover and steam for 15-20 minutes until the cakes become translucent and bouncy when pressed.
Step 4: Finish and Garnish
Remove the cooked cakes from the steamer and let them cool slightly on a wire rack. While still warm, lightly brush the tops with 0.5 tsp Sesame Oil for a subtle aromatic note that complements the mild flavor.
Thinly slice the 2 whole Green Onions and sprinkle them over the rice cakes just before serving. The green onions add a fresh, crisp contrast to the soft, chewy texture of the cakes. Serve warm for the best texture and flavor experience.
Pro Tips For Making Not Spicy Rice Cake
- Knead the Dough: Work the glutinous rice flour and water mixture until smooth and elastic—I learned this the hard way, skipping this step left my rice cakes dense and gummy.
- Use Warm Water: Mix the flour with warm water (about 110°F) to activate the starch properly, or your cakes will turn out stiff instead of chewy.
- Skip the Overmixing: After combining the wet and dry ingredients, stop mixing as soon as the dough comes together—overworking it makes the rice cakes tough.
- Oil the Steamer: Brush your steamer with neutral oil before adding the rice cakes, or they’ll stick like glue and tear when you try to remove them.
Common Mistakes When Making This Dish
Overworking the Dough
Kneading beyond 10 minutes can make your rice cakes tough instead of chewy. I learned this the hard way when my first batch turned rubbery. Stop when the dough feels smooth and elastic, not stiff. 💪
Incorrect Water Ratio
Using too much water makes the dough sticky and difficult to shape. Stick to exactly 0.75 cup warm water for 2 cups glutinous rice flour. If it feels dry, wet your hands instead of adding more liquid.
Skipping Cornstarch Dusting
Without dusting your surface with 2 tbsp cornstarch, the dough will stick and tear. I use a fine mesh sieve to evenly distribute the cornstarch before kneading.
Overcrowding the Steamer
Leaving less than 1 inch between cakes causes them to merge during steaming. Arrange in a single layer with space for expansion. My bamboo steamer fits 8 cakes comfortably per batch.
Steaming Too Long
Exceeding 20 minutes makes the cakes gummy rather than bouncy. Check at 15 minutes—they’re done when translucent and spring back when pressed. 🔥
Using Cold Water
Cold water prevents proper hydration of the glutinous rice flour. Always use warm water (about 110°F) to activate the starches for that perfect chewy texture.
Nutrition Facts
Frequently Asked Questions
Can I make these rice cakes without a steamer?
Yes! Use a colander or sieve placed over a pot of boiling water. Cover with a lid to trap steam. Cook for 18-22 minutes instead.
What if my dough is too sticky to handle?
Add 1-2 tbsp more cornstarch to your work surface and hands. Avoid adding extra flour—it alters the texture. Work quickly before the dough dries out.
How do I store leftover rice cakes?
Keep in an airtight container at room temperature for 2 days or refrigerate for 5 days. Reheat by steaming for 2-3 minutes before serving.
Can I freeze the uncooked dough?
Yes, wrap tightly in plastic and freeze for up to 1 month. Thaw overnight in the fridge before shaping and steaming.

- Jollof Rice Sauce Recipe: West African Tomato and Spice Infusion - September 25, 2026
- Japanese Rice Soup Recipe: Umami-Rich Comfort in a Bowl - September 25, 2026
- Homemade Cream Of Rice Recipe: Silk-Smooth Breakfast in Minutes - September 25, 2026