
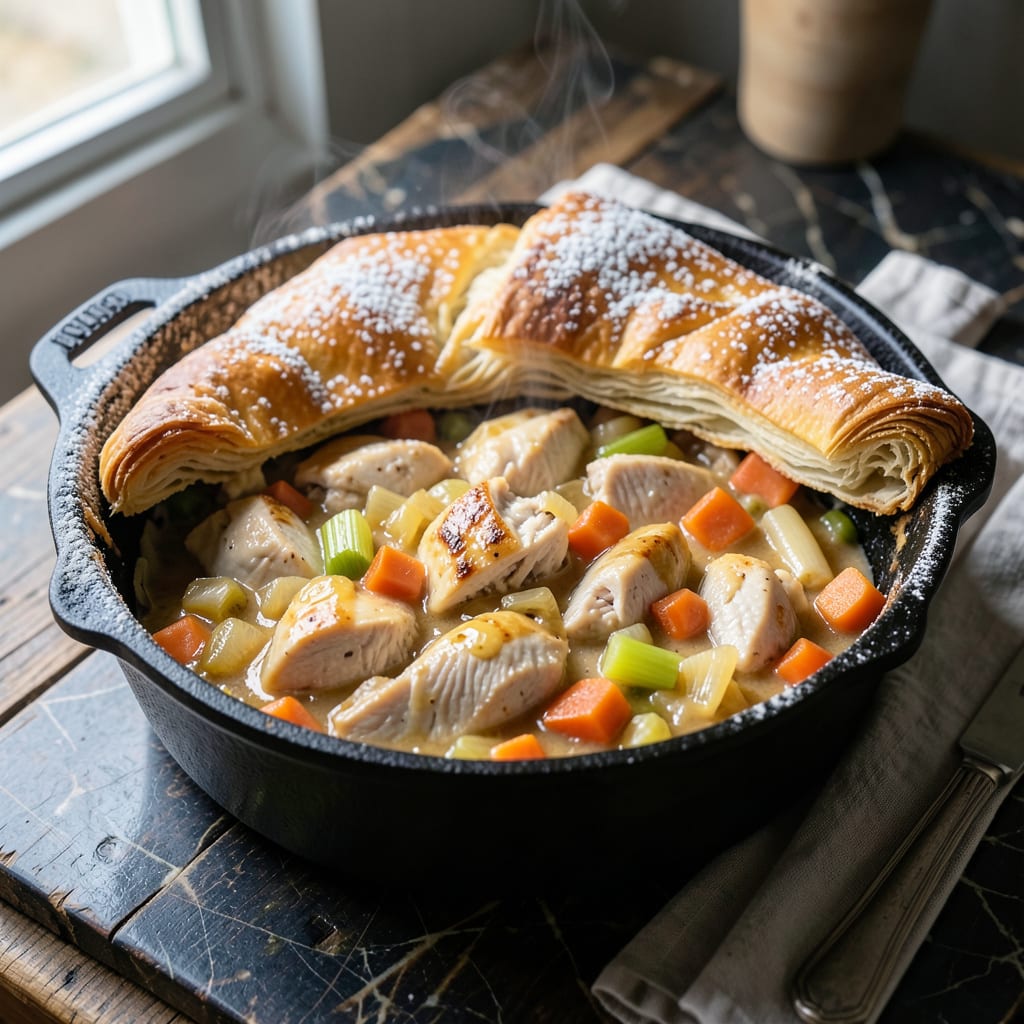
There’s something deeply satisfying about a chicken pot pie with a flaky crust encasing a rich, hearty filling—all made in one pot for easy cleanup. This method streamlines the classic without sacrificing any of its comforting appeal.
By cooking the filling directly in the pot and topping it with a simple biscuit crust, you achieve the same cozy, homemade taste with far less effort. The result is a golden, buttery topping over a creamy, vegetable-packed filling that’s ready to serve straight from the pot.
Ingredients for One Pot Chicken Pot Pie
Simple pantry staples plus fresh veggies create this comforting one-pot classic with ease.
| Ingredient | Amount | Notes |
|---|---|---|
| Boneless Skinless Chicken Breasts 🍗 | 1 ½ lb | Cut into 1-inch cubes |
| All-Purpose Flour 🌾 | ⅓ cup | For thickening the filling |
| Unsalted Butter 🧈 | ¼ cup | For sautéing and richness |
| Yellow Onion 🧅 | 1 whole | Diced medium-fine |
| Carrots 🥕 | 2 whole | Peeled and diced |
| Celery Stalks 🌿 | 2 whole | Diced for flavor base |
| Garlic Cloves 🧄 | 3 cloves | Minced for depth |
| Chicken Broth 🥣 | 2 cups | Low-sodium preferred |
| Frozen Peas 🌱 | 1 cup | No need to thaw |
| Whole Milk 🥛 | ½ cup | For creamy filling |
| Fresh Thyme Leaves 🌿 | 1 tbsp | Or 1 tsp dried |
| Salt 🧂 | 1 tsp | Adjust to taste |
| Black Pepper 🌶️ | ½ tsp | Freshly ground best |
| Baking Powder 🧂 | 2 tsp | For biscuit topping |
| All-Purpose Flour 🌾 | 2 cups | For biscuit topping |
[recipeingredientscaler]
The chicken quality affects the final texture. Free-range or organic breasts stay juicier during cooking. Look for uniform thickness when cubing to ensure even cooking. Most supermarkets carry pre-cut stew meat that works perfectly—just check for skin and bones. For the vegetables, fresh carrots and celery provide the best crunch, but frozen works in a pinch (just thaw and drain first).
No fresh thyme? Dried thyme at one-third the amount works fine. Swap the peas for frozen corn or green beans if that’s what you have. For a richer filling, use half-and-half instead of milk. The biscuit topping can be made with self-rising flour—just omit the baking powder. Short on time? Use store-bought biscuit dough for the topping.
The filling keeps well in the fridge for 3-4 days and actually tastes better the next day. The biscuit topping is best fresh but can be reheated in a 350°F oven for 10 minutes. Freeze the filling alone for up to 3 months—add the topping fresh when ready to bake.
Why You’ll Love This Recipe
- One Pot Wonder: I love that everything—chicken, carrots, onions—cooks together in one pot, no extra pans to wash.
- Buttery Comfort: The golden crust on top, made with butter and flour, is the kind of cozy that makes me want seconds.
- Weeknight Hero: Between us, this is my go-to for busy evenings when I need something hearty without the fuss.
- Leftovers Win: Honestly, it tastes even better the next day, and the portions stretch easily for lunches.
Step-by-Step Instructions for One Pot Chicken Pot Pie
This streamlined method delivers a golden biscuit topping over a creamy, hearty filling in one pot.
Step 1: Sauté Vegetables and Chicken
Heat the 0.25 cup unsalted butter in a large oven-safe pot or Dutch oven over medium heat. Add the diced yellow onion, carrots, and celery stalks, cooking for 5-6 minutes until the vegetables soften and the onion becomes translucent.
Add the 1.5 lb boneless skinless chicken breasts (cut into 1-inch cubes) and cook for 6-7 minutes until the pieces are no longer pink on the outside. Stir in the minced garlic cloves and fresh thyme leaves, cooking for 1 minute until fragrant.
Step 2: Create the Creamy Filling
Sprinkle the 0.33 cup all-purpose flour over the chicken and vegetables, stirring to coat evenly. Pour in the 2 cups chicken broth and 0.5 cup whole milk, stirring constantly to prevent lumps from forming.
Bring the mixture to a gentle simmer and cook for 5-6 minutes until the sauce thickens enough to coat the back of a spoon. Stir in the 1 cup frozen peas, 1 tsp salt, and 0.5 tsp black pepper, then remove from heat.
Step 3: Prepare and Add the Biscuit Topping
In a separate bowl, whisk together the 2 cups all-purpose flour, 2 tsp baking powder, and a pinch of salt. Cut in the remaining butter (if any) or use the residual butter from the pot until the mixture resembles coarse crumbs.
Gradually add 0.5 cup whole milk, stirring just until a soft dough forms. Drop spoonfuls of the biscuit dough evenly over the hot filling, ensuring full coverage.
Step 4: Bake to Golden Perfection
Preheat the oven to 375°F. Transfer the pot to the oven and bake uncovered for 20-25 minutes, or until the biscuit topping is golden brown and a toothpick inserted into the center comes out clean.
Let it rest for 5 minutes before serving. The filling will continue to thicken as it cools, and the biscuit topping will set into a flaky, tender layer that perfectly complements the creamy chicken and vegetables below.
Pro Tips For Making One Pot Chicken Pot Pie
- Precook the Chicken: Poach or sear the chicken breasts first, then shred and add back to the pot—I learned this the hard way after ending up with rubbery chicken in my filling.
- Bloom the Flour: Cook the flour and butter together for at least 2 minutes to remove the raw taste; sounds tedious but it makes a real difference in the final sauce.
- Cut Carrots Evenly: Slice carrots into ¼-inch thick rounds so they cook at the same rate as the onions—nothing worse than crunchy carrots in a creamy filling.
- Use Cold Butter: For the topping, grate cold butter directly into the flour mixture; it creates a flakier crust without overworking the dough.
Essential Equipment for This Dish
Oven-Safe Pot
You’ll need a large oven-safe pot or Dutch oven with a capacity of at least 5-6 quarts. I use my enamel-coated cast iron from Le Creuset—it conducts heat beautifully and goes straight from stovetop to oven. Avoid thin aluminum pots that may warp.
Wooden Spoon
A sturdy wooden spoon is essential for stirring the filling without scratching your pot. Look for one with a long handle to keep your hands away from the heat. I keep a 12-inch olive wood spoon dedicated to my Dutch oven for just this reason.
Mixing Bowls
Have a medium mixing bowl ready for the biscuit topping. A 2-quart glass bowl works perfectly and lets you see when the dough comes together. Stainless steel is also great—just avoid plastic, which can absorb odors. 💪
Whisk and Pastry Cutter
A balloon whisk helps incorporate the dry ingredients smoothly for the biscuit topping. For cutting in the butter, a pastry cutter makes quick work, though two forks in a scissor motion work in a pinch. I prefer the OXO Good Grips pastry cutter for its comfortable handle.
Measuring Cups
Accurate measurements matter here, especially for the biscuit topping. Use nested dry measuring cups for the flour and baking powder. I keep a set from Pyrek in my drawer—they’re durable and the markings are easy to read. 🌟
Oven Thermometer
For perfect results every time, I recommend an oven thermometer to verify your oven’s temperature. Many ovens run hot or cold, and this dish needs that 375°F to be spot-on. The Taylor Precision model is affordable and reliable.
Nutrition Facts
Frequently Asked Questions
Can I use store-bought biscuits for the topping?
Yes! Use 1 can (16 oz) of refrigerated biscuits for a quick shortcut. Arrange them over the filling and bake as directed. The result won’t be as homemade-tasting, but it’s a great time-saver.
How do I know when the filling is thick enough?
It’s ready when it coats the back of a spoon and leaves a clear path when you run your finger through it. This usually takes 5-6 minutes of simmering. If too thin, cook longer; if too thick, add a splash of broth.
Why did my biscuit topping turn out dense?
Overmixing the dough or using cold ingredients can cause this. Stir just until combined, and ensure your milk and butter aren’t ice-cold. For extra fluffiness, let the dough rest for 5 minutes before topping.
Can this be made ahead of time?
Prepare the filling and refrigerate it for up to 2 days. Add the biscuit topping and bake just before serving. Avoid assembling the entire dish ahead, as the topping may become soggy.

- Jollof Rice Sauce Recipe: West African Tomato and Spice Infusion - September 25, 2026
- Japanese Rice Soup Recipe: Umami-Rich Comfort in a Bowl - September 25, 2026
- Homemade Cream Of Rice Recipe: Silk-Smooth Breakfast in Minutes - September 25, 2026