
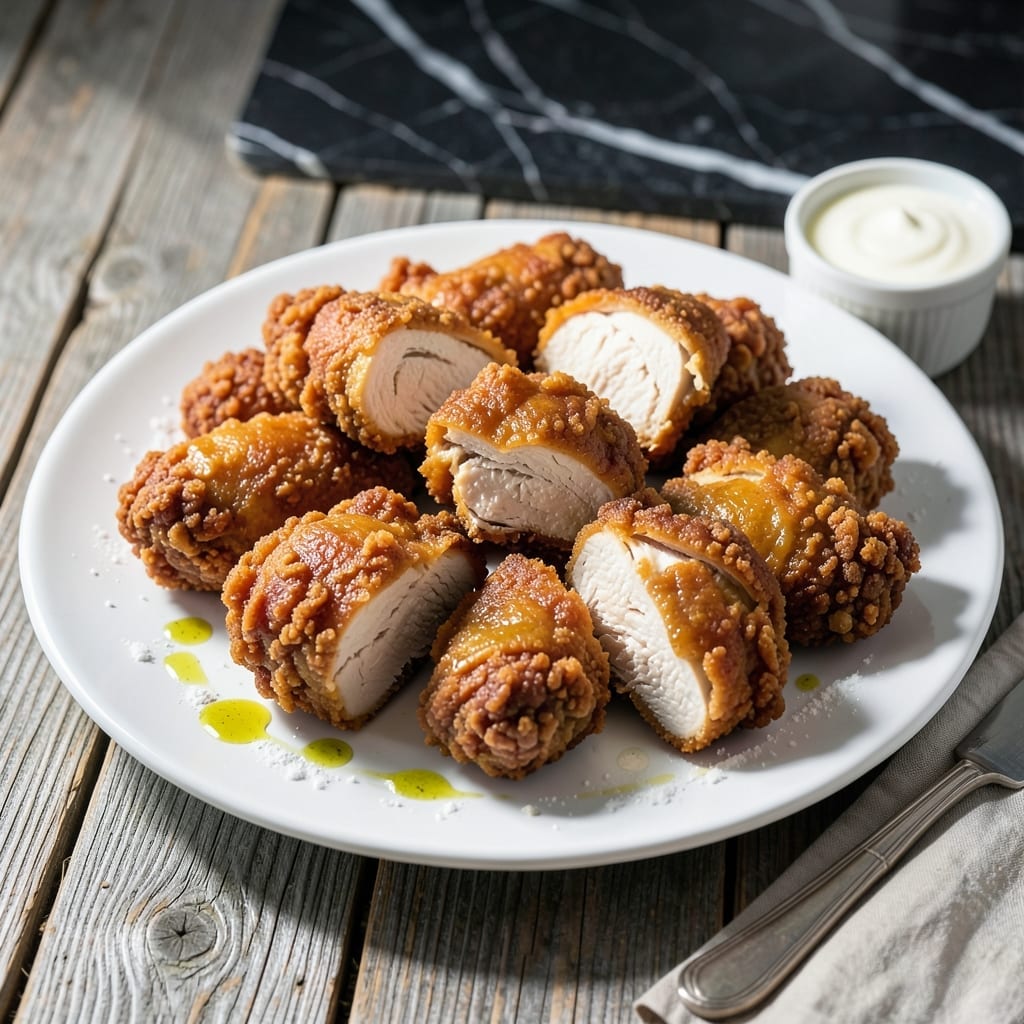
This classic baked chicken delivers a crispy golden coating with juicy meat every time. The secret lies in using Bisquick for a foolproof breading that adheres perfectly and bakes to a satisfying crunch.
With just 30 minutes in the oven, this method ensures the coating stays intact while the chicken remains tender inside. The process is straightforward—dip, coat, and bake—yet yields professional-quality results.
Each bite offers a contrast of textures: shatteringly crispy exterior giving way to moist, flavorful chicken. Serve with mashed potatoes or a simple salad for a complete meal.
This quick preparation works for weeknight dinners or casual gatherings. The simplicity of the technique makes it a reliable go-to for consistently delicious chicken.
Ingredients for Original Bisquick Chicken
Pantry staples plus a box of Bisquick create that signature crispy coating.
| Ingredient | Amount | Notes |
|---|---|---|
| Boneless Skinless Chicken Breasts 🍗 | 1 ½ lb | Pounded to even thickness |
| Original Bisquick Baking Mix 🥞 | 2 cups | Do not substitute pancake mix |
| Large Eggs 🥚 | 2 whole | Beaten for egg wash |
| Whole Milk 🥛 | ½ cup | For dredging liquid |
| All-Purpose Flour 🌾 | ½ cup | For initial dredge |
| Salt 🧂 | 1 tsp | Diamond Crystal kosher preferred |
| Black Pepper 🌶️ | ½ tsp | Freshly ground for best flavor |
| Garlic Powder 🧄 | 1 tsp | Adds depth to coating |
| Paprika 🌶️ | 1 tsp | For color and mild flavor |
| Vegetable Oil 🫒 | 2 tbsp | For greasing baking sheet |
| Unsalted Butter 🧈 | 3 tbsp | Melted for extra crispiness |
The Bisquick is non-negotiable here—General Mills Original is the gold standard. Most supermarkets carry it in the baking aisle. For the chicken, boneless, skinless breasts work best (thighs get too dark before the coating crisps). Look for even thickness or pound them yourself to ½-inch. The milk adds richness to the egg wash, but buttermilk can be used for extra tang if preferred.
No Bisquick? Homemade mix of 2 cups flour, 1 tbsp baking powder, ½ tsp salt, and 1 tsp sugar mimics it. Out of paprika? Smoked paprika adds a nice depth. The butter in the coating is key—don’t skip it, but vegetable oil works in a pinch (though flavor suffers slightly). For extra crunch, add crushed cornflakes to the Bisquick.
Breaded chicken keeps 4-5 days refrigerated, but it’s best fresh. Reheat in a 375°F oven for 10-12 minutes to revive crispiness. Freeze uncooked breaded pieces on a tray first, then transfer to bags for up to 3 months.
Why You’ll Love This Recipe
- One Bowl Wonder: I just dump the Bisquick, eggs, and milk in a bowl, coat the chicken, and bake—no fancy steps.
- Crispy Outside, Juicy Inside: That Bisquick crust gets golden and crunchy while keeping the chicken breast tender.
- Feeds the Whole Crew: I’ve served this for Sunday dinner and weeknight chaos. Both work.
- Leftovers? No Problem: Honestly, it reheats surprisingly well—still crispy in the toaster oven the next day.
Step-by-Step Instructions for Crispy Bisquick Chicken
Here’s the method. Straightforward, tested, works every time.
Step 1: Prep and Season the Chicken
Pound the 1.5 lb boneless skinless chicken breasts to an even ½-inch thickness between sheets of plastic wrap. This ensures even cooking and prevents dry spots. Pat the pieces dry with paper towels—excess moisture prevents proper browning.
Season both sides generously with the 1 tsp salt, ½ tsp black pepper, 1 tsp garlic powder, and 1 tsp paprika. This base layer of seasoning enhances the flavor of the coating. Let the chicken rest for 10 minutes while you prepare the dredging stations.
Step 2: Set Up the Dredging Stations
In a shallow dish, whisk together the ½ cup all-purpose flour, 1 tsp salt, ½ tsp black pepper, 1 tsp garlic powder, and 1 tsp paprika. This initial dredge creates a sticky surface for the Bisquick to adhere to.
In another shallow dish, beat the 2 whole large eggs with the ½ cup whole milk until fully combined. In a third dish, place the 2 cups Original Bisquick baking mix. This three-step dredging process guarantees a thick, crispy crust that stays put during baking.
Step 3: Coat the Chicken and Arrange for Baking
Dredge each piece of chicken first in the flour mixture, shaking off any excess. Then dip it in the egg wash, allowing any excess to drip off. Finally, press it firmly into the Original Bisquick baking mix, ensuring a thick, even coating on all sides. Place the coated chicken on a plate and let it rest for 5 minutes to set the crust.
Preheat your oven to 400°F. Pour the 2 tbsp vegetable oil onto a baking sheet and spread it evenly to coat the surface. This prevents sticking and promotes even browning. Melt the 3 tbsp unsalted butter and set it aside for basting later.
Step 4: Bake to Golden Perfection
Place the coated chicken pieces on the prepared baking sheet, leaving space between them to ensure even cooking. Bake on the middle rack for 20-25 minutes, or until the internal temperature reaches 165°F and the coating is golden brown and crisp.
Halfway through baking, carefully brush the chicken with the melted 3 tbsp unsalted butter. This adds richness and extra crispiness to the coating. Avoid flipping the chicken—baking it on one side ensures the crust stays intact and maximizes the crispy texture.
Step 5: Rest and Serve Immediately
Remove the chicken from the oven and let it rest on the baking sheet for 5 minutes. This allows the juices to redistribute, ensuring the meat stays moist and tender. The coating will become even crispier as it cools slightly.
Serve immediately while still hot. The result should be juicy, tender chicken encased in a thick, golden-brown crust with a satisfying crunch. For best results, pair with your favorite dipping sauce or a fresh salad.
Pro Tips For Making Original Bisquick Chicken
- Pound the Chicken: Use a rolling pin or meat mallet to pound the breasts to an even ½-inch thickness—this guarantees even cooking and prevents dry, overdone edges.
- Chill the Coating: After dredging in the Bisquick-milk-egg mixture, let the chicken rest in the fridge for 10 minutes before frying so the coating sticks better and fries up crispier.
- Skip the Overcrowding: I learned this the hard way—fry only 2-3 pieces at a time in hot oil (350°F) to avoid steaming the coating, which turns it soggy instead of golden.
- Double-Dredge for Crunch: Sounds weird, but it works: dip the chicken back in the wet mix and Bisquick a second time for an extra-thick, shatteringly crisp crust.
Regional Styles of These Flavors
Southern Comfort Style
In the South, we love adding 1 tsp cayenne pepper to the Bisquick for a subtle kick. The secret is also using buttermilk instead of milk in the egg wash for extra tang. I learned this trick from my grandmother in Georgia. 💛
Midwestern Classic
Midwest cooks often add ½ cup crushed cornflakes to the Bisquick for extra crunch. The coating turns a beautiful golden color in the oven. I remember my mother-in-law serving this with mashed potatoes and green beans.
Texas Bold Flavor
Everything’s bigger in Texas, including the flavor. Add 1 tbsp chili powder and ½ tsp cumin to the flour dredge. The result is a zesty coating that pairs perfectly with ranch dressing for dipping.
New England Light
For a lighter take, New England cooks sometimes use chicken tenders instead of breasts. They also replace the butter with olive oil for a slightly healthier version. The coating remains crispy but with a different flavor profile.
Pacific Northwest
Out west, they love incorporating 1 tbsp fresh herbs like rosemary or thyme into the Bisquick. The herbal notes complement the chicken beautifully. I picked up this variation while visiting Seattle. 🌟
Nutrition Facts
Frequently Asked Questions
Can I use chicken thighs instead of breasts?
Yes, but reduce baking time to 18-20 minutes at 400°F. Thighs cook faster and stay juicier. Watch closely to prevent over-browning the coating.
Why does my coating fall off during baking?
This usually means the chicken wasn’t dry before dredging or the rest step was skipped. Pat pieces thoroughly and let coated chicken rest 5 minutes before baking.
What’s the best way to keep it crispy when serving?
Serve immediately on a wire rack, not a plate. Steam from the hot chicken softens the crust. For crowds, keep warm in a 200°F oven on a rack.

- Jollof Rice Sauce Recipe: West African Tomato and Spice Infusion - September 25, 2026
- Japanese Rice Soup Recipe: Umami-Rich Comfort in a Bowl - September 25, 2026
- Homemade Cream Of Rice Recipe: Silk-Smooth Breakfast in Minutes - September 25, 2026