
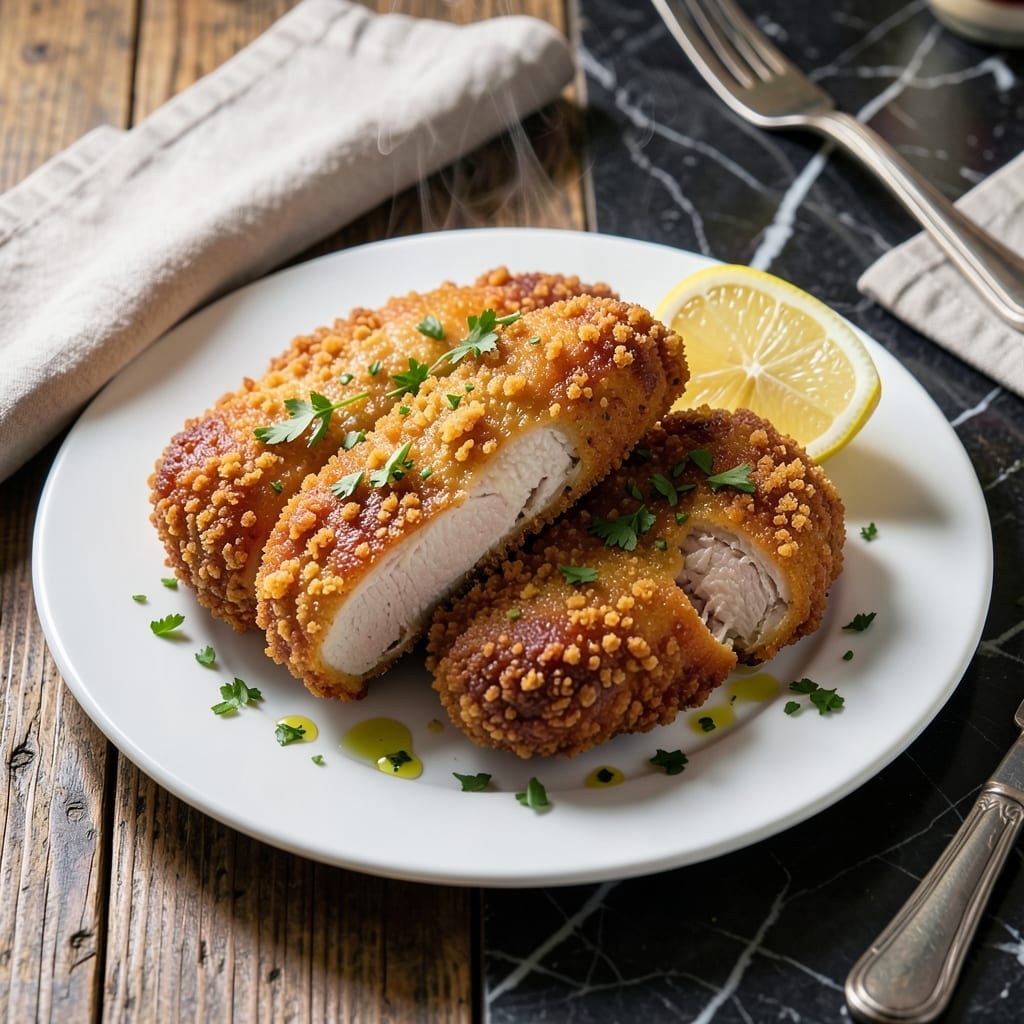
This panko chicken delivers the ultra-crispy texture that makes Japanese tonkatsu so irresistible. The secret lies in the double-breading technique that creates a shatteringly crisp crust.
I developed this method to achieve professional results at home without deep frying. The panko breadcrumbs, with their larger flakes, create more surface area for maximum crunch compared to regular breadcrumbs.
Each bite offers tender juicy chicken encased in a golden brown coating that stays crispy long after cooking. The contrast between the crunchy exterior and moist interior is what makes this dish truly special.
Serve with steamed rice and tonkatsu sauce for an authentic experience or pair with a simple salad for a lighter meal.
Ingredients for Panko Chicken
Quality ingredients create that signature shatteringly crisp crust around tender chicken.
| Ingredient | Amount | Notes |
|---|---|---|
| Boneless Skinless Chicken Breasts 🍗 | 1 ½ lb | Pounded to 1/2-inch thickness |
| Panko Breadcrumbs 🍞 | 2 cups | Japanese-style for maximum crunch |
| All-Purpose Flour 🌾 | ½ cup | For initial dredging |
| Large Eggs 🥚 | 2 whole | Beaten for egg wash |
| Neutral Oil 🫒 | 1 cup | For shallow frying, high smoke point |
| Kosher Salt 🧂 | 1 ½ tsp | Diamond Crystal preferred |
| Freshly Ground Black Pepper 🌶️ | 1 tsp | Medium grind |
| Garlic Powder 🧄 | 1 tsp | For seasoning flour |
| Onion Powder 🧅 | 1 tsp | For seasoning flour |
| Paprika 🌶️ | 1 tsp | Sweet or smoked variety |
| Tonkatsu Sauce 🍯 | ½ cup | For serving, store-bought or homemade |
| Steamed White Rice 🍚 | 2 cups | Cooked, for serving |
| Shredded Green Cabbage 🥬 | 2 cups | For serving, optional garnish |
The panko breadcrumbs are non-negotiable here—only Japanese-style panko delivers the ultra-crispy texture this dish demands. Look for brands like Kikkoman or Progresso at well-stocked supermarkets or Asian markets. The chicken breasts should be uniform in thickness (about 1/2-inch) to ensure even cooking. I source mine from Whole Foods for consistent quality and size.
No panko on hand? Crushed cornflakes plus a pinch of salt can work in a pinch, though the texture won’t be identical. For a gluten-free version, crushed rice cereal or gluten-free panko substitutes are your best bet. The neutral oil must have a high smoke point—peanut, canola, or vegetable oil all work well. Avoid olive oil here as its smoke point is too low for proper crisping.
The breaded cutlets keep warm in a 200°F oven for up to 30 minutes without losing crispness. Store leftovers in the fridge for 3-4 days, though they’re best served fresh. Reheat in a toaster oven to revive the crunch—microwaving will make them soggy.
Why You’ll Love This Recipe
- No-Fuss Coating: I love how the flour-egg-panko trio sticks perfectly with zero fuss—just dip and go.
- Crispy Magic: Panko gives that irresistible crunch that regular breadcrumbs just can’t match.
- Weeknight Hero: This is my go-to for busy evenings when I need dinner on the table fast.
- Budget Stretcher: Chicken breasts and panko are affordable staples, and this recipe makes them shine.
Step-by-Step Instructions for Ultra-Crispy Japanese Breaded Cutlets
Here’s the method. Straightforward, tested, works every time.
Step 1: Prepare and Season the Chicken Cutlets
Begin by pounding the 1.5 lb boneless skinless chicken breasts to an even ½-inch thickness between two sheets of plastic wrap. This ensures uniform cooking and prevents dry, overcooked edges while the thicker parts finish.
Season both sides generously with 1.5 tsp kosher salt, 1 tsp freshly ground black pepper, 1 tsp garlic powder, 1 tsp onion powder, and 1 tsp paprika. The spices should adhere evenly to all surfaces. Let the seasoned chicken rest at room temperature for 10 minutes to allow the salt to penetrate slightly.
Step 2: Set Up the Breading Station
Create a breading assembly line with three shallow dishes. Place the 0.5 cup all-purpose flour in the first dish. Beat the 2 whole large eggs in the second dish until fully homogeneous. Pour the 2 cups panko breadcrumbs into the third dish.
The key to maximum crunch is using Japanese-style panko—its larger, irregular flakes create a lighter, crispier crust than standard breadcrumbs. Arrange the dishes in order: flour, egg, panko. This sequence ensures proper adhesion of each layer.
Step 3: Bread and Fry the Cutlets
Dredge each chicken piece in the flour, pressing gently to create a thin, even coating. Shake off any excess. Next, dip into the beaten eggs, allowing any excess to drip back into the dish. Finally, press each piece firmly into the panko, ensuring complete coverage. The pressure helps the breadcrumbs adhere securely.
Heat 1 cup neutral oil in a large skillet over medium-high heat until shimmering but not smoking (350-375°F). Carefully place the breaded cutlets in the hot oil. Fry for 3-4 minutes per side until the coating is deep golden brown and the internal temperature reaches 165°F. Work in batches to avoid crowding the pan, which would lower the oil temperature and result in greasy cutlets.
Step 4: Drain and Serve Immediately
Transfer the fried cutlets to a wire rack set over a baking sheet to drain any excess oil. This prevents the crispy coating from becoming soggy. Let them rest for 2 minutes before serving—they’ll stay hot while you plate the accompaniments.
Serve the cutlets hot with 0.5 cup tonkatsu sauce for dipping, alongside 2 cups steamed white rice and 2 cups shredded green cabbage for a traditional presentation. The contrast of the ultra-crispy exterior with the tender chicken and cool, fresh cabbage completes the dish.
Pro Tips For Making Panko Chicken
- Pound the Chicken: I learned this the hard way—pound the breasts to an even ½-inch thickness so they cook through without burning the panko crust.
- Double Dredge: After burning three batches, I finally figured out that dipping in flour, egg, and panko twice gives that extra-crispy coating that actually stays put.
- Skip Cold Chicken: Resist the urge to bread straight from the fridge—let the chicken sit at room temp for 15 minutes or the breading won’t stick properly.
- Use a Rack: Sounds weird, but it works: place the fried chicken on a wire rack over a baking sheet to keep the bottom crisp while resting.
Common Mistakes When Making panko chicken
Overcrowding the Pan
Frying too many cutlets at once lowers the oil temperature, resulting in greasy, soggy breading. I fry in batches, giving each piece at least 1 inch of space between them. This ensures the oil stays at 350-375°F for that perfect golden crisp. 🔥
Skipping the Rest
Seasoning the chicken and letting it rest for 10 minutes before breading allows the salt to penetrate. Without this step, the exterior gets all the flavor while the inside stays bland. I notice a huge difference when I take the time to do this properly.
Uneven Thickness
Pounding the chicken to an even ½-inch thickness is non-negotiable. Thicker spots cook slower, leading to overcooked edges by the time the center reaches 165°F. Use a meat mallet and plastic wrap to protect the chicken while you work.
Poor Oil Choice
Neutral oils with high smoke points like peanut or canola are essential. Olive oil burns at frying temperatures, creating bitter flavors. I always keep a dedicated bottle of vegetable oil just for frying projects like this.
Rushing the Breading
Each step in the breading process needs 30 seconds to properly adhere. Press the panko firmly into the egg wash to create that shatteringly crisp crust. Skimping here means the coating might fall off during cooking.
Improper Draining
Placing fried cutlets on paper towels traps steam, making the breading soggy. A wire rack over a baking sheet lets air circulate, keeping them crisp. This simple trick makes all the difference for your final dish. ✨
Nutrition Facts
Frequently Asked Questions
Can I bake instead of frying?
Yes! Bake at 400°F for 15-20 minutes, flipping halfway. Spritz with oil for extra crispiness. The texture won’t be identical but still delicious.
How do I keep the coating from falling off?
Press firmly when breading and let each layer set for 30 seconds. Chill breaded cutlets for 10 minutes before frying to help adhesion.
What’s the best oil for frying?
Use neutral oils with high smoke points like peanut, canola, or vegetable oil. Avoid olive oil—it burns at frying temps.
Can I use chicken thighs instead?
Thighs stay juicier. Pound to ½-inch thickness and adjust cooking time to 4-5 minutes per side.

- Jollof Rice Sauce Recipe: West African Tomato and Spice Infusion - September 25, 2026
- Japanese Rice Soup Recipe: Umami-Rich Comfort in a Bowl - September 25, 2026
- Homemade Cream Of Rice Recipe: Silk-Smooth Breakfast in Minutes - September 25, 2026