
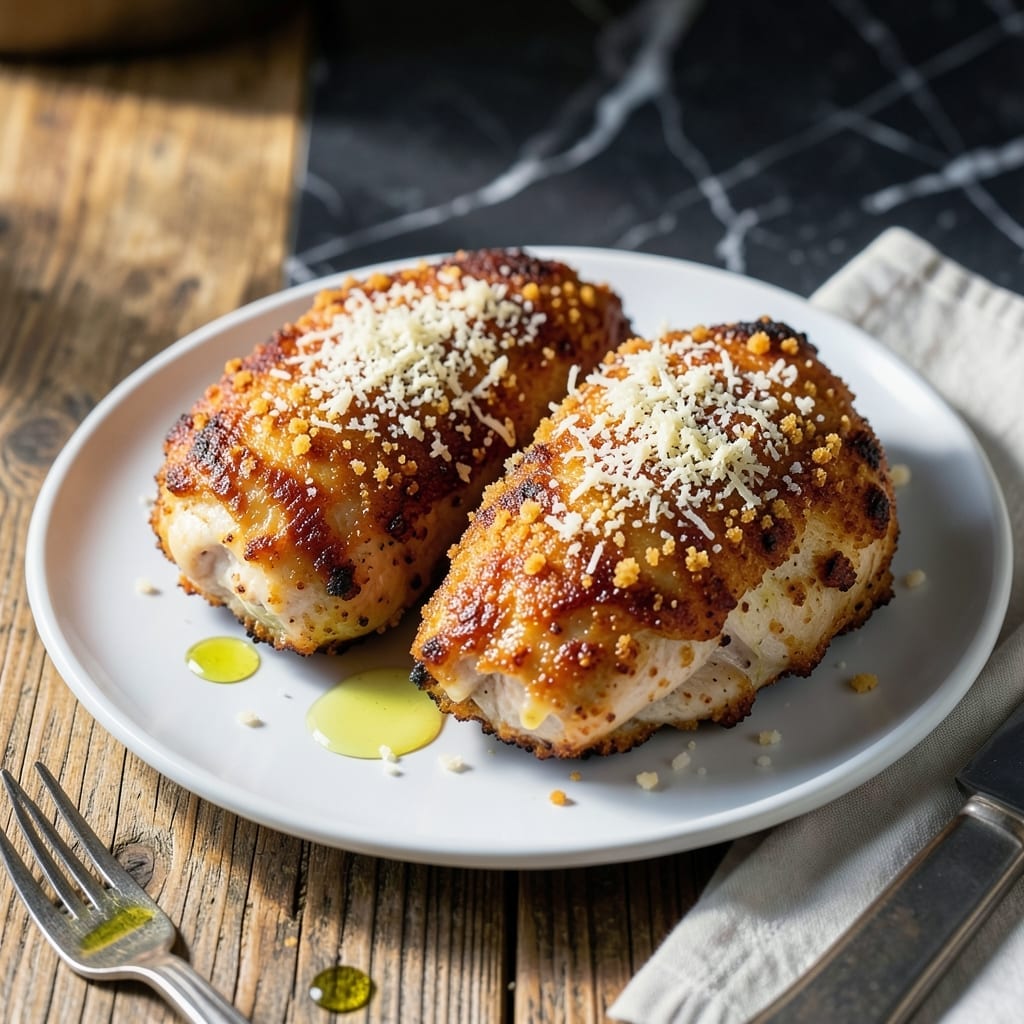
This recipe delivers the ultimate contrast in every bite with buttery soft chicken and a crispy parmesan crust that shatters beautifully.
The secret lies in pounding the cutlets thin for even cooking, then breading them with a panko-parmesan mixture for maximum crunch. Each piece emerges golden and fragrant from the pan.
You’ll achieve restaurant-quality results at home with simple techniques and everyday ingredients. The crust stays crispy while the chicken remains impossibly tender and juicy.
Serve immediately for the best texture. Here’s everything you need to make this crowd-pleasing dish.
Ingredients for Pillow Chicken
Everyday ingredients transform into restaurant-quality cutlets with buttery tenderness and shatteringly crisp crust.
| Ingredient | Amount | Notes |
|---|---|---|
| Boneless Skinless Chicken Breasts 🍗 | 1 ½ lb | Pounded to 1/4-inch thickness |
| All-Purpose Flour 🌾 | ½ cup | For initial dredging |
| Large Eggs 🥚 | 2 whole | Beaten for egg wash |
| Panko Breadcrumbs 🍞 | 1 ½ cups | For maximum crunch |
| Parmesan Cheese 🧀 | ¾ cup | Freshly grated from block |
| Unsalted Butter 🧈 | ½ cup | Melted for breading mixture |
| Garlic Powder 🧄 | 1 tsp | For seasoning breading |
| Onion Powder 🧅 | 1 tsp | For seasoning breading |
| Dried Oregano 🌿 | 1 tsp | For herbaceous note |
| Kosher Salt 🧂 | 1 tsp | Diamond Crystal preferred |
| Freshly Ground Black Pepper 🌶️ | ½ tsp | Divided for seasoning |
| Olive Oil 🫒 | ½ cup | For pan-frying chicken |
| Lemon Wedges 🍋 | 4 pieces | For serving |
| Fresh Parsley 🌿 | ¼ cup | Chopped, for garnish |
The chicken quality is paramount—opt for air-chilled, free-range breasts from Whole Foods or Costco for superior texture. Pounding to uniform thickness ensures even cooking and prevents dry edges. For the Parmesan, Parmigiano-Reggiano from Trader Joe’s offers excellent value, but any freshly grated block will deliver better results than pre-shredded (which contains anti-caking agents that inhibit melting).
Need gluten-free? Swap all-purpose flour for rice flour and panko for gluten-free breadcrumbs. No fresh parsley? Dried parsley at one-third the amount works in the breading. The butter can be replaced with ghee for higher smoke point, though the flavor profile will shift slightly. For extra crispiness, add 1/4 cup crushed cornflakes to the breading mixture.
Breaded cutlets keep in the fridge for 1 day before cooking, though best fried fresh. Leftovers reheat in a 375°F oven for 10-12 minutes to restore crispiness. Store cooked chicken in airtight container for up to 3 days.
Why You’ll Love This Recipe
- No-Fuss Coating: I just dip, dredge, and bake—no fancy techniques, just chicken breasts, flour, egg, and panko with Parmesan for that extra kick.
- Crispy Outside, Tender Inside: The panko gives it that golden crunch while the chicken stays juicy, and the Parmesan adds a salty depth that’s ridiculously good.
- Feeds the Whole Crew: I make a big batch for Sunday dinner, then pack leftovers for lunches—honestly, it reheats like a dream.
- Budget-Friendly Protein: Boneless chicken breasts stretch far, and with pantry staples like flour and eggs, it’s a solid, low-cost meal that never disappoints.
Step-by-Step Instructions for Pillow Chicken
Master these techniques to achieve tender cutlets with a perfectly crisp Parmesan crust.
Step 1: Prepare and Season the Chicken
Place the 1.5 lb boneless skinless chicken breasts between two sheets of plastic wrap. Using a meat mallet, pound them to an even 1/4-inch thickness. This ensures uniform cooking and prevents dry spots in thicker areas.
Season both sides generously with 1 tsp kosher salt and 0.5 tsp freshly ground black pepper. I use Diamond Crystal kosher salt for its clean flavor and even distribution. Let the chicken rest at room temperature for 10 minutes to allow the seasoning to penetrate.
Step 2: Create the Breading Station
Set up three shallow dishes for breading. In the first, add the 0.5 cup all-purpose flour. In the second, beat the 2 large eggs until smooth. In the third, combine the 1.5 cups panko breadcrumbs, 0.75 cup parmesan cheese, 1 tsp garlic powder, 1 tsp onion powder, and 1 tsp dried oregano.
Melt the 0.5 cup unsalted butter and drizzle half over the breadcrumb mixture, stirring to combine evenly. This adds richness and helps create that signature crispy texture. Reserve the remaining butter for later use.
Step 3: Bread and Rest the Cutlets
Dredge each chicken piece in flour, shaking off excess. Dip into the beaten eggs, allowing any excess to drip off. Press firmly into the breadcrumb mixture, ensuring complete coverage on both sides. The pressure helps the coating adhere properly.
Place the breaded cutlets on a wire rack set over a baking sheet. This allows air circulation, preventing the breading from becoming soggy. Let them rest for 5-10 minutes to set the coating—this is crucial for maintaining the crust during cooking.
Step 4: Pan-Fry to Golden Perfection
Heat the 0.5 cup olive oil in a large skillet over medium heat until shimmering. Working in batches to avoid crowding, add the chicken and cook for 4-5 minutes per side until the crust is deep golden brown and crispy.
Don’t move the cutlets during the first 2 minutes of cooking—this allows the crust to form properly. When ready to flip, you’ll notice the edges turning opaque and the breading releasing easily from the pan. Drizzle the reserved melted butter over the chicken during the last minute of cooking for extra richness.
Step 5: Drain and Serve Immediately
Transfer the cooked chicken to a paper towel-lined plate to drain excess oil. The internal temperature should reach 165°F. Let rest for 2 minutes to allow the juices to redistribute while maintaining the crispy exterior.
Garnish with 0.25 cup chopped fresh parsley and serve with lemon wedges on the side. The acid from the lemon cuts through the richness beautifully. For best results, serve immediately while the crust is at its crispiest.
Pro Tips For Making Pillow Chicken
- Pound the Chicken: I learned this the hard way—pounding the chicken breasts to an even 1/2-inch thickness guarantees they cook through without drying out. Use a rolling pin or heavy pan, and cover with plastic wrap to avoid tearing.
- Dry the Breasts: Pat the chicken dry with paper towels before dredging in flour. Sounds tedious, but it actually changes the outcome by helping the coating stick and crisp up properly.
- Skip the Overcrowding: Resist the urge to cook all the pieces at once. Frying in batches with about 2 tablespoons of oil per batch prevents steaming and gives you that golden, crunchy crust.
- Grate Fresh Parmesan: After burning three batches, I finally figured out that pre-grated parmesan has anti-caking agents that make the coating less crispy. Freshly grated melts better and adds real flavor.
Creative Variations of This Recipe
Spicy Buffalo Style
Toss your cooked cutlets in ¼ cup hot sauce (I love Frank’s RedHot) mixed with 2 tbsp melted butter right after frying. The crispy coating soaks up the tangy heat beautifully. Serve with blue cheese dressing and celery sticks for the full experience. 🔥
Lemon-Herb Mediterranean
Add 1 tbsp lemon zest and 2 tbsp chopped fresh dill to your breading mixture. After cooking, drizzle with 2 tbsp fresh lemon juice and serve with tzatziki sauce. This bright variation pairs perfectly with a Greek salad.
Parmesan-Garlic Oven-Baked
For a lighter version, bake at 400°F for 15-18 minutes on a wire rack. Add 1 tbsp minced garlic to your breading mix and finish with extra parmesan. The oven method keeps the chicken extra juicy while still delivering that satisfying crunch.
Coconut-Crusted Tropical
Replace ½ cup panko with unsweetened shredded coconut in your breading. The nutty coconut flavor complements the parmesan surprisingly well. Serve with a mango salsa for a sweet-savory contrast. 🌴
Gluten-Free Adaptation
Use rice flour for dredging and gluten-free panko (I recommend Kikkoman brand). Add 1 tsp xanthan gum to help the breading bind better. The texture is identical to the original—crispy outside, tender inside.
Air Fryer Method
Spray breaded cutlets lightly with olive oil and cook at 375°F for 12-15 minutes, flipping halfway. This gives you that same golden crust with less oil. Check that the internal temperature reaches 165°F before serving.
Nutrition Facts
Frequently Asked Questions
Why pound the chicken to 1/4-inch thickness?
Pounding ensures even cooking and prevents dry edges. Thinner cutlets cook faster and more uniformly, so every bite stays tender and juicy.
Can I use regular breadcrumbs instead of panko?
Regular breadcrumbs work, but panko creates a lighter, crispier crust. If substituting, reduce the amount slightly since regular breadcrumbs are denser.
How do I keep the coating from falling off?
Press firmly when breading and let cutlets rest 5-10 minutes before frying. This helps the coating adhere properly during cooking.
What’s the best oil for frying?
Use oils with a high smoke point like vegetable, canola, or peanut oil. Olive oil works too, but avoid extra-virgin as it can burn at high heat.

- Jollof Rice Sauce Recipe: West African Tomato and Spice Infusion - September 25, 2026
- Japanese Rice Soup Recipe: Umami-Rich Comfort in a Bowl - September 25, 2026
- Homemade Cream Of Rice Recipe: Silk-Smooth Breakfast in Minutes - September 25, 2026