
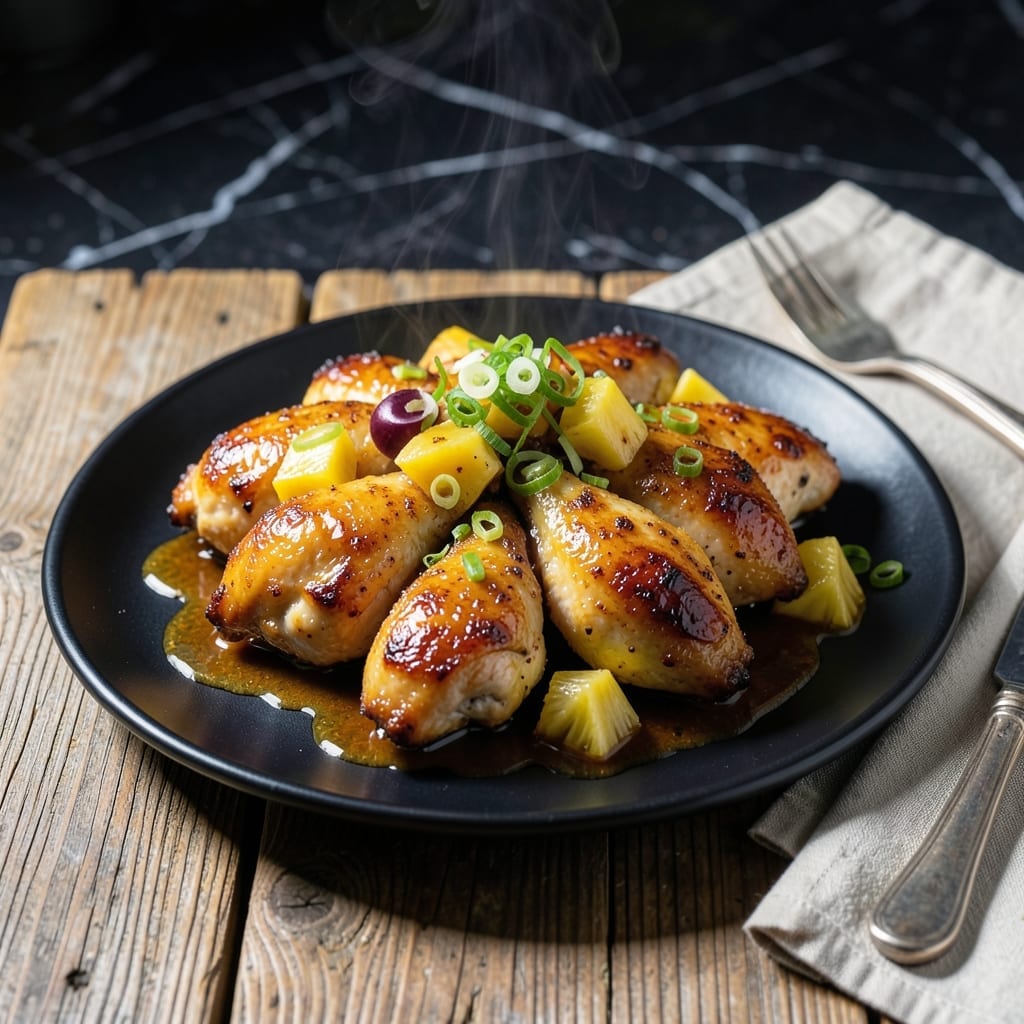
This dish brings together juicy chicken thighs and sweet pineapple in a perfect balance of flavors. The combination of tender meat and caramelized fruit creates a meal that feels special without requiring complicated techniques.
I developed this recipe to highlight how well savory and sweet work together. The chicken cooks until golden and crispy, while the pineapple softens just enough to release its natural sugars.
What results is a plate of tender chicken with a sticky, slightly charred pineapple glaze. Each bite delivers the contrast of rich meat and bright, fruity sweetness that keeps you coming back.
Serve it over rice to soak up every drop of the flavorful pan juices.
Ingredients for Pineapple Chicken Thigh
Juicy chicken thighs and sweet pineapple come together for a flavor-packed meal over rice.
| Ingredient | Amount | Notes |
|---|---|---|
| Boneless Skinless Chicken Thighs 🍗 | 1 ½ lb | Patted dry for crispiness |
| Fresh Pineapple 🍍 | 2 cups | Cubed, about 1-inch pieces |
| Soy Sauce 🫙 | ¼ cup | Low-sodium preferred |
| Brown Sugar 🍚 | 3 tbsp | Light or dark works |
| Rice Vinegar 🫙 | 2 tbsp | For tangy balance |
| Garlic Cloves 🧄 | 4 cloves | Minced for depth |
| Fresh Ginger 🌿 | 1 tbsp | Grated, peeled first |
| Cornstarch 🌾 | 1 tbsp | For thickening sauce |
| Vegetable Oil 🫒 | 2 tbsp | High smoke point for searing |
| Red Pepper Flakes 🌶️ | ½ tsp | Adjust for heat preference |
| Green Onions 🧅 | 3 whole | Thinly sliced for garnish |
| Long-Grain White Rice 🍚 | 1 ½ cups | Uncooked, for serving |
| Sesame Seeds 🌰 | 1 tsp | Toasted, optional garnish |
The chicken thighs are the star—boneless, skinless gives you that perfect crispy edge while staying juicy inside. I grab mine from Whole Foods or Costco (their organic ones are great). For the pineapple, fresh is non-negotiable—canned gets mushy and lacks that bright, caramelized flavor. Look for a ripe one (golden color, sweet smell at the base).
No pineapple? Mango or peaches work in a pinch (same volume). Swap soy sauce for tamari if you need gluten-free. Out of brown sugar? Coconut sugar at a 1:1 ratio brings a similar depth. The ginger and garlic are doing heavy flavor lifting—don’t skip them. If you’ve got fresh galangal, even better (use same amount as ginger).
Leftovers keep for 4 days in the fridge—reheat gently to avoid drying out the chicken. The sauce thickens as it cools, so stir in a splash of water when reheating. Freezes beautifully for 3 months (portion before freezing for easy meals).
Why You’ll Love This Recipe
- One Pan Wonder: I toss everything in a single pan—chicken, pineapple, and sauce—and let the oven do the work.
- Sweet-Tangy Crave: That brown sugar and rice vinegar glaze with fresh pineapple? Ridiculously good. I’ll be real: I lick the pan.
- Feeds the Crew: Between us, this stretches for dinner and next-day lunches with zero extra effort.
- Budget Hero: Boneless thighs are cheap, and fresh pineapple goes a long way. Honestly, it’s my wallet’s favorite meal.
Step-by-Step Instructions for Pineapple Chicken Thighs
Here’s my method for achieving that perfect balance of sweet and savory with juicy tenderness.
Step 1: Sear the Chicken Thighs to Golden Perfection
Pat the 1.5 lb boneless skinless chicken thighs dry with paper towels—this is crucial for achieving a good sear. Heat 2 tbsp vegetable oil in a large skillet over medium-high heat until shimmering but not smoking. You’ll know it’s ready when the oil ripples across the surface.
Add the chicken thighs in a single layer, being careful not to crowd the pan. Sear for 5-6 minutes per side until deep golden brown and crispy. The chicken should release easily from the pan when it’s ready to flip—if it sticks, give it another minute. Transfer to a plate and set aside.
Step 2: Build the Pineapple Sauce Base
In the same skillet, reduce heat to medium and add the 2 cups fresh pineapple cubes. Cook for 3-4 minutes, stirring occasionally, until the pineapple starts to soften and caramelize slightly around the edges. The natural sugars will begin to brown, creating a beautiful fond.
Add the minced 4 cloves garlic cloves and grated 1 tbsp fresh ginger, stirring constantly for 30 seconds until fragrant. Be careful not to let the garlic burn—it should turn just slightly golden. This aromatic base is the flavor foundation for your sauce.
Step 3: Create the Glaze and Thicken
Pour in the 0.25 cup soy sauce, 3 tbsp brown sugar, and 2 tbsp rice vinegar. Stir well to combine, scraping up any browned bits from the bottom of the pan. Add the 0.5 tsp red pepper flakes for a subtle kick. Bring to a gentle simmer and let cook for 2-3 minutes.
In a small bowl, mix the 1 tbsp cornstarch with 2 tbsp of water to create a slurry. Slowly whisk this into the simmering sauce. Cook for another 1-2 minutes until the sauce thickens enough to coat the back of a spoon. The transformation from thin liquid to glossy glaze is your visual cue.
Step 4: Finish and Garnish
Return the seared chicken thighs to the skillet, spooning the pineapple sauce over them to coat completely. Reduce heat to low and simmer for 3-4 minutes until the chicken is cooked through and the sauce has thickened further. The internal temperature should reach 165°F.
While the chicken finishes, cook the 1.5 cups long-grain white rice according to package instructions. Once done, transfer the chicken to a serving platter over the rice. Garnish with thinly sliced 3 whole green onions and sprinkle with 1 tsp sesame seeds for that final touch of color and nutty flavor.
Pro Tips For Making Pineapple Chicken Thigh
- Sear Chicken First: I learned this the hard way—browning the thighs in a hot pan for 3-4 minutes per side before adding the pineapple mixture guarantees a caramelized crust and locks in juices.
- Drain Pineapple Well: Sounds weird, but it works: pat the fresh pineapple chunks dry with a paper towel to prevent the sauce from becoming watery and diluting the brown sugar glaze.
- Skip the Overcrowding: After burning three batches, I finally figured out that cooking the chicken in a single layer (not piled up) ensures even browning and proper sauce reduction.
- Use the Fond: My grandmother swore by this, and she was right: deglaze the pan with a splash of rice vinegar after searing to scrape up all those browned bits—it adds serious depth to the sauce.
Dietary Considerations for This Dish
Gluten-Free Option
For a gluten-free version, simply swap the soy sauce for tamari—it has the same rich, umami flavor without the wheat. I always keep a bottle of San-J tamari in my pantry for this exact reason. The rest of the recipe remains unchanged. 💡
Lower Sugar Alternative
If you’re watching your sugar intake, reduce the brown sugar to 1 tbsp and add 1 tsp honey or maple syrup for natural sweetness. The pineapple already brings plenty of sweetness, so this adjustment keeps the dish balanced.
Dairy-Free Friendly
This dish is naturally dairy-free, as there are no butter, cheese, or cream components. The vegetable oil and pineapple provide all the richness needed. Just double-check your soy sauce or tamari to ensure no hidden dairy derivatives.
Protein Swap
For a lighter option, substitute the chicken thighs with boneless, skinless chicken breasts. Sear them for 4-5 minutes per side to prevent drying out. They’ll still soak up the pineapple glaze beautifully.
Vegetarian Adaptation
Skip the chicken entirely and use extra-firm tofu or tempeh instead. Press and cube the tofu, then sear until golden before adding the pineapple sauce. The tofu absorbs the flavors just like the chicken does. 🌱
Allergen Notes
This recipe contains soy (from the soy sauce) and corn (from the cornstarch). For soy allergies, use coconut aminos as a substitute. For corn allergies, thicken the sauce with arrowroot powder instead.
Nutrition Facts
Frequently Asked Questions
Can I use canned pineapple instead?
Fresh is best for texture and flavor, but canned works in a pinch. Use chunks in juice (not syrup) and pat them dry before adding. The result will be softer and slightly less vibrant in taste.
How do I prevent the sauce from thinning out?
What if my chicken isn’t crispy? Pat the thighs very dry before searing and don’t move them until they release easily from the pan. Also, ensure your oil is hot enough—it should shimmer at medium-high heat.
Can I make this ahead of time?
Yes! Prepare the dish up to 1 day ahead and refrigerate. Reheat gently on the stove with a splash of water to loosen the sauce. Avoid microwaving, as it can make the chicken rubbery.

- Jollof Rice Sauce Recipe: West African Tomato and Spice Infusion - September 25, 2026
- Japanese Rice Soup Recipe: Umami-Rich Comfort in a Bowl - September 25, 2026
- Homemade Cream Of Rice Recipe: Silk-Smooth Breakfast in Minutes - September 25, 2026