
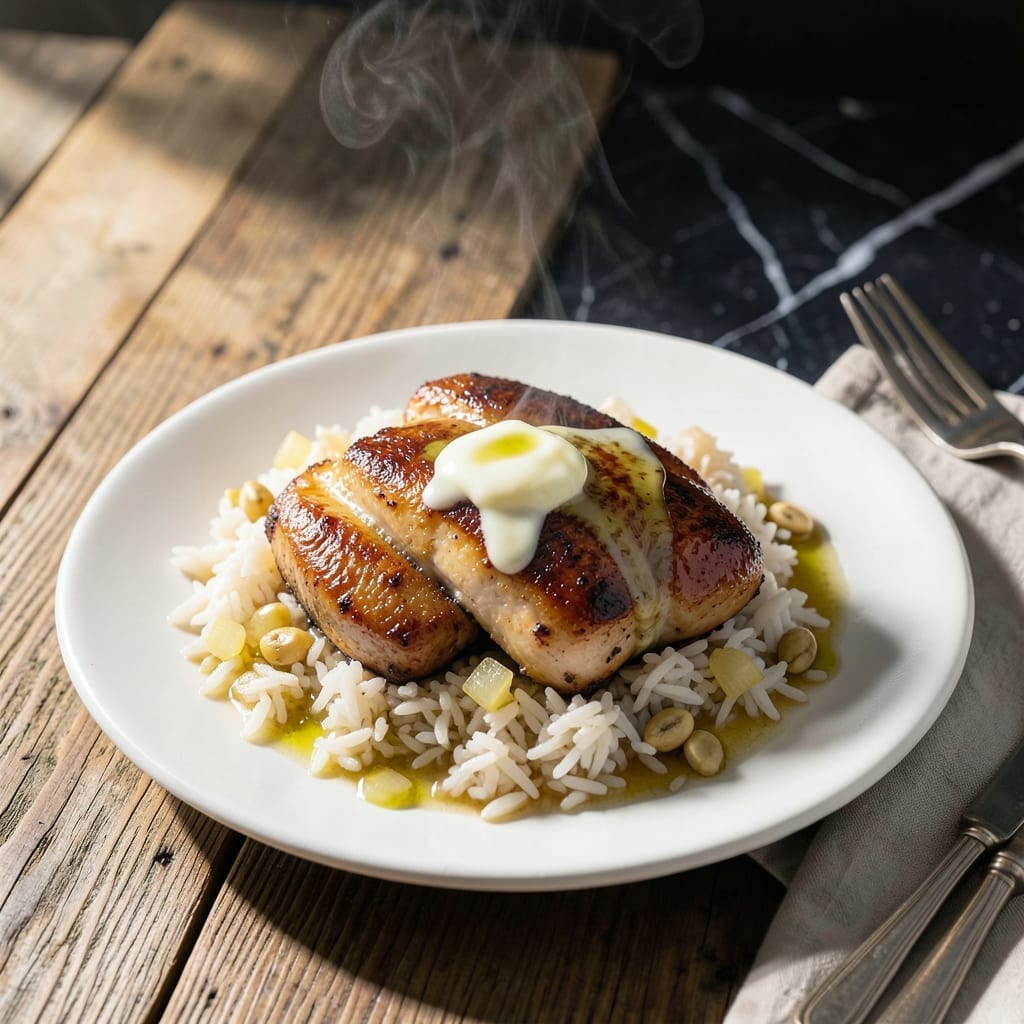
This pressure cooker recipe delivers weeknight comfort with minimal effort and maximum flavor. No babysitting the stove required—just set it and forget it until dinner is ready.
The beauty lies in its simplicity: chicken and rice cook together in one pot, absorbing flavors while the pressure cooker works its magic. The result is tender meat and perfectly cooked grains every time.
I’ve tested this method countless times, and it never fails to produce a hearty, satisfying meal. The hands-off approach means you can focus on other tasks while dinner practically makes itself.
Ideal for busy evenings when you crave comfort without the fuss. Let’s get started.
Ingredients for Power Pressure Cooker Xl Chicken and Rice
Simple ingredients, one pot, and your pressure cooker does the rest for this cozy meal.
| Ingredient | Amount | Notes |
|---|---|---|
| Boneless, Skinless Chicken Thighs 🍗 | 1 ½ lb | Trimmed of excess fat |
| Long-Grain White Rice 🍚 | 1 ½ cups | Uncooked, rinsed well |
| Chicken Broth 💧 | 2 ½ cups | Low-sodium preferred |
| Yellow Onion 🧅 | 1 whole | Medium, finely diced |
| Garlic Cloves 🧄 | 4 cloves | Minced for depth |
| Unsalted Butter 🧈 | 2 tbsp | Or substitute olive oil |
| Dried Thyme 🌿 | 1 tsp | Crushed between fingers |
| Dried Rosemary 🍃 | 1 tsp | Crushed for full flavor |
| Bay Leaf 🍂 | 1 whole | Removed before serving |
| Kosher Salt 🧂 | 1 tsp | Diamond Crystal preferred |
| Black Pepper 🌶️ | ½ tsp | Freshly ground for best flavor |
| Frozen Peas 🌱 | 1 cup | No need to thaw |
| Fresh Parsley 🌿 | ¼ cup | Chopped, for garnish |
The chicken thighs are key here—bone-in works too but takes a bit longer. I grab mine from Costco (great price, consistent quality) or the butcher counter at Whole Foods. For rice, long-grain white is ideal (jasmine or basmati both work). The broth? Better Than Bouillon paste mixed with water gives the richest flavor without the salt overload of canned.
No chicken thighs? Breasts work in a pinch but can dry out—reduce cook time by 3 minutes. Swap white rice for brown? Add 5 extra minutes under pressure. Out of fresh garlic? Garlic powder at one-quarter the amount (so 1 tsp here). Don’t skip the butter—it adds that rich finish. If using olive oil, go for a good extra-virgin (the good stuff, not the pre-shredded kind).
Leftovers keep beautifully—actually taste better the next day. Store in an airtight container for up to 4 days in the fridge or freeze for 3 months. The rice soaks up all the juices, so add a splash of broth when reheating.
Why You’ll Love This Recipe
- Set It and Forget: I toss in chicken, rice, broth, and aromatics, then the pressure cooker does all the work.
- Garlic-Infused Comfort: The onion and garlic melt into the broth, making every bite of rice and chicken ridiculously flavorful.
- Meal Prep Magic: This makes enough for 4 lunches—just reheat with a splash of water to keep it moist.
Step-by-Step Instructions for Chicken and Rice
Set it and forget it—this method delivers perfect results with minimal effort.
Step 1: Sauté Aromatics in the Pressure Cooker
Set your Power Pressure Cooker XL to the Sauté function. Melt the 2 tbsp unsalted butter and add the finely diced yellow onion. Cook for 3-4 minutes until the onion softens and turns translucent.
Add the 4 cloves minced garlic cloves, 1 tsp dried thyme, and 1 tsp dried rosemary. Stir for 30 seconds until fragrant—this builds the flavor base. Be careful not to burn the garlic; it should just start to turn light golden.
Step 2: Brown the Chicken Thighs
Add the 1.5 lb boneless, skinless chicken thighs to the pot, seasoning with 1 tsp kosher salt and 0.5 tsp black pepper. Sear for 2-3 minutes per side until the chicken develops a light golden crust.
This step isn’t just for color—it locks in juices and adds depth to the final dish. Don’t worry about cooking the chicken through; the pressure cooker will handle that. Remove the chicken temporarily and set it aside.
Step 3: Deglaze and Add Remaining Ingredients
Pour in ½ cup of the 2.5 cups chicken broth and scrape the bottom of the pot to release any browned bits. This deglazing step ensures nothing sticks and burns during pressure cooking.
Add the remaining 2 cups chicken broth, the 1.5 cups long-grain white rice, and the 1 whole bay leaf. Stir to combine, then return the chicken to the pot, nestling it into the rice mixture.
Step 4: Pressure Cook to Perfection
Secure the lid and set the valve to Sealing. Cook on High Pressure for 10 minutes. The cooker will take about 10-15 minutes to come to pressure before the timer starts.
Once the cooking cycle completes, let the pressure release naturally for 5 minutes, then quick-release any remaining pressure. Open the lid carefully, tilting it away from you to avoid steam.
Step 5: Finish with Peas and Garnish
Stir in the 1 cup frozen peas—they’ll heat through in just a minute or two thanks to the residual heat. The peas should be bright green and tender when ready.
Discard the bay leaf, then garnish with the 0.25 cup chopped fresh parsley. Let the dish sit for 5 minutes to allow the flavors to meld before serving. The rice should be tender, the chicken juicy, and the broth fully absorbed.
Pro Tips For Making Power Pressure Cooker Xl Chicken And Rice
- Sear the Chicken: I learned this the hard way—browning the thighs for 2-3 minutes per side in the pressure cooker before adding liquids locks in flavor and keeps them from turning rubbery.
- Rinse the Rice: Sounds tedious, but rinsing the long-grain white rice until the water runs clear removes excess starch and prevents a gummy texture in the final dish.
- Skip Overfilling: Resist the urge to exceed the 2/3 max fill line in your Power Pressure Cooker XL—this recipe expands, and overfilling risks clogging the valve or uneven cooking.
- Use Warm Broth: After burning a batch waiting for cold broth to pressurize, I now use hot chicken broth—it cuts 5-10 minutes off the total cook time and starts building flavor immediately.
Flavor Customization for This Recipe
Spice It Up
Add ½ tsp cayenne pepper or 1 tsp smoked paprika to the sautéed aromatics for a subtle kick. My family loves it when I toss in 1 diced jalapeño with the onion. These spices wake up the dish without overpowering the chicken and rice.
Herb Variations
Swap the dried herbs for 2 tbsp fresh thyme and rosemary if you have them in your garden. I often add 1 tsp poultry seasoning for a more complex flavor. Fresh herbs add brightness, while dried provide deeper, earthier notes.
Creamy Twist
Stir in ½ cup heavy cream or ½ cup coconut milk after pressure cooking for a richer finish. This turns the dish into a creamy one-pot meal. I often sprinkle ¼ cup grated Parmesan on top before serving for extra depth. 💛
Citrus Zing
Add 1 tbsp lemon zest and 2 tbsp lemon juice at the end for a fresh, bright flavor. The acidity cuts through the richness of the chicken and rice. I squeeze the lemon juice directly over the dish just before garnishing.
Vegetable Boost
Add 1 cup diced carrots or 1 cup chopped bell peppers with the onions for extra texture and nutrients. I love adding ½ cup corn kernels along with the peas for a pop of color and sweetness. 🥕
Umami Depth
Boost the savory notes with 1 tbsp soy sauce or 1 tbsp Worcestershire sauce stirred into the broth. A dash of fish sauce adds a subtle, complex depth that’s hard to place but impossible to resist. I always keep a bottle of Red Boat fish sauce in my pantry.
Nutrition Facts
Frequently Asked Questions
What if my chicken isn’t fully cooked after pressure cooking?
If the chicken isn’t done, simply reseal the lid and cook for an additional 3-5 minutes on High Pressure. Always check the internal temperature reaches 165°F for safety.
Can I use brown rice instead of white?
Yes, but increase the cook time to 22 minutes under pressure and use a 1:2 rice-to-liquid ratio. Brown rice needs more time and liquid to become tender.
Why did my rice turn out mushy?
Mushy rice usually means too much liquid or over-stirring. Stick to 1.5 cups rice and 2.5 cups broth, and avoid stirring after pressure cooking. Let it rest 5 minutes before serving.
Can I double this recipe?
Yes, but don’t exceed ⅔ full capacity in your pressure cooker. Double all ingredients except cooking time—it remains 10 minutes under pressure.

- Jollof Rice Sauce Recipe: West African Tomato and Spice Infusion - September 25, 2026
- Japanese Rice Soup Recipe: Umami-Rich Comfort in a Bowl - September 25, 2026
- Homemade Cream Of Rice Recipe: Silk-Smooth Breakfast in Minutes - September 25, 2026