
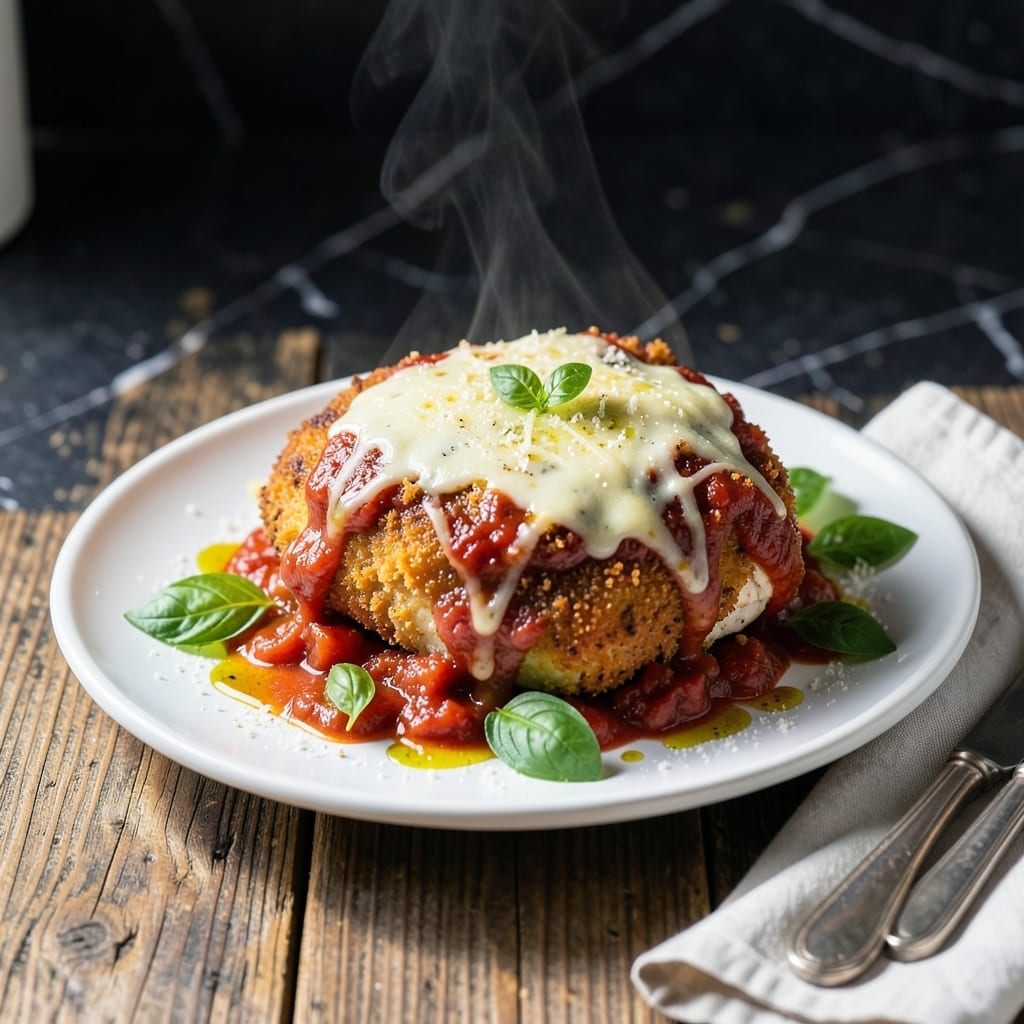
This recipe brings together crispy breaded chicken cutlets with a rich, slow-simmed tomato ragu for a dish that’s both comforting and impressive. The contrast between the tender chicken and the hearty sauce is what makes this meal special.
I’ve perfected the method to ensure the chicken stays juicy beneath its golden coating while the ragu develops deep, savory flavors. The key is layering the sauce and cheese just right to achieve that classic parmesan melt without soggy breading.
You’ll end up with a dish that looks and tastes restaurant-worthy, with every bite delivering the perfect balance of textures and flavors. The ragu adds a rustic touch that elevates this beyond traditional chicken parm.
Serve it with pasta or a side of garlic bread to soak up every last drop of sauce. Here’s how to make it.
Ingredients for Ragu Chicken Parm
Crispy cutlets meet rich ragu in this impressive yet approachable dish with familiar ingredients.
| Ingredient | Amount | Notes |
|---|---|---|
| Chicken Breast 🍗 | 1 ½ lb | Boneless, skinless, pounded to 1/2-inch thickness |
| All-Purpose Flour 🌾 | 1 cup | For dredging chicken |
| Large Eggs 🥚 | 2 whole | Beaten for breading |
| Italian Breadcrumbs 🍞 | 2 cups | Panko for extra crispiness |
| Parmesan Cheese 🧀 | 1 cup | Freshly grated from block |
| Olive Oil 🫒 | 1 cup | For frying chicken |
| Tomato Ragu 🍅 | 4 cups | Slow-simmed, hearty texture |
| Mozzarella Cheese 🧀 | 8 oz | Fresh mozzarella, sliced |
| Garlic Cloves 🧄 | 4 cloves | Minced for sauce |
| Yellow Onion 🧅 | 1 whole | Finely diced for ragu |
| San Marzano Tomatoes 🍅 | 1 can | 28 oz, crushed for ragu |
| Fresh Basil Leaves 🌿 | ¼ cup | Chopped, for garnish |
| Salt 🧂 | 1 ½ tsp | Divided for seasoning |
| Black Pepper 🌶️ | ½ tsp | Freshly ground preferred |
| Red Pepper Flakes 🌶️ | ½ tsp | Optional for heat |
The chicken quality is critical here. Boneless, skinless breasts from Whole Foods or Costco ensure even cooking—avoid pre-cut tenders as they dry out. Pound them to an even thickness (about 1/2-inch) for consistent crispiness. For the ragu, San Marzano tomatoes from Eataly or a well-stocked supermarket deliver the authentic flavor. Fresh Parmesan from the deli counter melts better than pre-grated.
No San Marzano tomatoes? Any good-quality canned crushed tomatoes work—just avoid the generic brands. For a quicker version, store-bought ragu (look for Rao’s or Victoria) can substitute, but simmer it down to thicken. Skip the Panko? Regular breadcrumbs work, though they won’t be as crispy. Vegetable oil can replace olive oil for frying if needed (don’t use butter—it’ll burn).
The breaded chicken is best eaten fresh, but the ragu keeps for 5 days in the fridge or 3 months frozen. Leftovers? Reheat the sauce gently and crisp the chicken in the oven. Fresh basil wilts quickly—store stems in water like flowers for up to 1 week.
Why You’ll Love This Recipe
- I’ll be real: the leftovers taste even better the next day, and one batch easily feeds my family of four with seconds.
- One Pan Wonder: I love that everything comes together in a single skillet—crispy breaded chicken, rich ragu, and that melty parmesan topping all in one place.
- Crispy Meets Saucy: That contrast of the golden breadcrumb crust with the tangy tomato ragu and sharp parmesan? I make it just for that first bite.
- Weeknight Hero: Between us, this is my Tuesday night MVP—ready before the kids start asking if dinner’s almost done.
Step-by-Step Instructions for Ragu Chicken Parm
This method ensures crispy breaded chicken topped with rich tomato sauce and melted cheese.
Step 1: Bread and Fry the Chicken Breast
Set up a breading station with three shallow dishes. Place the 1 cup All-Purpose Flour in the first, beat the 2 whole Large Eggs in the second, and mix the 2 cups Italian Breadcrumbs with 1 cup Parmesan Cheese in the third.
Dredge each piece of 1.5 lb Chicken Breast in flour, shaking off excess, then dip in egg, letting excess drip off. Coat thoroughly in breadcrumb mixture, pressing gently to adhere. Heat 1 cup Olive Oil in a large skillet over medium-high heat until shimmering.
Fry chicken for 4-5 minutes per side until golden brown and crispy. The oil should sizzle but not smoke violently. Drain on a wire rack to maintain crispiness while you prepare the sauce.
Step 2: Prepare the Tomato Ragu Base
In a separate saucepan, heat 1 tablespoon of the Olive Oil over medium heat. Add the finely diced 1 whole Yellow Onion and cook for 5-6 minutes until translucent and soft.
Add the minced 4 cloves Garlic Cloves and cook for 30 seconds until fragrant. Stir in the 1 can San Marzano Tomatoes and 0.5 tsp Red Pepper Flakes, then simmer for 10 minutes.
Season with 1 tsp Salt and 0.5 tsp Black Pepper. Combine this with the 4 cups Tomato Ragu and let it warm through on low heat.
Step 3: Assemble and Bake the Dish
Preheat your oven to 375°F. Place the crispy chicken in a baking dish and ladle the warm ragu over each piece. Top each with slices of 8 oz Mozzarella Cheese, dividing evenly.
Bake for 15-20 minutes until the cheese is fully melted and bubbly with golden spots. The ragu should be hot and the chicken should still retain its crispness underneath the sauce.
Remove from the oven and let rest for 5 minutes before serving. This allows the cheese to set slightly for cleaner serving.
Step 4: Garnish and Serve
Sprinkle with the chopped 0.25 cup Fresh Basil Leaves and any remaining 0.5 tsp Salt. The basil should wilt slightly from the heat of the dish, releasing its aroma.
Serve immediately while the chicken is still crispy underneath the sauce. Each portion should have a generous amount of ragu and melted cheese, with visible golden breading peeking through.
Pro Tips For Making Ragu Chicken Parm
- Pound the Chicken: Use a meat mallet to pound the chicken breasts to an even 1/2-inch thickness. I learned this the hard way—uneven pieces cook inconsistently, leaving you with dry edges and undercooked centers.
- Grate Fresh Parmesan: Skip the pre-grated stuff and use a block of Parmesan you grate yourself. The pre-shredded version has anti-caking agents that make it melt poorly, and the difference in flavor is non-negotiable.
- Double Dredge for Crisp: After the initial flour-egg-breadcrumb coat, dip the chicken back in the egg and breadcrumbs once more. Sounds tedious, but it creates that extra-crispy crust that holds up to the ragu without turning soggy.
- Rest Before Saucing: Let the fried chicken rest on a wire rack for 5 minutes before adding the ragu. This keeps the coating from sliding off when you smother it in sauce—I used to skip this and wondered why my parm looked like a sad, naked cutlet.
Serving Suggestions for This Recipe
Plating Perfection
Serve each piece of chicken on a shallow, wide plate to showcase the golden breading peeking through the bubbling cheese. I like using white ceramic plates for contrast. Spoon extra ragu around the base, creating a rustic pool for the chicken to rest in.
Pasta Pairing
Toss 8 oz of spaghetti or pappardelle with a light coating of olive oil and a ladle of ragu. The pasta acts as a bed for the chicken, soaking up flavors beautifully. Use De Cecco or Barilla for authentic texture.
Garlic Bread Side
A slice of garlic bread is perfect for mopping up leftover sauce. I make mine with a baguette from a local bakery, brushed with garlic butter and toasted until golden. It adds a satisfying crunch to the meal.
Fresh Salad Balance
A simple arugula salad with lemon vinaigrette cuts through the richness. Toss 4 cups baby arugula with 2 tbsp olive oil, 1 tbsp lemon juice, and shaved Parmesan. The peppery greens refresh your palate. 🥗
Wine Pairing
A medium-bodied Chianti or Sangiovese complements the acidity of the ragu. The tannins in the wine balance the richness of the dish. Serve slightly chilled to enhance the pairing. 🍷
Family-Style Serving
For gatherings, arrange the chicken on a large platter with the ragu in a separate bowl. Let everyone assemble their own plates. This keeps the breading crisp and allows customization. I love watching guests build their perfect bite.
Nutrition Facts
Frequently Asked Questions
Can I use pre-made ragu for this?
Yes! Use 2 jars (24 oz each) of high-quality ragu like Rao’s. Simmer it for 10-15 minutes to thicken before assembling. This saves time while keeping great flavor.
How do I keep the breading crispy?
Fry until deep golden brown and drain on a wire rack, not paper towels. Bake the assembled dish for only 15-20 minutes at 375°F to prevent sogginess.
What if my chicken is too thick?
Pound breasts to an even 1/2-inch thickness between plastic wrap. This ensures even cooking and crispy breading. Use a meat mallet or rolling pin.
Can I make this ahead of time?
Prepare the ragu and bread the chicken up to 1 day ahead. Store separately in the fridge. Fry and assemble just before baking to maintain texture.

- Jollof Rice Sauce Recipe: West African Tomato and Spice Infusion - September 25, 2026
- Japanese Rice Soup Recipe: Umami-Rich Comfort in a Bowl - September 25, 2026
- Homemade Cream Of Rice Recipe: Silk-Smooth Breakfast in Minutes - September 25, 2026