
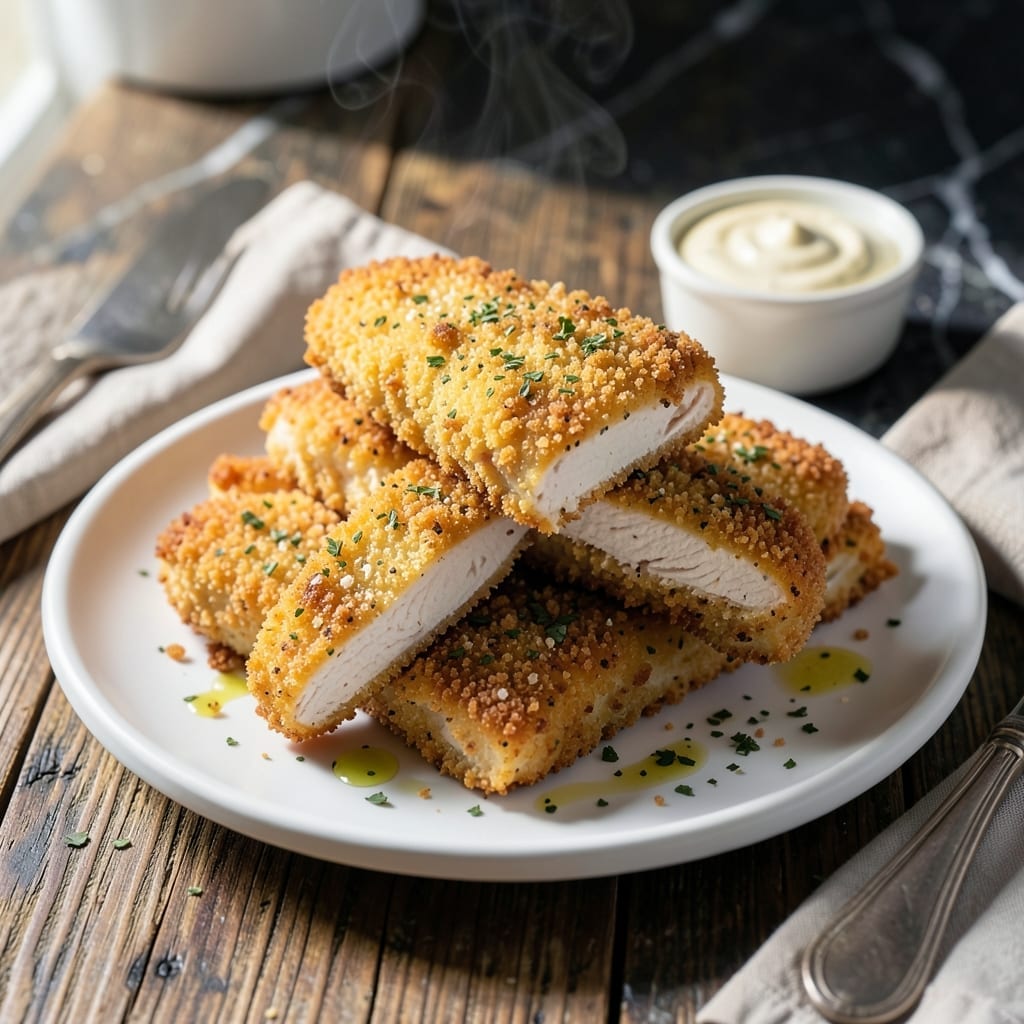
This recipe delivers crispy chicken fingers with a herb-infused coating that stays golden and flavorful. The secret lies in a well-seasoned breading and proper frying technique.
I developed this method to ensure every bite has that perfect crunch without being greasy. The ranch seasoning blends seamlessly into the coating, creating a uniform flavor in every piece.
What you get is tender chicken inside with a crispy exterior that holds up to dipping. The herbs in the ranch seasoning add depth that store-bought versions can’t match.
Serve with your favorite dipping sauce for a meal that satisfies every time. This technique works for both baking and frying methods.
Ingredients for Ranch Chicken Fingers
Pantry staples and fresh chicken come together for that perfect crispy, herb-infused crunch everyone loves.
| Ingredient | Amount | Notes |
|---|---|---|
| Chicken Breast 🍗 | 1 ½ lb | Boneless, skinless, cut into strips |
| All-Purpose Flour 🌾 | 1 cup | For initial dredging |
| Large Eggs 🥚 | 2 whole | Beaten for egg wash |
| Ranch Seasoning 🌿 | 2 tbsp | Store-bought or homemade blend |
| Panko Breadcrumbs 🍞 | 2 cups | For extra crispy coating |
| Dried Parsley 🍃 | 1 tsp | For herb infusion |
| Dried Dill 🌿 | 1 tsp | Complements ranch flavor |
| Garlic Powder 🧄 | 1 tsp | Enhances savory depth |
| Onion Powder 🧅 | 1 tsp | Balances herb profile |
| Salt 🧂 | 1 tsp | Kosher or sea salt preferred |
| Black Pepper 🌶️ | ½ tsp | Freshly ground recommended |
| Vegetable Oil 🫒 | 2 cups | For frying to golden crisp |
| Buttermilk 🥛 | ½ cup | For tenderizing chicken |
The chicken quality matters most here. Boneless, skinless breasts give the best texture—avoid pre-cut tenders as they dry out faster. Costco or Whole Foods have reliable options. For the breading, Panko is non-negotiable for that restaurant-style crunch (regular breadcrumbs just won’t cut it). The ranch seasoning should be fresh—check the expiration date, as old spices lose potency fast.
No buttermilk? Milk with a tablespoon of lemon juice or vinegar works in a pinch. Short on Panko? Crushed cornflakes or Ritz crackers add a similar crunch. The dried herbs can be swapped for fresh at triple the amount—just chop finely. For a gluten-free version, cornstarch instead of flour and gluten-free Panko keep the crisp intact.
Fry in batches to avoid crowding—keeps the oil hot and the coating crisp. Leftovers hold up well in the fridge for 3-4 days (reheat in the oven at 375°F). Freeze uncooked breaded strips on a tray first, then bag for up to 2 months.
Why You’ll Love This Recipe
- Minimal Effort: I just dip, coat, and bake—no fancy steps, just panko and ranch seasoning doing all the work.
- Ridiculously Good: That crispy panko crust with the zesty ranch kick? Honestly, I’ll eat them straight off the tray.
- Kid-Approved Meal: My picky niece devours these, and I’ve served them at game nights without a single leftover.
- Budget Stretch: One pound of chicken breast makes plenty, and the pantry staples keep costs low.
Step-by-Step Instructions for Ranch Chicken Fingers
This method ensures a perfectly crispy coating with herb-infused flavor in every bite.
Step 1: Prepare and Season the Chicken
Cut the 1.5 lb chicken breast into 1-inch thick strips of even size. This ensures uniform cooking and prevents smaller pieces from overcooking while waiting for larger ones to finish.
Pat the chicken strips completely dry with paper towels. Moisture is the enemy of crispiness. Season both sides lightly with 1 tsp salt and 0.5 tsp black pepper to enhance the natural flavor of the chicken before breading.
Step 2: Set Up the Breading Stations
Create a breading assembly line with three shallow dishes. In the first dish, combine the 1 cup all-purpose flour, 2 tbsp ranch seasoning, 1 tsp dried parsley, 1 tsp dried dill, 1 tsp garlic powder, and 1 tsp onion powder. Mix thoroughly to distribute the spices evenly.
In the second dish, beat the 2 whole large eggs with the 0.5 cup buttermilk until fully combined. This egg wash helps the coating adhere and adds tenderness. Place the 2 cups panko breadcrumbs in the third dish, keeping them separate until ready to use.
Step 3: Dredge and Coat the Chicken
Working with one piece at a time, dredge each chicken strip in the flour mixture, pressing gently to ensure full coverage. Shake off any excess flour—too much will create a gummy texture rather than a crispy one.
Dip the floured chicken into the egg wash, allowing any excess to drip off. Then press the strip into the panko breadcrumbs, turning to coat all sides completely. The panko’s coarse texture creates extra crispiness. Place the breaded strips on a wire rack set over a baking sheet.
Step 4: Fry to Golden Perfection
Heat the 2 cups vegetable oil in a large, heavy-bottomed skillet over medium-high heat to 350°F. Use a deep-fry thermometer to monitor the temperature—maintaining consistent heat is crucial for even cooking and preventing greasy results.
Fry the chicken strips in batches to avoid crowding the pan, which would lower the oil temperature. Cook for 3-4 minutes per side until golden brown and the internal temperature reaches 165°F. The coating should be deeply crispy and the chicken fully cooked through with no pink remaining.
Transfer the cooked strips to a paper towel-lined plate to drain excess oil while you finish frying the remaining batches.
Pro Tips For Making Ranch Chicken Fingers
- Pound Even Thickness: Use a meat mallet to pound the chicken breast to 1/2-inch thickness—this guarantees even cooking and prevents dry, overdone edges.
- Double Dip Coating: For extra crunch, dip the chicken in flour, egg, then panko, and repeat the egg and panko layers; the ranch seasoning sticks better this way.
- Skip Cold Chicken: Let the chicken sit at room temperature for 15 minutes before cooking—I learned this the hard way after my first batch came out dry.
- Use Fresh Panko: Swap stale panko for fresh; it crisps up better and gives that golden, airy texture ranch chicken fingers need.
Common Mistakes When Making Perfect Results
Uneven Strip Sizes
Cutting chicken into inconsistent sizes leads to uneven cooking. I always slice my 1.5 lb chicken breast into uniform 1-inch thick strips. Thinner pieces overcook while thicker ones stay raw inside. Use a ruler if needed—precision matters. 🌡️
Skipping the Drying Step
Moisture on chicken prevents the coating from adhering properly. After cutting, I pat each strip completely dry with paper towels. This small step makes the difference between a crispy crust and a soggy one.
Overcrowding the Pan
Frying too many strips at once lowers the oil temperature. I cook in batches with at least 1 inch of space between pieces. This maintains 350°F heat, ensuring even browning without greasiness.
Ignoring Oil Temperature
Oil that’s too cool creates greasy chicken, while too hot burns the coating. I use a thermometer to maintain 350°F throughout. A ThermoWorks instant-read thermometer is my go-to for accuracy.
Rushing the Rest
Let fried strips drain on a wire rack for 2-3 minutes before serving. This allows excess oil to drip off while keeping the coating crisp. Skipping this step results in soggy bottoms. 💪
Using Wrong Flour
All-purpose flour works best for the initial dredge. I avoid cake flour (too soft) or bread flour (too dense). The 1 cup all-purpose flour creates the perfect base for the ranch seasoning to cling to.
Nutrition Facts
Frequently Asked Questions
Can I bake these instead of frying?
Bake at 400°F for 15-20 minutes, flipping halfway. For extra crispiness, spray or brush the strips with oil before baking.
What’s the best way to reheat leftovers?
Reheat in a 375°F oven for 8-10 minutes to restore crispiness. Avoid microwaving, as it makes the coating soggy.
Can I use regular breadcrumbs instead of panko?
You can, but panko gives the best crunch. If substituting, add 1/4 cup crushed cornflakes to regular breadcrumbs for extra texture.
How do I keep the coating from falling off?
Pat the chicken completely dry before breading, and let the egg wash drip off slightly before adding panko. Press the crumbs firmly onto the chicken.

- Jollof Rice Sauce Recipe: West African Tomato and Spice Infusion - September 25, 2026
- Japanese Rice Soup Recipe: Umami-Rich Comfort in a Bowl - September 25, 2026
- Homemade Cream Of Rice Recipe: Silk-Smooth Breakfast in Minutes - September 25, 2026