
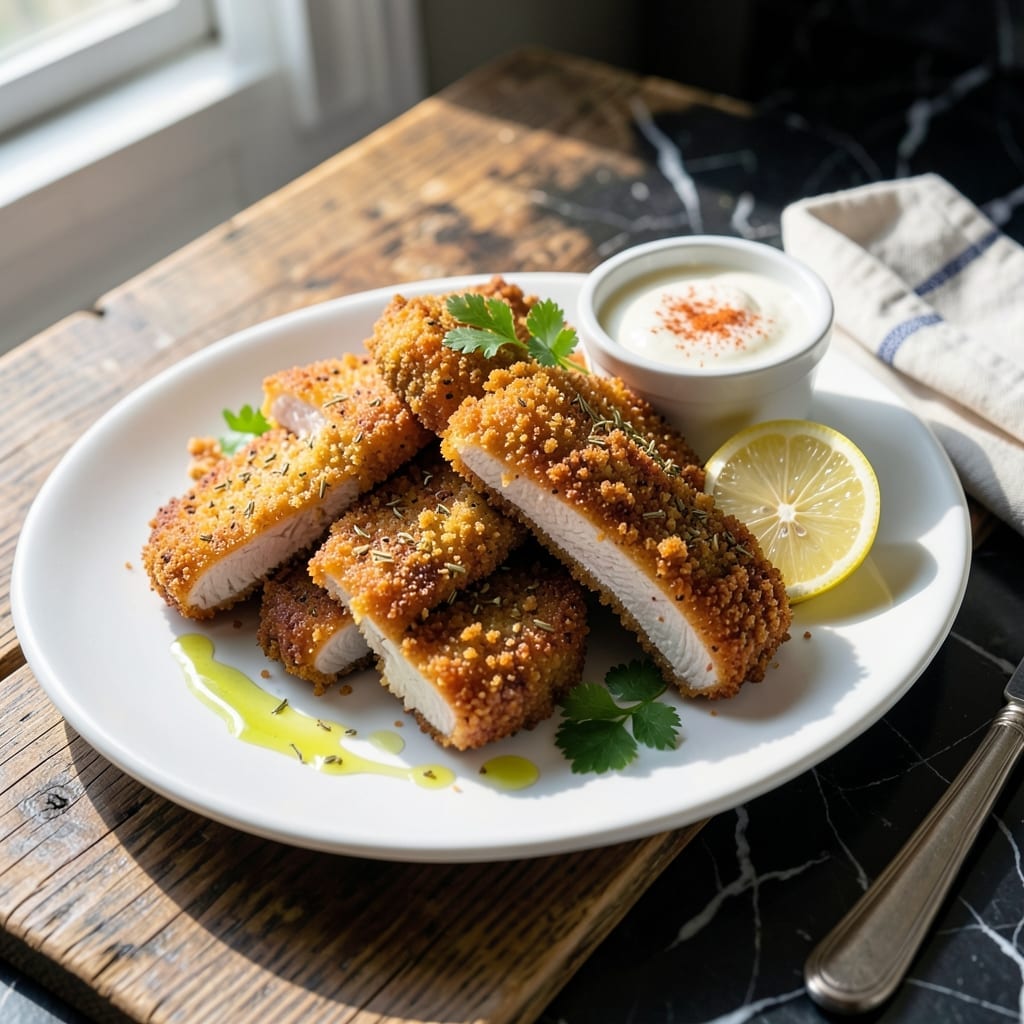
This recipe delivers crispy chicken with a tender center every time, using a technique I perfected in my tiny Boston kitchen. The secret lies in a double-coating method that locks in juices while creating an irresistible crunch.
Each strip emerges golden brown with herb-infused flavor that shines through the crispy exterior. I use a precise temperature and timing method to ensure the chicken stays moist, never dry. The result is restaurant-quality at home.
These strips work for weeknight dinners or party platters. Serve with your favorite dipping sauces for a meal that satisfies every craving.
No special equipment needed—just a skillet and basic ingredients. The method is straightforward but yields impressive results.
Ingredients for Recipe for Chicken Tenderloin Strips
Transform simple chicken tenderloins into crispy, herb-infused strips with this straightforward method.
| Ingredient | Amount | Notes |
|---|---|---|
| Chicken Tenderloins 🍗 | 1 ½ lb | Boneless, skinless, patted dry |
| All-Purpose Flour 🌾 | 1 cup | For initial dredging |
| Large Eggs 🥚 | 2 whole | Beaten for egg wash |
| Panko Breadcrumbs 🍞 | 1 ½ cups | For crispy coating |
| Dried Oregano 🍃 | 1 tsp | For herb-infused flavor |
| Dried Thyme 🍃 | 1 tsp | For herb-infused flavor |
| Garlic Powder 🧄 | 1 tsp | For depth of flavor |
| Paprika 🌶️ | 1 tsp | Smoked or sweet variety |
| Salt 🧂 | 1 tsp | Kosher or sea salt preferred |
| Black Pepper 🌶️ | ½ tsp | Freshly ground preferred |
| Vegetable Oil 🫒 | 1 cup | For frying, high smoke point |
| Buttermilk 🥛 | ½ cup | For tenderizing chicken |
The chicken tenderloins are the foundation—opt for fresh, high-quality cuts from a trusted butcher or Whole Foods. Uniform size ensures even cooking, so trim any uneven pieces. For the breading, Panko breadcrumbs create that signature crunch, and I recommend Kikkoman for consistent texture (available at most supermarkets). The buttermilk is non-negotiable for moisture; low-fat works in a pinch.
No buttermilk? Whole milk with a tablespoon of vinegar (let sit 5 minutes) does the trick. Swap Panko for regular breadcrumbs at a 1:1 ratio, though the texture won’t be as crisp. Fresh herbs can replace dried—use triple the amount and finely chop. For gluten-free, cornstarch and crushed cornflakes make a stellar substitute for the flour and breadcrumbs.
Prep the chicken just before cooking to keep it tender. Leftovers hold up well—store in an airtight container for up to 3 days in the fridge. Reheat in a toaster oven or air fryer to revive the crispiness. Freezing isn’t ideal, but cooked strips can be frozen for 1 month if necessary.
Why You’ll Love This Recipe
- Ready in 20: I can coat, bake, and serve these faster than deciding what to order in.
- Crispy Perfection: That panko crust with oregano gives every bite a satisfying crunch and herby warmth.
- Kid-Approved Staple: My picky nephew devours them, and I’ve served them at game nights and lunchboxes alike.
- Budget Hero: Chicken tenderloins stretch further than whole breasts, and panko is cheap in bulk.
Step-by-Step Instructions for Chicken Tenderloin Strips
Master the technique for perfect texture—crispy outside, herb-infused and juicy inside every time.
Step 1: Prepare and Tenderize the Chicken
Pat the 1.5 lb Chicken Tenderloins completely dry with paper towels. I cannot overstate how crucial this step is—any moisture will prevent the coating from adhering properly and compromise the crispiness.
Place the tenders in a bowl and pour the 0.5 cup Buttermilk over them. The buttermilk’s acidity tenderizes the meat while adding subtle richness. Let them soak for 15-20 minutes at room temperature. You’ll notice the chicken plumps slightly as it absorbs the liquid.
Step 2: Set Up the Breading Station
In a shallow dish, combine the 1 cup All-Purpose Flour, 1 tsp Salt, 0.5 tsp Black Pepper, 1 tsp Garlic Powder, 1 tsp Paprika, 1 tsp Dried Oregano, and 1 tsp Dried Thyme. The spices create a fragrant, herb-forward base that infuses every bite.
In a second dish, beat the 2 whole Large Eggs until uniform. In a third dish, spread the 1.5 cups Panko Breadcrumbs. Panko’s coarse texture ensures a shatteringly crisp crust that holds up better than traditional breadcrumbs.
Step 3: Bread the Chicken with Precision
Working with one piece at a time, remove a tender from the buttermilk and let the excess drip off. Dredge it thoroughly in the flour mixture, pressing gently to adhere. Shake off any excess—you want a thin, even layer, not a thick paste.
Next, dip the floured tender into the beaten eggs, ensuring full coverage. Finally, roll it in the panko, pressing firmly so the crumbs stick. Place the breaded tenders on a wire rack set over a baking sheet. This setup allows air circulation, preventing soggy spots. Let them rest for 5 minutes to set the coating.
Step 4: Fry to Golden Perfection
Heat the 1 cup Vegetable Oil in a large, heavy skillet over medium-high heat until it reaches 350-375°F. To test readiness, drop in a pinch of panko—if it sizzles and floats immediately, the oil is ready.
Fry the tenders in batches to avoid crowding, which lowers the oil temperature and leads to greasy results. Cook for 3-4 minutes per side until the coating is deep golden brown and the internal temperature reaches 165°F. The panko should audibly sizzle as it crisps. Transfer to a clean wire rack to drain excess oil.
Pro Tips For Making Recipe For Chicken Tenderloin Strips
- Pound the Tenderloins: Use a meat mallet or rolling pin to gently flatten the tenderloins to an even ½-inch thickness—I learned this the hard way after too many chewy, undercooked centers.
- Double Dredge for Crunch: Dip each piece in flour, then egg, then panko, and repeat the egg and panko once more. Sounds tedious, but it actually changes the outcome with that extra crunch.
- Skip the Overcrowding: Fry in batches with at least an inch between pieces, or the temperature drops and you’ll end up with soggy, steamed strips instead of crispy ones.
- Warm the Oil First: Heat about ½ inch of oil in the pan until shimmering—test with a pinch of panko; if it sizzles immediately, it’s ready. After burning three batches, I finally figured out timing is everything here.
Make-Ahead Tips for This Recipe
Prep Ahead Strategy
I always prep the chicken and breading station the night before. Pat the 1.5 lb Chicken Tenderloins dry, then soak in 0.5 cup Buttermilk in the fridge. Store the flour, egg wash, and panko mixtures in sealed containers at room temperature. This cuts morning prep to 10 minutes. 💡
Breading in Advance
You can fully bread the tenders up to 4 hours ahead. Arrange them on a wire rack, cover loosely with plastic wrap, and refrigerate. Bring them to room temperature for 15 minutes before frying to ensure even cooking and prevent soggy coating.
Freezing Uncooked
For longer storage, bread the tenders and freeze on a baking sheet for 1 hour, then transfer to a zip-top bag. They’ll keep for 1 month. Fry from frozen, adding 1-2 minutes per side to the cook time. No thawing needed!
Cooked Strip Storage
Cooked strips stay fresh in the fridge for 3 days in an airtight container. To revive, spread on a baking sheet and warm at 375°F for 8-10 minutes. This restores the crispiness better than microwaving. ❄️
Party Platter Prep
For gatherings, fry the strips 1 hour ahead and keep warm on a wire rack in a 200°F oven. This maintains their crunch without overcooking. Serve with dipping sauces on the side to avoid sogginess.
Buttermilk Shortcut
If you forget to soak the chicken overnight, a quick 20-minute buttermilk bath at room temperature still tenderizes effectively. I’ve tested this in my tiny Boston kitchen—it works in a pinch!
Nutrition Facts
Frequently Asked Questions
What if I don’t have buttermilk?
Mix 0.5 cup milk with 1.5 tsp vinegar or lemon juice. Let it sit for 5 minutes to thicken before using. This works just as well for tenderizing the chicken.
Can I bake these instead of frying?
Yes! Place breaded strips on a wire rack over a baking sheet. Bake at 400°F for 15-20 minutes, flipping halfway. They won’t be as crispy but will still be delicious.
Why did my coating fall off?
This usually happens if the chicken isn’t dry before breading or if the oil isn’t hot enough. Pat the chicken thoroughly and ensure oil reaches 350-375°F before frying.
How do I know when they’re done?
Use a meat thermometer to check for 165°F internally. The coating should be deep golden brown and the juices should run clear.

- Jollof Rice Sauce Recipe: West African Tomato and Spice Infusion - September 25, 2026
- Japanese Rice Soup Recipe: Umami-Rich Comfort in a Bowl - September 25, 2026
- Homemade Cream Of Rice Recipe: Silk-Smooth Breakfast in Minutes - September 25, 2026