
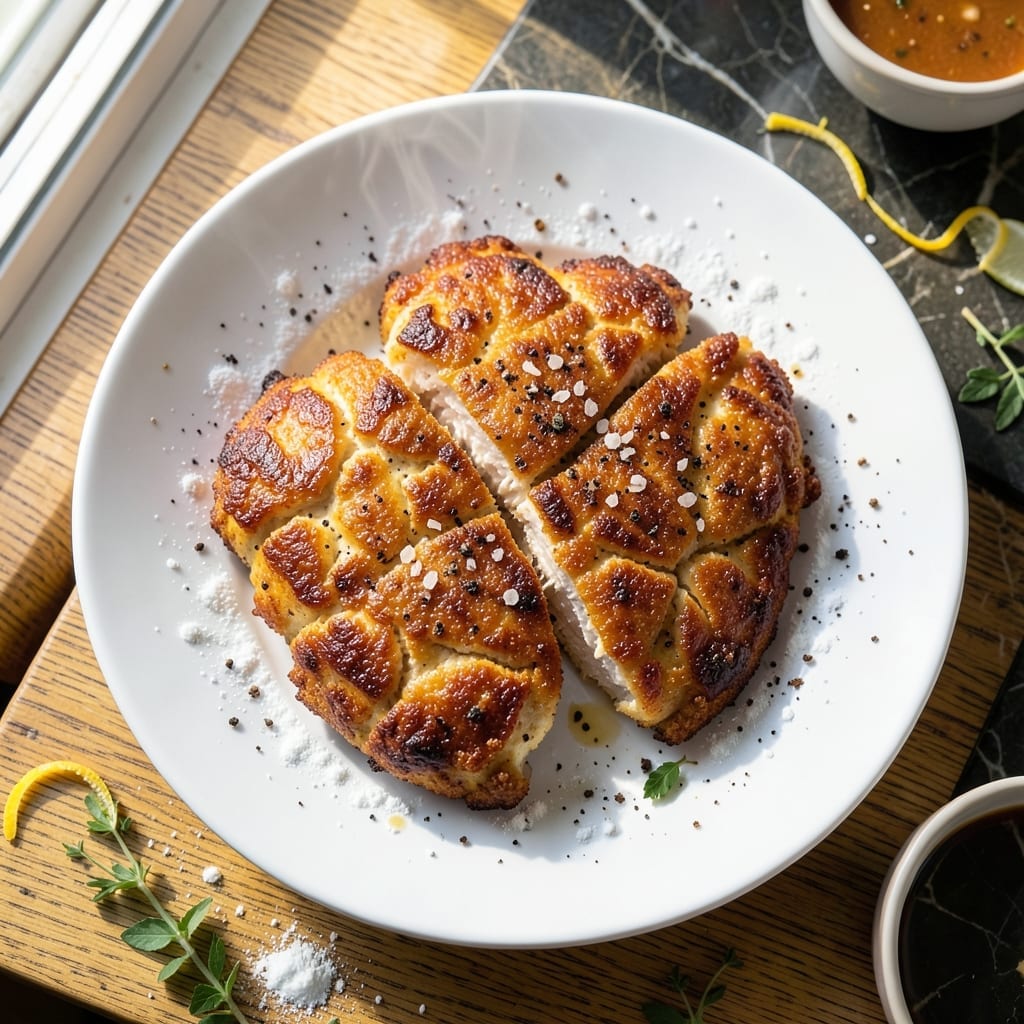
There’s a real art to achieving juicy fried chicken that stays tender inside while developing a golden crust. This method relies on a simple but precise technique that ensures every bite delivers on both texture and flavor.
The key is maintaining the right oil temperature and avoiding overcrowding the pan, which prevents the chicken from steaming. A quick brine before coating adds moisture, while a well-seasoned flour mixture guarantees a crisp, flavorful exterior.
What results is perfectly cooked chicken with a shatteringly crisp crust and a center that stays succulent. The contrast between the crunch and the tenderness is what makes this dish so satisfying.
Serve it hot with your favorite sides for a meal that feels indulgent yet straightforward to prepare.
Ingredients for Recipe for Fried Boneless Chicken Breast
Pantry staples plus a quick brine deliver juicy, crispy chicken every time.
| Ingredient | Amount | Notes |
|---|---|---|
| Boneless, Skinless Chicken Breasts 🍗 | 1 ½ lb | Pounded to even thickness |
| Buttermilk 🥛 | 1 ½ cups | For brining chicken |
| All-Purpose Flour 🌾 | 2 cups | Divided for dredging |
| Cornstarch 🌾 | ½ cup | For extra crispiness |
| Kosher Salt 🧂 | 2 tsp | Diamond Crystal preferred |
| Black Pepper 🌶️ | 1 tsp | Freshly ground |
| Garlic Powder 🧄 | 1 tsp | Not garlic salt |
| Onion Powder 🧅 | 1 tsp | For depth of flavor |
| Paprika 🌶️ | 1 tsp | Sweet or smoked variety |
| Cayenne Pepper 🔥 | ¼ tsp | Adjust for heat preference |
| Vegetable Oil 🫒 | 4 cups | For frying, high smoke point |
| Large Eggs 🥚 | 2 whole | Beaten for binding |
The chicken quality is non-negotiable. Boneless, skinless breasts should be uniform in thickness—pound them yourself if needed. Buttermilk is the brine base; Full-fat ensures maximum tenderizing. For flour, White Lily or King Arthur brands yield the lightest crust. The oil must hit 350°F before adding chicken to prevent greasiness.
No buttermilk? Mix 1.5 cups milk with 1.5 tbsp vinegar and let sit 5 minutes. Swap cornstarch for arrowroot powder at equal amounts. Out of paprika? Smoked paprika adds depth, or use half the amount of chili powder. For oil, peanut oil offers a higher smoke point if you’re frying in batches.
Fry in small batches to maintain oil temperature. Drain on a wire rack (not paper towels) to keep it crisp. Leftovers hold for 3-4 days refrigerated, but reheat in the oven—never the microwave—to preserve texture.
Why You’ll Love This Recipe
- One Bowl Wonder: I mix the buttermilk, flour, and cornstarch right in the same bowl—no extra dishes to wash.
- Crispy Outside, Juicy Inside: The cornstarch in the coating gives it that perfect crunch, while the buttermilk keeps the chicken tender.
- Meal Prep Magic: I fry a big batch on Sunday and we’re set for sandwiches, salads, or quick dinners all week.
- Budget Stretcher: Boneless chicken breasts go a long way, and the pantry staples mean I’m not buying anything fancy.
Step-by-Step Instructions for Fried Boneless Chicken Breast
Master these steps for a perfectly crisp exterior and moist interior every time.
Step 1: Brine the Chicken in Buttermilk
Begin by pounding the 1.5 lb boneless, skinless chicken breasts to an even ½-inch thickness using a meat mallet. This ensures uniform cooking and prevents dry spots. Place the pounded chicken in a shallow dish and pour over the 1.5 cups buttermilk.
Cover and refrigerate for at least 4 hours, or ideally overnight. The buttermilk tenderizes the meat while adding subtle tang, which balances the richness of the fried coating. Don’t skip this step—it’s the secret to that promised juiciness.
Step 2: Prepare the Dredging Station
In a large bowl, whisk together the 2 cups all-purpose flour, 0.5 cup cornstarch, 2 tsp kosher salt, 1 tsp black pepper, 1 tsp garlic powder, 1 tsp onion powder, 1 tsp paprika, and 0.25 tsp cayenne pepper. The cornstarch is key—it creates an ultra-crispy crust that stays shatteringly crisp.
In a separate bowl, beat the 2 whole large eggs until frothy. Set up your dredging station with the flour mixture, egg wash, and a clean plate for the coated chicken. This two-stage process ensures maximum adhesion and even coverage.
Step 3: Bread and Rest the Chicken
Remove the chicken from the buttermilk, letting excess drip off. Dredge each piece in the flour mixture, pressing firmly to adhere. Shake off any excess, then dip in the beaten eggs, allowing any thick globs to drip back into the bowl. Finally, return to the flour mixture for a second coating.
Place the breaded chicken on the clean plate and let it rest for 10-15 minutes. This resting period allows the coating to hydrate and adhere properly, preventing it from falling off during frying. The pieces should look dry to the touch when ready.
Step 4: Fry to Golden Perfection
In a deep, heavy-bottomed skillet or Dutch oven, heat the 4 cups vegetable oil to 350°F. Use a deep-fry thermometer for accuracy—oil temperature is critical. When the oil reaches temperature, carefully lower in 2-3 pieces of chicken, being careful not to overcrowd the pan.
Fry for 6-8 minutes per side until the coating is deep golden brown and the internal temperature reaches 165°F. The oil should bubble steadily but not violently. Use tongs to flip the chicken only once to maintain the crust’s integrity.
Step 5: Drain and Serve Immediately
Transfer the fried chicken to a wire rack set over a baking sheet or a paper towel-lined plate. This allows air to circulate, keeping the crust crisp while the chicken finishes cooking internally. Let it drain for 2-3 minutes before serving.
Serve immediately while hot and crispy. The contrast of the golden, crackling exterior and the juicy, tender meat inside is what makes this dish exceptional. Any leftovers should be reheated in an oven or air fryer to revive the crispness.
Pro Tips For Making Recipe For Fried Boneless Chicken Breast
- Pound the Thickness: Use a meat mallet or rolling pin to even out the chicken breasts to about ½-inch thickness—this guarantees even cooking and prevents dry, overdone edges while the center catches up.
- Soak Overnight: Let the chicken soak in the buttermilk for at least 4 hours, or ideally overnight. I learned this the hard way—skipping it leaves the meat tough and the crust struggling to stick.
- Double Dredge: After the buttermilk, dredge the chicken in the flour-cornstarch mix, dip it back in buttermilk, then dredge again. Sounds tedious, but it creates that shatteringly crisp crust everyone wants.
- Rest Before Frying: Let the dredged chicken rest on a wire rack for 10 minutes before frying—this gives the coating time to set, so it doesn’t slide off in the oil.
Dietary Considerations for This Dish
Gluten-Free Option
Swap the all-purpose flour for a 1:1 gluten-free baking blend, like King Arthur’s Measure for Measure. Add 1 tsp xanthan gum to help the coating adhere better. The texture will be slightly different but still crispy and delicious. 💪
Lower-Carb Version
Replace half the flour with almond flour and increase cornstarch to 1 cup. This reduces carbs significantly while keeping the crust crunchy. The almond flour adds a subtle nuttiness that pairs well with the spices.
Dairy-Free Adaptation
Use unsweetened almond milk or coconut milk with 1 tbsp vinegar per cup as a buttermilk substitute. For the egg wash, aquafaba (chickpea brine) works surprisingly well. These swaps maintain moisture without dairy.
Reduced-Sodium Choice
Cut the kosher salt in half and boost flavor with 1 tsp lemon zest and 1 tsp dried herbs like thyme or oregano. The acidity and herbs enhance taste without relying on salt. 💛
Lower-Fat Method
Use an air fryer at 375°F for 12-15 minutes, flipping halfway. Spray the breaded chicken lightly with oil to crisp. This cuts oil by 75% while keeping the texture satisfyingly crunchy.
Egg-Free Coating
Replace eggs with 2 tbsp cornstarch mixed with 3 tbsp water for a slurry. Alternatively, use flax eggs (1 tbsp ground flaxseed + 3 tbsp water per egg). Both options bind the coating effectively.
Nutrition Facts
Frequently Asked Questions
Why do I need to pound the chicken to even thickness?
Pounding ensures even cooking—thinner parts won’t dry out while thicker sections finish. ½-inch thickness guarantees consistent doneness throughout each piece.
Can I skip the buttermilk brine?
Not recommended. The brine tenderizes and adds flavor. Without it, the meat may dry out and lack depth. 4 hours minimum is ideal for best results.
How do I know when the oil is hot enough?
Use a thermometer for accuracy—350°F is perfect. If the oil smokes, it’s too hot. If it doesn’t bubble around a wooden chopstick, it’s not ready yet.
What’s the best way to keep the crust crispy?
Drain on a wire rack, not paper towels. This allows air circulation, preventing steam from softening the golden coating. Serve immediately for maximum crunch.

- Jollof Rice Sauce Recipe: West African Tomato and Spice Infusion - September 25, 2026
- Japanese Rice Soup Recipe: Umami-Rich Comfort in a Bowl - September 25, 2026
- Homemade Cream Of Rice Recipe: Silk-Smooth Breakfast in Minutes - September 25, 2026