
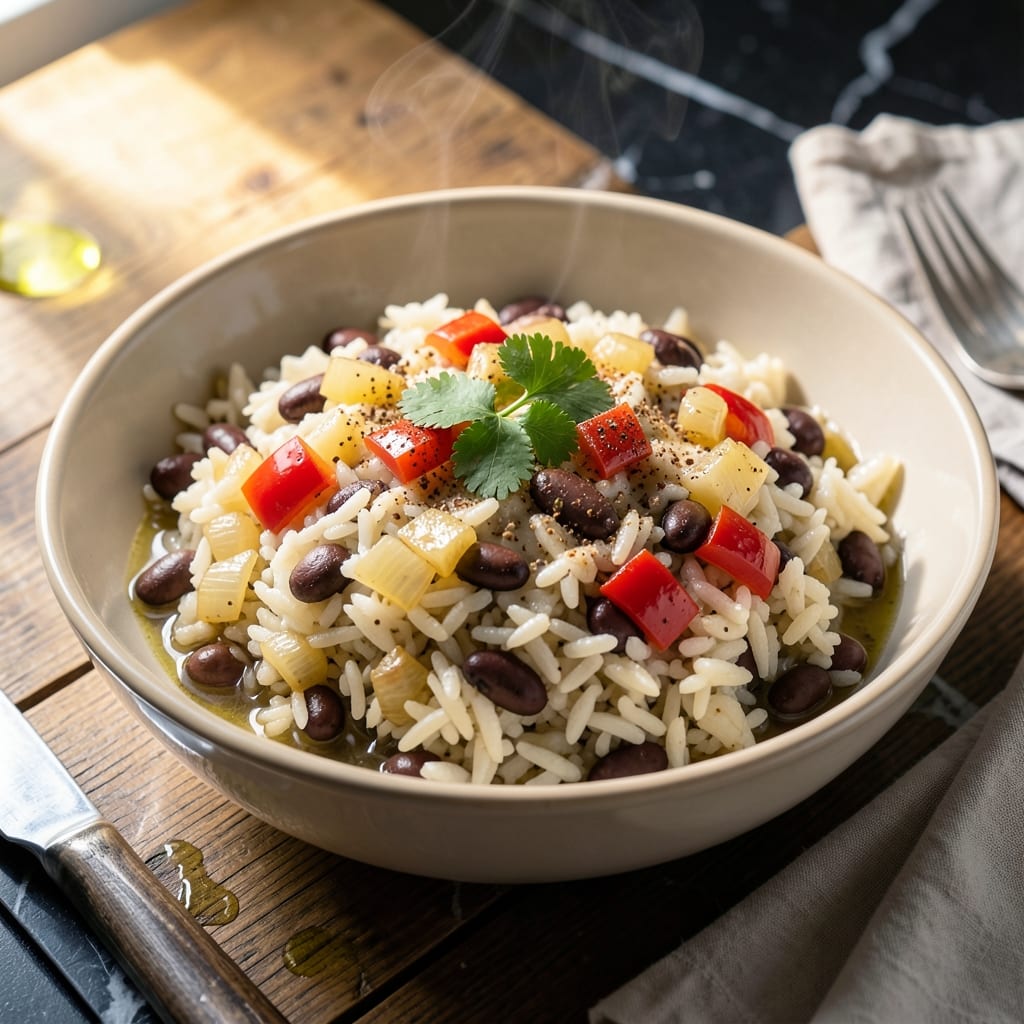
This rice cooker method transforms a classic dish into a hands-free meal with minimal effort. I developed this technique after too many burnt pots on my tiny Boston stove, proving that perfect rice and beans don’t require constant attention.
The beauty lies in the rice cooker’s ability to maintain precise heat and moisture levels. With the right ratio of beans to rice and proper liquid measurements, you’ll achieve consistently fluffy grains and tender beans every time.
What emerges is a complete, balanced dish with beans that absorb the rice’s starch and seasonings. The texture is ideal for serving as a side or main course, with each bite offering the perfect combination of flavors.
This approach works with any bean variety or seasoning blend. The rice cooker handles the timing while you focus on other meal components.
Ingredients for Rice and Beans Recipe Rice Cooker
Pantry staples plus a quick soak. Nothing exotic, just hearty, hands-free goodness.
| Ingredient | Amount | Notes |
|---|---|---|
| Long-Grain White Rice 🍚 | 1 ½ cups | Rinsed until water runs clear |
| Dried Black Beans 🫘 | 1 cup | Soaked overnight or quick-soaked |
| Vegetable Broth 🥣 | 3 cups | Low-sodium preferred for control |
| Yellow Onion 🧅 | 1 whole | Medium, finely diced |
| Garlic Cloves 🧄 | 3 cloves | Minced for even distribution |
| Red Bell Pepper 🌶️ | 1 whole | Diced, seeds removed |
| Ground Cumin 🌿 | 1 tsp | Toasted briefly for depth |
| Smoked Paprika 🌶️ | 1 tsp | Adds essential smoky flavor |
| Dried Oregano 🍃 | ½ tsp | Mediterranean or Mexican variety |
| Bay Leaf 🌿 | 1 whole | Removed before serving |
| Olive Oil 🫒 | 2 tbsp | Extra-virgin for best flavor |
| Salt 🧂 | 1 tsp | Adjust to taste at end |
| Black Pepper 🌶️ | ½ tsp | Freshly ground preferred |
| Lime 🍈 | 1 whole | Juiced, plus zest if desired |
The beans are the backbone here. Dried black beans from Whole Foods bulk bins are my go-to—they cook up creamy without falling apart. If using canned, rinse them well to remove excess sodium. The rice? Jasmine or basmati work too, but long-grain white gives that classic fluffy texture. I always grab my spices from Penzeys when I can—their cumin has amazing aroma.
No time to soak beans? Quick-soak method works in a pinch (cover with boiling water, let sit 1 hour). Swap black beans for pinto or kidney beans—just adjust soaking time. Fresh out of bell pepper? Zucchini or frozen corn add nice texture. The smoked paprika is key though—don’t skip it. If you’ve got fresh cilantro, toss a handful in at the end for brightness.
This keeps 4-5 days in the fridge—flavors actually improve overnight. Freezes beautifully for 3 months. Portion into containers for easy lunches. The rice cooker liner makes cleanup a breeze (trust me on this one).
Why You’ll Love This Recipe
- Set It and Forget: I toss everything in the rice cooker, press start, and let it do the work—no stirring, no watching.
- Garlic-Infused Comfort: The garlic and onion simmering in vegetable broth give the beans and rice this deep, cozy flavor.
- Meal Prep Magic: I make a big batch Sunday and it’s my lunch all week—still tastes great reheated.
- Pocket-Friendly Feast: Dried beans and rice stretch so far, and honestly, it’s one of the cheapest meals I make that feels hearty.
Step-by-Step Instructions for Rice and Beans in a Rice Cooker
This hands-free method delivers perfectly tender results with minimal effort on your part.
Step 1: Sauté Aromatics for Maximum Flavor
Heat the 2 tbsp olive oil in your rice cooker using the sauté function (or a skillet if your model lacks this feature). Add the finely diced yellow onion and cook for 3-4 minutes until it becomes translucent and soft.
Stir in the diced red bell pepper and cook for another 2 minutes until it begins to soften. Add the minced garlic cloves and cook for 30 seconds until fragrant—don’t let it brown. This builds a flavor foundation that makes all the difference.
Step 2: Toast Spices and Combine Ingredients
Add the 1 tsp ground cumin, 1 tsp smoked paprika, and 0.5 tsp dried oregano to the pot. Stir constantly for 30 seconds to toast the spices until they release their aroma. This step enhances their natural oils and deepens the flavor.
Now add the 1.5 cups long-grain white rice, 1 cup dried black beans, 1 whole bay leaf, 1 tsp salt, and 0.5 tsp black pepper. Stir to coat everything in the spices and oil. The rice should look slightly glossy from the oil.
Step 3: Add Broth and Cook
Pour in the 3 cups vegetable broth and stir to combine. Make sure the bay leaf is submerged in the liquid. Secure the rice cooker lid and select the standard rice cooking setting. This will typically cook for 20-25 minutes before switching to warm.
If your rice cooker has a bean setting, use that instead—it may extend the cooking time to 30-35 minutes. The dish is done when all liquid is absorbed and the rice is tender. Resist the urge to open the lid during cooking, as this releases steam and can affect the cooking time.
Step 4: Finish and Serve
Once cooking is complete, let the rice and beans sit covered for 10 minutes. This allows the rice to steam and the flavors to meld together. Remove the bay leaf before serving.
Squeeze the juice from the 1 whole lime over the dish and stir gently to incorporate. Taste and adjust seasoning if needed—the lime adds a bright finish that balances the smoky spices. Serve warm, with extra lime wedges if desired.
Pro Tips For Making Rice And Beans Recipe Rice Cooker
- Soak the Beans: I learned this the hard way—dried black beans need at least 4 hours in water to soften enough for the rice cooker, or you’ll end up with crunchy beans no matter how long it runs.
- Sauté Aromatics First: After burning three batches, I finally figured out that quickly sautéing the onion and garlic in oil before adding to the rice cooker actually changes the outcome, giving the dish depth it’s missing otherwise.
- Use Extra Broth: Long-grain white rice and beans absorb a lot, so add about 1/4 cup more vegetable broth than you think you need—your future self will thank you when it’s not dry and undercooked.
- Skip the Stirring: Resist the urge to stir while it cooks; it breaks the rice and turns your perfectly fluffy grains into mushy disappointment.
Essential Equipment for Great rice and beans recipe rice cooker
Rice Cooker Essentials
I swear by my Zojirushi 5.5-cup rice cooker—it’s handled my tiny Boston kitchen chaos for years. The non-stick inner pot and precise temperature control make it perfect for this recipe. Look for models with a sauté function to streamline the process.
Bean Preparation Tools
A fine-mesh strainer is non-negotiable for rinsing rice and beans. I use the OXO Good Grips model—it fits over my sink perfectly. For soaking, any large bowl works, but I prefer one with a lid to prevent fridge odors from seeping in.
Knife and Cutting Board
A sharp 8-inch chef’s knife makes quick work of dicing onions and peppers. My Mercer Culinary knife has been my trusty sidekick since culinary school days. Pair it with a large cutting board—I prefer bamboo for its gentle surface and sustainability. 💪
Measuring Accuracy
Precise measurements matter for the rice-to-liquid ratio. I keep a set of OXO measuring cups in my drawer—they nest neatly and have clear markings. For spices, 1 tsp measures are essential; I use the magnetic set from RSVP International.
Serving and Storage
A rice paddle comes with most cookers, but I also keep a wooden spoon handy for stirring during sautéing. For leftovers, glass containers from Pyrex are my go-to—they’re microwave-safe and don’t stain. The lime juice at the end? A simple handheld juicer gets every last drop. 💛
Nutrition Facts
Frequently Asked Questions
Do I need to soak the beans first?
Yes, soaking is essential for dried beans in this method. Either soak overnight in cold water or use the quick-soak method (boil 2 minutes, then rest for 1 hour).
Can I use canned beans instead?
but drain and rinse them well first. Add them with the broth, and reduce cooking time to 15-20 minutes since they’re pre-cooked.
What if my rice cooker doesn’t have a sauté function?
Sauté the aromatics in a skillet first, then transfer everything to your rice cooker. The flavor development is worth the extra step.
How do I prevent mushy rice?
Use the exact liquid ratio, don’t stir after cooking starts, and let it rest 10 minutes after cooking. This ensures fluffy grains.

- Jollof Rice Sauce Recipe: West African Tomato and Spice Infusion - September 25, 2026
- Japanese Rice Soup Recipe: Umami-Rich Comfort in a Bowl - September 25, 2026
- Homemade Cream Of Rice Recipe: Silk-Smooth Breakfast in Minutes - September 25, 2026