
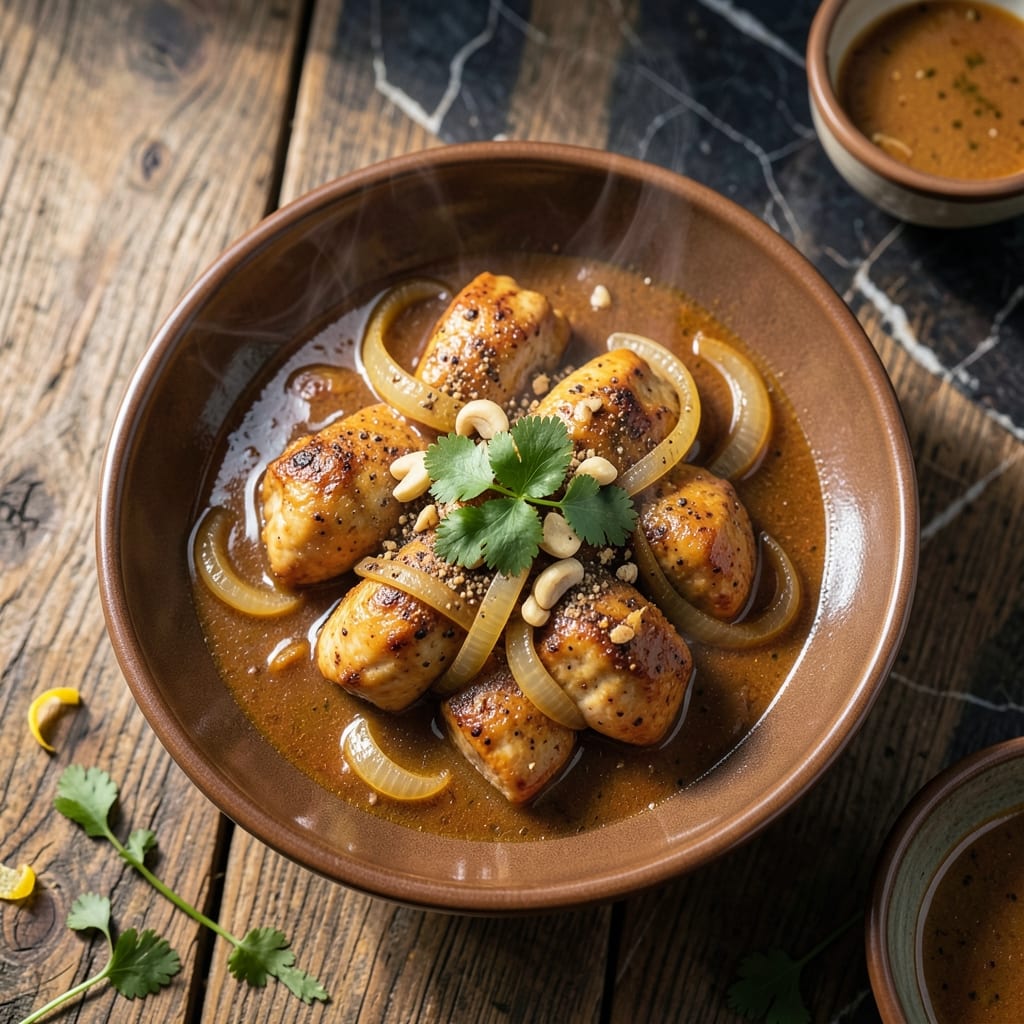
This rice cooker method transforms chicken curry from a weekend project into a set-it-and-forget-it meal. The appliance handles the slow simmering that builds deep, aromatic flavors without constant attention.
I developed this technique after realizing how perfectly the rice cooker maintains the steady, low heat needed to tenderize the chicken while infusing it with spices. The result is consistently tender meat in a rich, fragrant sauce.
You’ll appreciate how the rice cooker’s sealed environment traps steam, intensifying the curry’s flavors. The chicken emerges perfectly cooked, and the sauce reduces naturally to the ideal consistency.
With minimal prep and no stove watching, this approach delivers restaurant-quality curry using one appliance. The hands-off process makes it ideal for busy weeknights.
Ingredients for Rice Cooker Chicken Curry
Transform everyday ingredients into a fragrant, hands-off curry with minimal effort and maximum flavor.
| Ingredient | Amount | Notes |
|---|---|---|
| Boneless Skinless Chicken Thighs 🍗 | 1 ½ lb | Cut into bite-sized pieces |
| Yellow Onion 🧅 | 1 whole | Finely diced for base |
| Garlic Cloves 🧄 | 4 cloves | Minced for maximum flavor |
| Fresh Ginger Root 🌿 | 1 tbsp | Peeled and grated |
| Curry Powder 🌶️ | 2 tbsp | Madras or mild variety |
| Ground Cumin 🌿 | 1 tsp | Toasted for depth |
| Ground Coriander 🌿 | 1 tsp | Essential for balance |
| Turmeric Powder 🌶️ | ½ tsp | For color and earthiness |
| Cayenne Pepper 🔥 | ¼ tsp | Adjust to heat preference |
| Canned Diced Tomatoes 🍅 | 1 can | 14.5 oz, with juices |
| Coconut Milk 🥥 | 1 can | Full-fat for creaminess |
| Chicken Broth 💧 | 1 cup | Low-sodium preferred |
| Vegetable Oil 🫒 | 2 tbsp | Neutral flavor for sautéing |
| Fresh Cilantro 🌿 | ¼ cup | Chopped for garnish |
| Kosher Salt 🧂 | 1 tsp | Diamond Crystal preferred |
The chicken thighs are non-negotiable for this preparation. Boneless, skinless ensures even cooking and tenders beautifully in the rice cooker’s moist environment. Costco’s organic thighs are consistently high quality, but any supermarket brand works. For the coconut milk, full-fat cans from Thai Kitchen or Native Forest deliver the richest texture. Avoid light versions—they lack the necessary fat for depth.
No curry powder? Blend 1 tbsp cumin, 1 tbsp coriander, 1 tsp turmeric, and ½ tsp cinnamon for a DIY version. Fresh ginger can be swapped for 1 tsp ground ginger in a pinch. The cayenne is flexible—omit for mild heat or double for serious spice. Fire-roasted diced tomatoes add smokiness if you prefer. Cilantro haters can use parsley instead (no judgment).
This curry tastes even better the next day. Store in an airtight container for up to 4 days in the fridge or freeze for 3 months. The rice cooker’s nonstick pot makes cleanup effortless—just soak with warm, soapy water post-meal.
Why You’ll Love This Recipe
- Set and Forget: Honestly, I just dump everything in the rice cooker and let it work its magic while I do other things.
- Deep Aromatic Flavor: The garlic, ginger, and curry powder create a rich, fragrant sauce that soaks right into the chicken thighs.
- Meal Prep Dream: I make a big batch on Sunday and it reheats beautifully for lunches all week.
- Budget Stretcher: Boneless thighs are cheap, and a little curry powder goes a long way to feed the whole family.
Step-by-Step Instructions for Rice Cooker Chicken Curry
This hands-off method delivers rich, aromatic curry with minimal active cooking time.
Step 1: Sauté Aromatics in the Rice Cooker
Begin by adding the 2 tbsp vegetable oil to the rice cooker inner pot and select the sauté function. When the oil shimmers, add the finely diced yellow onion and cook for 3-4 minutes until translucent and just beginning to soften.
Next, stir in the minced garlic cloves, grated fresh ginger root, 2 tbsp curry powder, 1 tsp ground cumin, 1 tsp ground coriander, 0.5 tsp turmeric powder, and 0.25 tsp cayenne pepper. Cook for 1 minute until fragrant—this blooms the spices and deepens their flavors.
Step 2: Brown the Chicken and Deglaze
Add the 1.5 lb boneless skinless chicken thighs, cut into bite-sized pieces, to the pot along with the 1 tsp kosher salt. Cook for 5-6 minutes, stirring occasionally, until the chicken loses its raw color and begins to brown lightly on the edges.
Pour in the 1 can canned diced tomatoes with juices and scrape up any browned bits from the bottom of the pot. This deglazing step ensures all the caramelized flavors incorporate into the sauce. Let the mixture simmer for 2 minutes to meld the ingredients.
Step 3: Add Liquids and Pressure Cook
Stir in the 1 can coconut milk and 1 cup chicken broth, ensuring all ingredients are well combined. Secure the rice cooker lid and select the pressure cook function. Set the timer for 10 minutes on high pressure.
The liquid should just cover the chicken pieces. If your rice cooker lacks a pressure function, use the standard cook setting and allow it to simmer for 20-25 minutes until the chicken is fully cooked and tender. The curry will thicken as it cooks.
Step 4: Release Pressure and Finish
Once the cooking cycle completes, allow the pressure to release naturally for 10 minutes, then quick-release any remaining pressure. Open the lid carefully, tilting it away from you to avoid steam burns.
Stir the curry gently to redistribute the ingredients. The sauce should coat the back of a spoon, and the chicken should be fork-tender. If the curry is too thin, simmer uncovered for 3-5 minutes to reduce slightly.
Step 5: Garnish and Serve
Taste and adjust seasoning if needed, though the initial 1 tsp kosher salt should suffice. Sprinkle with the 0.25 cup fresh cilantro just before serving to preserve its bright, herbaceous flavor.
Serve the curry hot over steamed rice or with naan bread to soak up the rich, spiced sauce. The flavors will continue to develop if held on the warm setting for up to 30 minutes.
Pro Tips For Making Rice Cooker Chicken Curry
- Brown the Chicken First: Sear the chicken thighs in a pan before adding to the rice cooker—this locks in flavor and prevents a mushy texture. I learned this the hard way after my first few batches tasted bland.
- Grate the Ginger: Use a microplane for the fresh ginger instead of mincing—it distributes better in the curry and eliminates fibrous bits. Sounds weird, but it works.
- Don’t Overfill: Keep the rice cooker at or below the 2/3 max line, or the curry will spill over when simmering. After burning three batches, I finally figured out the right ratio.
- Toast the Curry Powder: Heat the curry powder in a dry pan for 30 seconds before adding liquids—it wakes up the spices. My grandmother swore by this, and she was right.
Storing and Reheating This Recipe
Fridge Storage
Let the curry cool for no more than 2 hours before transferring to airtight containers. I use glass Pyrex with snap-on lids for easy reheating. Store at 40°F or below for up to 4 days. The flavors actually improve overnight as the spices meld together. ❄️
Freezer Storage
This curry freezes beautifully for up to 3 months without texture loss. I recommend quart-size freezer bags—they lay flat, saving space, and thaw faster than rigid containers. Leave 1 inch headspace for expansion and squeeze out excess air to prevent freezer burn.
For best results, portion into meal-sized servings before freezing. Thai Kitchen coconut milk helps maintain creaminess after thawing.
Stovetop Reheating
My preferred method for maintaining texture: pour curry into a heavy pot, add ¼ cup chicken broth to prevent sticking, and heat over medium-low for 10-15 minutes. Stir occasionally and adjust seasonings—curry often needs a pinch of salt after reheating. 🔥
Microwave Method
For quick lunches, microwave individual portions covered with a damp paper towel. Use 70% power for 2-3 minutes, stir, then continue in 1-minute intervals until reaching 165°F. Add a splash of water if it looks dry.
Nutrition Facts
Frequently Asked Questions
Can I use chicken breast instead of thighs?
Thighs work best because their fat keeps the meat moist during cooking. Chicken breast will work but may dry out. If using, reduce cooking time by 5 minutes and add ¼ cup extra broth.
What if my curry is too thin?
Uncover and simmer on the rice cooker’s warm setting for 5-10 minutes. For faster thickening, transfer to a skillet and cook over medium-high heat for 3-4 minutes.
Can I add vegetables to this?
Potatoes, carrots, or bell peppers work well. Add hearty veggies with the chicken, and delicate ones (like spinach) during the last 5 minutes of cooking.

- Jollof Rice Sauce Recipe: West African Tomato and Spice Infusion - September 25, 2026
- Japanese Rice Soup Recipe: Umami-Rich Comfort in a Bowl - September 25, 2026
- Homemade Cream Of Rice Recipe: Silk-Smooth Breakfast in Minutes - September 25, 2026