
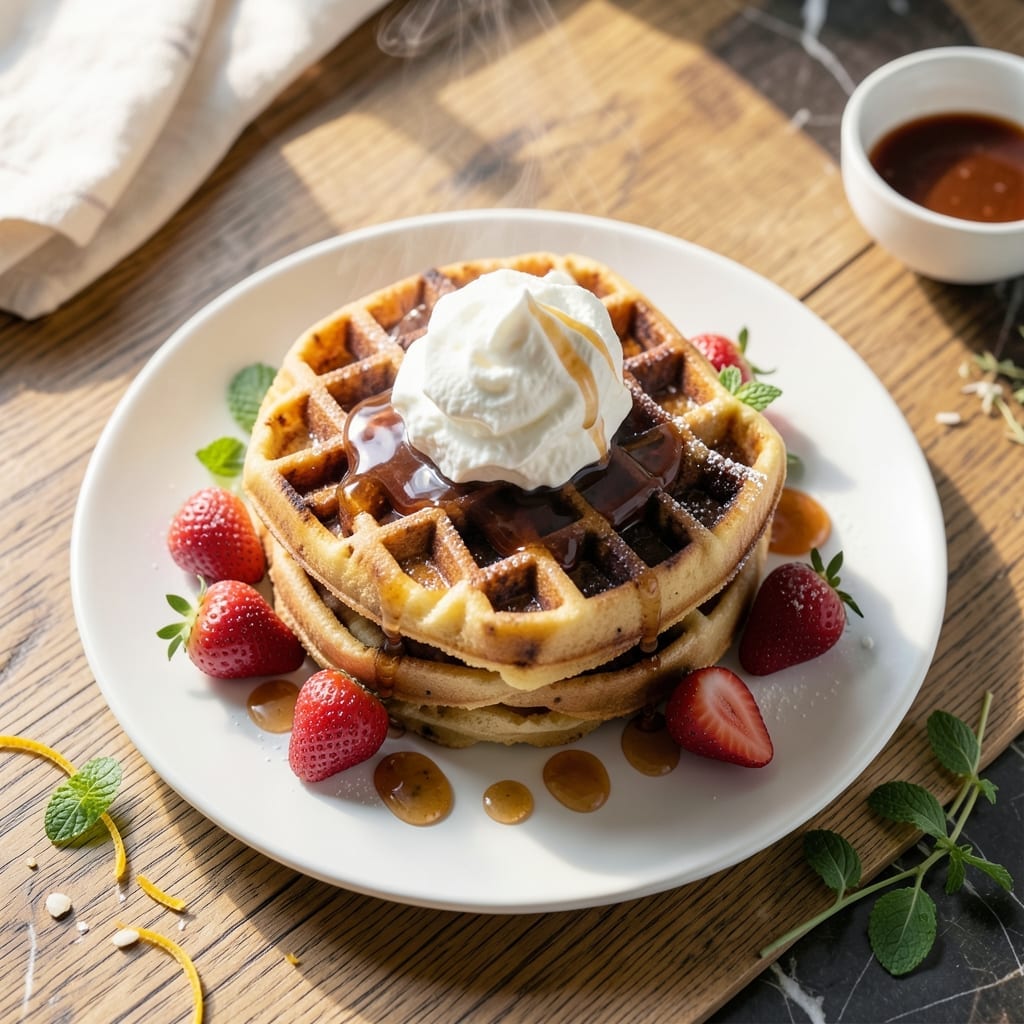
This rice flour waffle recipe transforms breakfast into something extraordinary. The batter comes together in minutes, delivering light and crispy results that rival any diner version.
Rice flour creates an impossibly delicate texture that stays crisp long after leaving the iron. The secret lies in letting the batter rest briefly before cooking, allowing the flour to fully hydrate for maximum fluffiness.
You’ll achieve golden waffles with a shatteringly crisp exterior and tender interior. The subtle nuttiness of rice flour adds depth without overpowering the classic waffle flavor.
Serve warm with maple syrup and fresh fruit for a breakfast that feels indulgent yet remains effortlessly simple to prepare.
Ingredients for Rice Flour Waffles
Fine rice flour and simple pantry staples create extraordinary breakfast waffles with minimal effort.
| Ingredient | Amount | Notes |
|---|---|---|
| White Rice Flour 🌾 | 2 cups | Fine grind for best texture |
| All-Purpose Flour 🌾 | ½ cup | For structure and balance |
| Granulated Sugar 🍚 | 2 tbsp | For subtle sweetness |
| Baking Powder 🧂 | 1 tbsp | Ensures light fluffiness |
| Salt 🧂 | ½ tsp | Fine sea salt preferred |
| Large Eggs 🥚 | 2 whole | Room temperature for even mixing |
| Whole Milk 🥛 | 1 ¾ cups | Full-fat for richness |
| Unsalted Butter 🧈 | ¼ cup | Melted and cooled |
| Vanilla Extract 💧 | 1 tsp | Pure extract for best flavor |
| Vegetable Oil 🫒 | 2 tbsp | For cooking grease |
The rice flour is non-negotiable for that delicate, crispy texture. Bob’s Red Mill white rice flour is widely available and consistent. Look for a fine grind—coarse can make the waffles gritty. The all-purpose flour adds structure, but don’t swap it for bread flour (too dense). King Arthur is my go-to for reliable results. Use full-fat milk for maximum richness and tenderness in the crumb.
No white rice flour? Brown rice flour works at a 1:1 ratio but yields a slightly nuttier, denser waffle. For a gluten-free version, replace the all-purpose flour with cornstarch or tapioca starch. Out of buttermilk? Whole milk plus 1 tsp lemon juice gets you close. The butter can be swapped for coconut oil if you need dairy-free, but that’s a different recipe entirely.
Batter rests best at room temperature—10 minutes max. Cooked waffles keep warm in a 200°F oven for up to 20 minutes. Freeze extras between parchment for up to 3 months; reheat in a toaster.
Why You’ll Love This Recipe
- One Bowl Mix: I dump all the dry ingredients—rice flour, all-purpose flour, sugar, baking powder, salt—straight into one bowl and stir. No sifting, no fuss.
- Crispy Yet Tender: The rice flour gives them this light, almost delicate crunch on the outside while staying soft inside. Honestly, it’s the texture I crave every morning.
- Breakfast or Brunch: I’ve served these for lazy Sunday breakfasts and even as a quick weeknight dinner with fruit and yogurt. Between us, they work for both.
- Budget Stretch: A bag of rice flour lasts forever, and the rest are pantry staples. I’ll be real: it’s cheaper than takeout and just as satisfying.
Step-by-Step Instructions for Light and Crispy Waffles
Master these techniques to achieve perfectly crisp waffles with a delicate, airy interior.
Step 1: Combine Dry Ingredients for Optimal Texture
In a large mixing bowl, whisk together the 2 cups White Rice Flour, 0.5 cup All-Purpose Flour, 2 tbsp Granulated Sugar, 1 tbsp Baking Powder, and 0.5 tsp Salt until fully combined. The rice flour creates a light, crisp texture while the all-purpose flour provides necessary structure.
Ensure there are no lumps in the mixture. I sift the flours first when possible, though whisking vigorously achieves the same result. This step establishes the foundation for waffles that are both sturdy and delicate.
Step 2: Create a Smooth, Fluffy Wet Mixture
In a separate bowl, whisk the 2 whole Large Eggs until slightly frothy. Add the 1.75 cups Whole Milk, 0.25 cup Unsalted Butter (melted and cooled), and 1 tsp Vanilla Extract, mixing until fully incorporated and smooth.
The melted butter should be cool enough that it doesn’t cook the eggs when added. This wet mixture provides moisture and richness that balances the dry ingredients perfectly.
Step 3: Fold Ingredients Together Gently
Pour the wet ingredients into the dry ingredients and fold together using a silicone spatula. Mix just until combined—small lumps are acceptable. Overmixing develops gluten in the all-purpose flour, which would make the waffles tough rather than tender.
The batter should be thick but pourable. If it seems too dense, let it rest for 5 minutes to allow the rice flour to hydrate fully. This resting period often resolves any initial thickness issues.
Step 4: Cook Until Deep Golden and Crisp
Preheat your waffle iron to medium-high heat. Brush the grids lightly with Vegetable Oil using a pastry brush. Pour about ½ cup of batter onto the center of the lower grid, spreading slightly if needed.
Close the iron and cook for 4-5 minutes until the waffle is deep golden brown and crisp. Avoid opening the iron too early—this prevents the waffle from cooking through properly. The steam should stop escaping when it’s ready to remove.
Step 5: Serve Immediately for Maximum Crispness
Transfer the cooked waffle to a wire rack rather than a plate to maintain crispness. If keeping warm before serving, place in a 200°F oven directly on the rack for no more than 10 minutes—any longer and they’ll lose their perfect texture.
Serve immediately with your preferred toppings. The contrast between the crisp exterior and light, airy interior is most pronounced when enjoyed fresh from the iron. Repeat with remaining batter, brushing with additional Vegetable Oil between batches as needed.
Pro Tips For Making Rice Flour Waffles
- Preheat the Iron: I learned this the hard way—crank your waffle iron to medium-high heat for at least 5 minutes before adding batter. Rice flour waffles need that steady, hot surface to crisp up properly.
- Whisk Dry Ingredients: After burning three batches, I finally figured out that whisking the rice flour, all-purpose flour, baking powder, and salt together first prevents clumps and guarantees even rising.
- Skip Overmixing: Resist the urge to stir the batter until completely smooth. A few lumps are fine, and overmixing makes the waffles dense instead of light and crisp.
- Rest the Batter: Give the batter 5-10 minutes to sit after mixing—it thickens slightly, making it easier to spread on the iron, and the waffles come out with better texture.
Make-Ahead Tips for This Recipe
Prep Batter Ahead
Mix your dry ingredients the night before and store in an airtight container. In the morning, just whisk the wet ingredients and combine. The rice flour needs that brief rest anyway to achieve maximum crispness. I often prep everything before bed. ⏰
Refrigerator Storage
Uncooked batter keeps well in the fridge for up to 12 hours. Give it a quick stir before using, as the rice flour may settle. The cold batter might seem thicker, but it cooks up just as light and crispy.
Freeze Cooked Waffles
Cool waffles completely on a wire rack, then freeze in a single layer before transferring to a ziplock bag. They’ll keep for up to 3 months. This prevents them from sticking together and getting soggy. 💡
Reheat from Frozen
Pop frozen waffles directly into your toaster on the highest setting. They’ll crisp up beautifully in 2-3 minutes. For larger batches, use a 375°F oven for 8-10 minutes on a wire rack.
Overnight Waffle Iron
If making a big batch, preheat your waffle iron while the batter rests. I use a Cuisinart Round Classic—it heats evenly and has nonstick plates that make cleanup a breeze. Always brush with oil between batches.
Keep Warm Trick
Place cooked waffles directly on your oven rack at 200°F. This maintains crispness while you finish the batch. Never stack them—they’ll steam and lose that perfect texture we all love.
Nutrition Facts
Frequently Asked Questions
Can I make these without a waffle iron?
Not ideally. The waffle iron’s grid pattern is essential for that signature crisp texture. For a similar taste, try making pancakes with the batter, but expect a different texture.
Why rest the batter before cooking?
Letting it rest for 5-10 minutes allows the rice flour to fully hydrate, resulting in lighter, crispier waffles. Skipping this step may yield denser results.
Can I substitute almond milk for whole milk?
Yes, but use unsweetened almond milk for best results. The waffles may be slightly less rich, but will still turn out crispy and flavorful.
How do I prevent waffles from sticking?
Always preheat the iron and brush with oil between batches. A nonstick iron helps too. Avoid cooking spray, as it can build up and cause sticking over time.

- Jollof Rice Sauce Recipe: West African Tomato and Spice Infusion - September 25, 2026
- Japanese Rice Soup Recipe: Umami-Rich Comfort in a Bowl - September 25, 2026
- Homemade Cream Of Rice Recipe: Silk-Smooth Breakfast in Minutes - September 25, 2026