
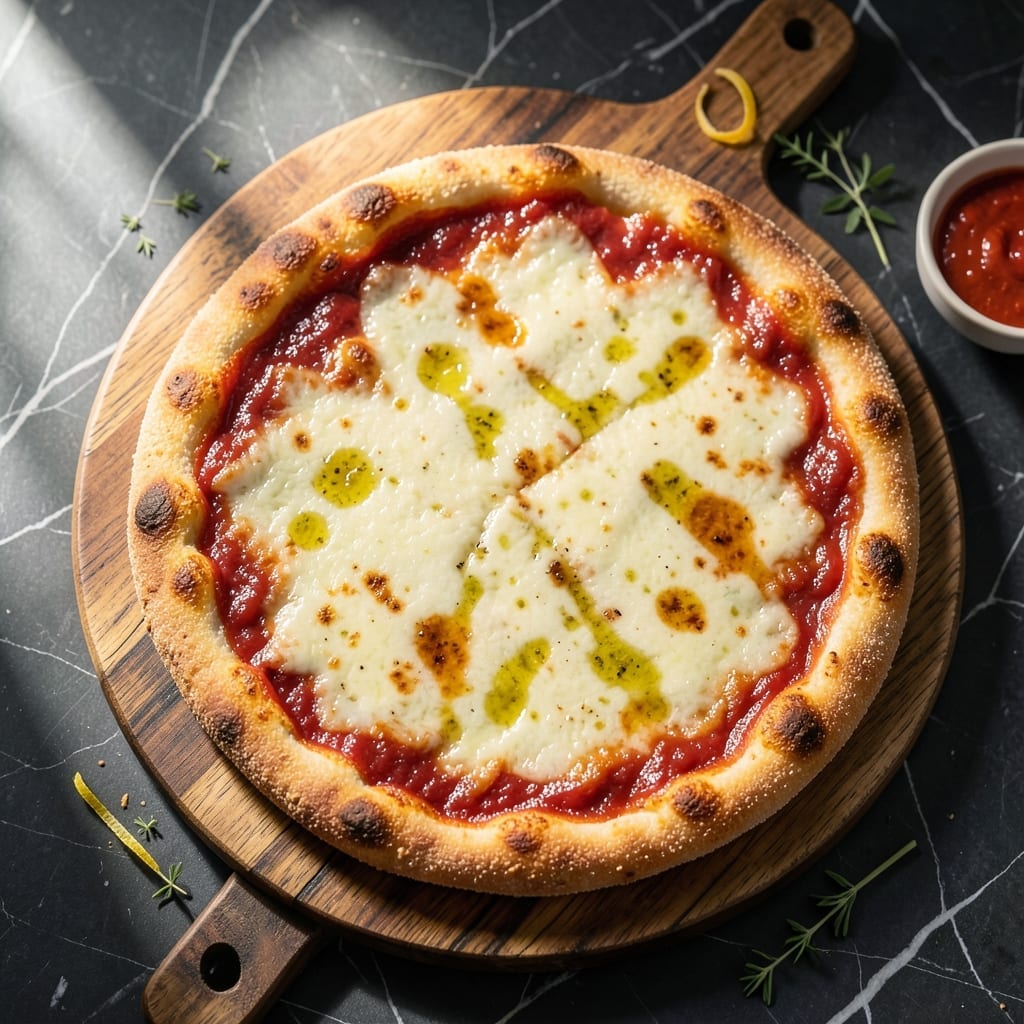
I developed this gluten-free pizza crust after years of testing alternatives to traditional dough. Rice flour creates a base that bakes up with the right structure and bite, without the usual gluten content.
The key to achieving a crispy texture lies in pre-baking the crust before adding toppings. This ensures it holds up to sauces and cheese without turning soggy, delivering that satisfying crunch with every bite.
What you get is a sturdy, flavorful foundation that works with any toppings you choose. The process takes about 45 minutes from start to finish, with most of that being hands-off baking time.
This method proves that gluten-free doesn’t mean sacrificing texture or taste. The crust bakes to golden perfection, ready for your favorite pizza combinations.
Ingredients for Rice Pizza Crust
Rice flour, a few binders, and pantry staples create this sturdy gluten-free base with perfect crunch.
| Ingredient | Amount | Notes |
|---|---|---|
| White Rice Flour 🌾 | 2 cups | Fine grain preferred for texture |
| Tapioca Starch 🌾 | ½ cup | Thickens and adds crispness |
| Xanthan Gum 🧪 | 1 tsp | Binds gluten-free flours |
| Salt 🧂 | 1 tsp | Fine sea salt preferred |
| Sugar 🍚 | 1 tsp | Balances yeast flavor |
| Active Dry Yeast 🍞 | 2 ¼ tsp | One packet, proofed properly |
| Warm Water 💧 | 1 ¼ cups | 110°F for yeast activation |
| Olive Oil 🫒 | 2 tbsp | Extra-virgin for flavor |
| Large Eggs 🥚 | 2 whole | Room temperature for binding |
| Italian Seasoning 🌿 | 1 tsp | Dried blend for flavor |
| Garlic Powder 🧄 | ½ tsp | Enhances savory notes |
| Grated Parmesan Cheese 🧀 | ¼ cup | Optional for topping edge |
The rice flour is key here—Bob’s Red Mill is widely available and consistent. Tapioca starch adds the crispness that gluten-free crusts often lack. Xanthan gum is non-negotiable for structure (find it in the gluten-free section at Whole Foods or Kroger). Yeast needs to be fresh; check the expiration date or it won’t proof properly (warm water, sugar test—if it bubbles, you’re good).
No xanthan gum? Psyllium husk powder at the same amount works in a pinch. Swap tapioca starch for cornstarch if needed, but texture may differ slightly. Eggs bind everything—if you’re avoiding them, flax eggs (1 tbsp ground flax + 3 tbsp water per egg) are your best bet. The olive oil can be any neutral oil, but extra-virgin adds nice flavor (worth the splurge).
The dough rests for 30 minutes before shaping—don’t skip this. Baked crusts keep 1-2 days at room temperature in an airtight container, or freeze for 1 month. Re-crisp in the oven before topping for best results (10 minutes at 375°F does the trick).
Why You’ll Love This Recipe
- One Bowl Mix: I just dump the rice flour, tapioca starch, and xanthan gum in a bowl—no rolling pins or fancy tools needed.
- Crispy & Light: That combo of rice flour and tapioca starch gives it this perfect crispy-chewy texture that beats regular crust.
- Gluten-Free Win: Honestly, it’s my go-to for movie nights when friends with gluten issues come over.
- Budget Stretcher: A bag of rice flour lasts forever, and it’s way cheaper than takeout.
Step-by-Step Instructions for Rice Pizza Crust
Here’s the method. Straightforward, tested, works every time.
Step 1: Activate the Yeast and Combine Dry Ingredients
In a small bowl, combine the 2.25 tsp Active Dry Yeast, 1 tsp Sugar, and 1.25 cups Warm Water at 110°F. Let it sit for 5-7 minutes until foamy—this proves the yeast is alive and ready to work.
Meanwhile, in a large mixing bowl, whisk together the 2 cups White Rice Flour, 0.5 cup Tapioca Starch, 1 tsp Xanthan Gum, 1 tsp Salt, 1 tsp Italian Seasoning, and 0.5 tsp Garlic Powder. The xanthan gum is critical here—it replaces the gluten that would normally bind the dough.
Step 2: Mix the Wet and Dry Ingredients
Pour the yeast mixture into the dry ingredients. Add the 2 tbsp Olive Oil and 2 whole Large Eggs, then beat with a wooden spoon or dough whisk until a thick, sticky batter forms. It will look more like cake batter than traditional pizza dough, but that’s exactly right.
Let the batter rest for 5 minutes. This allows the rice flour to fully hydrate and the xanthan gum to start its binding magic. You’ll notice the texture thickens slightly during this time as the ingredients meld together.
Step 3: Shape and Pre-Bake the Crust
Preheat your oven to 425°F and line a baking sheet with parchment paper. Spoon the batter onto the prepared sheet and spread it into an even ¼-inch thick circle using a wet spatula or your hands (keep them damp to prevent sticking).
Bake for 12-15 minutes until the edges just start to turn light golden brown and the top appears set but not fully crisp. This par-baking step is essential—it firms up the crust so it can hold toppings without becoming soggy.
Step 4: Add Toppings and Finish Baking
Remove the crust from the oven and sprinkle the 0.25 cup Grated Parmesan Cheese evenly over the surface, especially around the edges for extra crispiness. Add your desired toppings, keeping them light to avoid a soggy center.
Return the pizza to the oven and bake for another 8-10 minutes until the crust is deep golden brown and crisp at the edges. The cheese should be melted and bubbly, and the bottom should have a satisfying crunch when you lift it with a spatula.
Let it rest for 2-3 minutes before slicing—this allows the crust to firm up slightly so it holds together when you serve it.
Pro Tips For Making Rice Pizza Crust
- Pre-Bake the Crust: Bake the rice flour crust for 8-10 minutes at 400°F before adding toppings—this prevents a gummy center. I learned this the hard way after pulling out too many soggy slices.
- Measure Xanthan Precisely: Use exactly 1/2 teaspoon of xanthan gum per cup of rice flour. More makes it rubbery, less leaves it crumbly.
- Skip Cold Ingredients: Make sure your eggs or liquids are room temperature before mixing. Cold ingredients can make the batter seize up, and the crust won’t hold together.
- Use Parchment Paper: Line your pan with parchment instead of greasing it—rice flour batter sticks like glue. Sounds obvious, but I ruined two crusts before switching.
Dietary Considerations for This Dish
Gluten-Free Friendly
This crust is naturally gluten-free, perfect for anyone with celiac disease or gluten sensitivity. The rice flour base combined with xanthan gum provides structure without wheat. I’ve served this to gluten-intolerant friends who couldn’t believe it wasn’t traditional dough. 💪
Vegetarian by Default
The recipe uses only plant-based ingredients plus eggs, making it vegetarian-friendly. For a vegan version, simply replace the eggs with flax eggs (1 tbsp ground flax + 3 tbsp water per egg) and ensure your toppings are plant-based.
Nut-Free Option
All ingredients are naturally nut-free, but always check your rice flour and tapioca starch labels for cross-contamination warnings if allergies are severe. I use Bob’s Red Mill products for their dedicated gluten-free facility.
Dairy Considerations
The only dairy comes from the optional Parmesan cheese. Omit it or use a dairy-free alternative like nutritional yeast or vegan Parmesan for a completely dairy-free version. The crust itself remains just as crispy.
Low-FODMAP Adaptation
For those avoiding FODMAPs, replace the garlic powder with 1/2 tsp chives and use maple syrup instead of sugar for yeast activation. The rice flour and tapioca starch are already low-FODMAP friendly. 🌱
Nutrition Facts
Frequently Asked Questions
Can I use brown rice flour instead of white?
Yes, but expect a nuttier flavor and slightly denser texture. Brown rice flour works in a 1:1 swap, though the crust may be less crisp. For best results, add an extra 1 tsp of xanthan gum to improve binding.
Why does the crust need pre-baking?
Pre-baking at 425°F for 12-15 minutes creates a firm base that won’t turn soggy under toppings. This step mimics the crispness of traditional pizza crust while keeping it gluten-free.
How do I store leftovers?
Keep in an airtight container at room temperature for 1-2 days. To revive, reheat in a 375°F oven for 10 minutes to restore crispness. Freeze for up to 1 month if needed.
Can I make this without eggs?
Replace each egg with a flax egg (1 tbsp ground flax + 3 tbsp water). Let it thicken for 5 minutes before mixing. The texture remains sturdy.

- Jollof Rice Sauce Recipe: West African Tomato and Spice Infusion - September 25, 2026
- Japanese Rice Soup Recipe: Umami-Rich Comfort in a Bowl - September 25, 2026
- Homemade Cream Of Rice Recipe: Silk-Smooth Breakfast in Minutes - September 25, 2026