
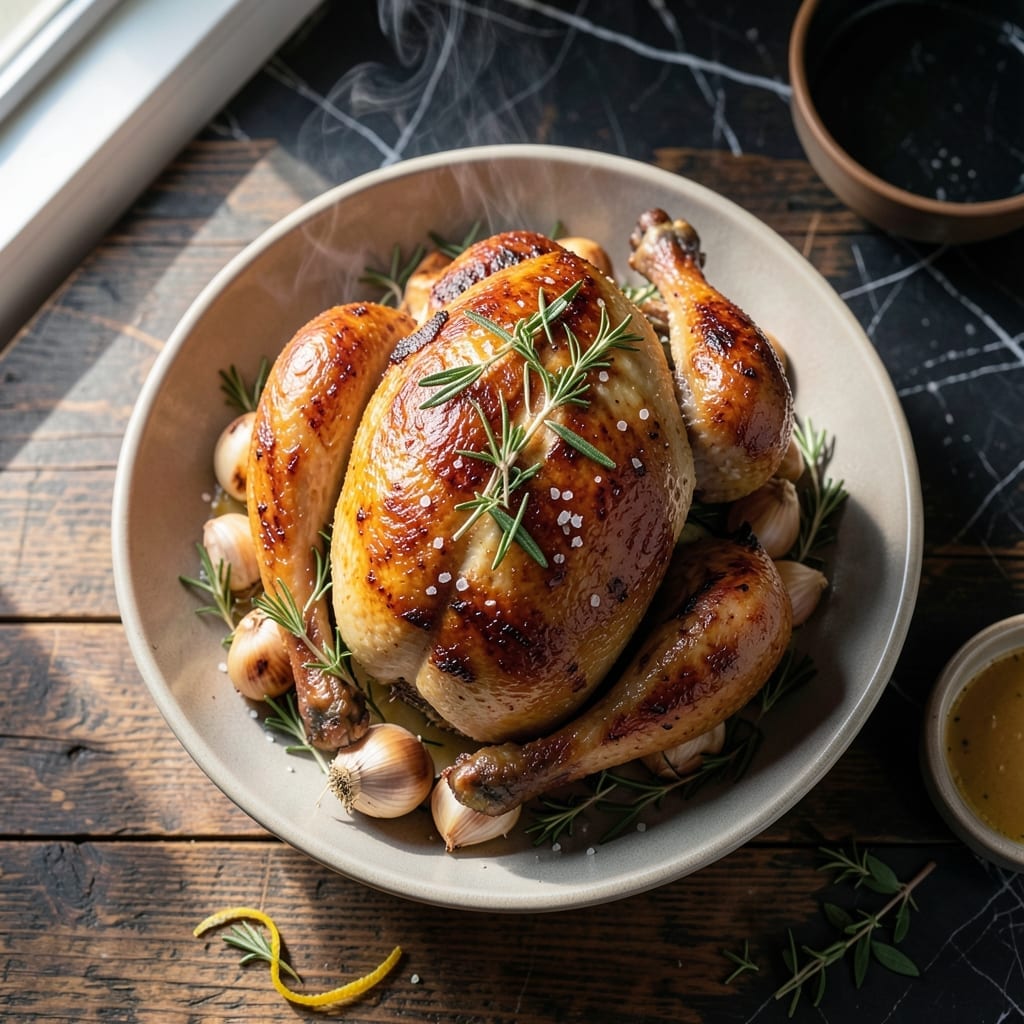
Spring chicken deserves a proper roast, and this method delivers crispy skin with tender, juicy meat every time. The key is starting with high heat to render the fat and create that perfect golden crust.
I’ve tested countless approaches, and the herb-infused butter under the skin is what makes this special. It bastes the meat from within as it roasts, locking in moisture and flavor. A simple seasoning blend enhances without overpowering.
By the time it comes out of the oven, you’ll have a bird with skin that shatters at the touch and meat that stays succulent. The herbs leave a subtle aroma that complements the natural richness of the chicken.
Serve with roasted vegetables to soak up every drop of those flavorful pan juices. This technique works for any spring chicken, regardless of size.
Ingredients for Roast Spring Chicken
A whole bird and a handful of fresh herbs create this showstopping roast with golden skin.
| Ingredient | Amount | Notes |
|---|---|---|
| Whole Spring Chicken 🍗 | 1 whole | About 3-4 lb, giblets removed |
| Unsalted Butter 🧈 | ½ cup | Softened for herb butter |
| Fresh Thyme 🌿 | 2 tbsp | Chopped, or 2 tsp dried |
| Fresh Rosemary 🌿 | 2 tbsp | Chopped, or 2 tsp dried |
| Garlic Cloves 🧄 | 4 cloves | Minced for herb butter |
| Kosher Salt 🧂 | 1 ½ tsp | Divided for seasoning inside and out |
| Black Pepper 🌶️ | 1 tsp | Freshly ground for best flavor |
| Lemon 🍋 | 1 whole | Halved for cavity and garnish |
| Yellow Onion 🧅 | 1 whole | Quartered for cavity |
| Olive Oil 🫒 | 1 tbsp | For rubbing skin |
| All-Purpose Flour 🌾 | 1 tbsp | For thickening pan juices |
| Chicken Stock 🥣 | ½ cup | Low-sodium preferred |
| Fresh Parsley 🌿 | ¼ cup | Chopped, for garnish |
The chicken is the star here. Look for a spring chicken (about 3-4 lb) at your butcher or Whole Foods—younger birds yield the most tender meat. If buying frozen, thaw it in the fridge overnight. The herb butter under the skin is non-negotiable: use European-style butter for richer flavor. Fresh herbs from the farmers market (or even your grocery store’s produce section) will give you the brightest aroma.
No fresh thyme or rosemary? Dried herbs at one-third the amount work in a pinch. Short on garlic? Garlic powder at half the quantity can substitute, though fresh is always better. For the stock, Better Than Bouillon makes a great low-sodium chicken base. The lemon can be swapped for orange if you’re feeling adventurous—adds a nice citrus twist to the pan juices.
Roast the chicken the same day you buy it, or store it in the coldest part of your fridge for up to 2 days. Leftovers keep for 4 days refrigerated. The pan juices can be frozen for 3 months—perfect for a quick sauce later.
Why You’ll Love This Recipe
- One Pan Wonder: I just toss the chicken with butter, thyme, rosemary, and garlic, then let the oven do the work.
- Herb-Infused Bliss: The combination of fresh thyme, rosemary, and garlic makes every bite ridiculously flavorful.
- Feeds a Crowd: I love that one roasted spring chicken easily serves my whole family with leftovers for lunch.
Step-by-Step Instructions for Roast Spring Chicken
Master the technique for crispy skin and herb-infused juiciness with this professional approach.
Step 1: Prepare and Season the Chicken
Pat the whole spring chicken completely dry inside and out with paper towels. This step is crucial for achieving crispy skin—any moisture will prevent proper browning. Season the cavity generously with ½ tsp kosher salt and ½ tsp black pepper.
Stuff the cavity with the quartered yellow onion and one lemon half. This infuses the meat with subtle citrus and onion flavors as it roasts. Tie the legs together with kitchen twine to maintain an even shape, which promotes uniform cooking.
Step 2: Create the Herb Butter and Rub
In a small bowl, mix the 0.5 cup unsalted butter with the 2 tbsp fresh thyme, 2 tbsp fresh rosemary, and minced 4 cloves garlic cloves. The softened butter should blend easily with the herbs to create a fragrant paste.
Gently separate the chicken skin from the breast meat with your fingers, being careful not to tear it. Spread about half of the herb butter under the skin, directly on the meat. Rub the remaining herb butter all over the outside of the chicken. This ensures maximum flavor penetration and crispy skin.
Step 3: Roast at High Heat for Crispy Skin
Preheat your oven to 425°F. Place the chicken breast-side up on a roasting rack set inside a rimmed baking sheet. Drizzle with 1 tbsp olive oil and sprinkle with the remaining 1 tsp kosher salt and ½ tsp black pepper. The oil helps the skin crisp evenly.
Roast for 1 hour to 1 hour 15 minutes, basting with pan juices every 20 minutes. The chicken is done when the internal temperature in the thickest part of the thigh reaches 165°F and the juices run clear. The skin should be deep golden brown and crispy.
Step 4: Make the Pan Sauce
Transfer the chicken to a cutting board and tent loosely with foil. Let it rest for 15 minutes while you make the sauce. Place the roasting pan on the stovetop over medium heat and sprinkle in the 1 tbsp all-purpose flour. Stir to combine with the pan drippings.
Slowly whisk in the 0.5 cup chicken stock, scraping up any browned bits from the bottom of the pan. Simmer for 3-4 minutes until the sauce thickens slightly. Strain if desired for a smoother consistency, then adjust seasoning with additional salt and pepper if needed.
Step 5: Carve and Serve
Remove the twine and carve the chicken. Start by removing the legs and thighs, then separate the wings, and finally slice the breast meat. Arrange the pieces on a serving platter and drizzle with some of the pan sauce.
Garnish with the remaining lemon half and 0.25 cup fresh parsley. Serve the rest of the sauce on the side for dipping. The result should be juicy, herb-infused meat with perfectly crispy skin and a rich, flavorful pan sauce to tie it all together.
Pro Tips For Making Roast Spring Chicken
- Start Hot, Finish Low: I learned this the hard way—sear the chicken at 425°F for 20 minutes first, then drop to 375°F to finish. This guarantees crispy skin without drying out the meat.
- Butter Under Skin: Sounds weird, but it works: gently loosen the skin and rub softened unsalted butter mixed with thyme and rosemary directly onto the breast meat. The flavor penetration is unreal.
- Skip Cold Chicken: After burning three batches, I finally figured out that pulling the chicken from the fridge 30-45 minutes before roasting ensures even cooking. Cold meat seizes up and cooks unevenly.
- Rest Before Carving: Give it a solid 10-15 minutes under loose foil after roasting—yes, even if you’re impatient like me. The juices redistribute, and you won’t cry over a dry bird.
Essential Equipment for Great roast spring chicken
Roasting Pan
A sturdy roasting pan with rack is essential for even air circulation and crispy skin. I use a stainless steel pan from All-Clad—it conducts heat beautifully and won’t warp. The rack elevates the bird, allowing fat to drain away while promoting browning. 💡
Kitchen Twine
Don’t skip the kitchen twine for trussing—it keeps the chicken compact for even cooking. I prefer 100% cotton twine from Mercer Culinary, which is food-safe and won’t burn. A 12-inch length is perfect for securing the legs.
Instant-Read Thermometer
An accurate thermometer is non-negotiable for perfect results. I swear by my ThermoWorks Instant Read—it gives precise readings in 2-3 seconds. Check the thickest part of the thigh, avoiding bone, to confirm 165°F.
Basting Tool
A silicon basting brush or bulb baster helps distribute pan juices during roasting. I use a OXO silicone brush—it’s heat-resistant and easy to clean. Baste every 20 minutes for maximum flavor and moisture.
Mixing Bowls
For the herb butter, a small mixing bowl with a stable base is ideal. I like Pyrex glass bowls—they’re durable and won’t absorb odors. A 1-cup bowl is the perfect size for this recipe.
Carving Knife
After resting, a sharp 8-inch chef’s knife makes carving effortless. I use a Wüsthof Classic—it glides through the crispy skin and tender meat. Keep your knife sharp for clean, even slices every time.
Nutrition Facts
Frequently Asked Questions
What temperature should I roast at for crispy skin?
Start at 425°F to render fat and create a golden crust. This high heat ensures the skin gets crispy while keeping the meat juicy inside.
How long should I let it rest before carving?
Rest the chicken for 15 minutes after roasting. This allows juices to redistribute, ensuring moist, tender meat when you carve.
Can I use dried herbs instead of fresh?
Yes, use dried herbs at 1/3 the amount of fresh. For example, 2 tsp dried thyme replaces 2 tbsp fresh. Dried herbs are more concentrated, so adjust accordingly.
Why do I need to pat the chicken dry first?
Drying the skin removes moisture, which is key for achieving that perfect crispy texture. Any remaining water will steam the skin instead of browning it.

- Jollof Rice Sauce Recipe: West African Tomato and Spice Infusion - September 25, 2026
- Japanese Rice Soup Recipe: Umami-Rich Comfort in a Bowl - September 25, 2026
- Homemade Cream Of Rice Recipe: Silk-Smooth Breakfast in Minutes - September 25, 2026