
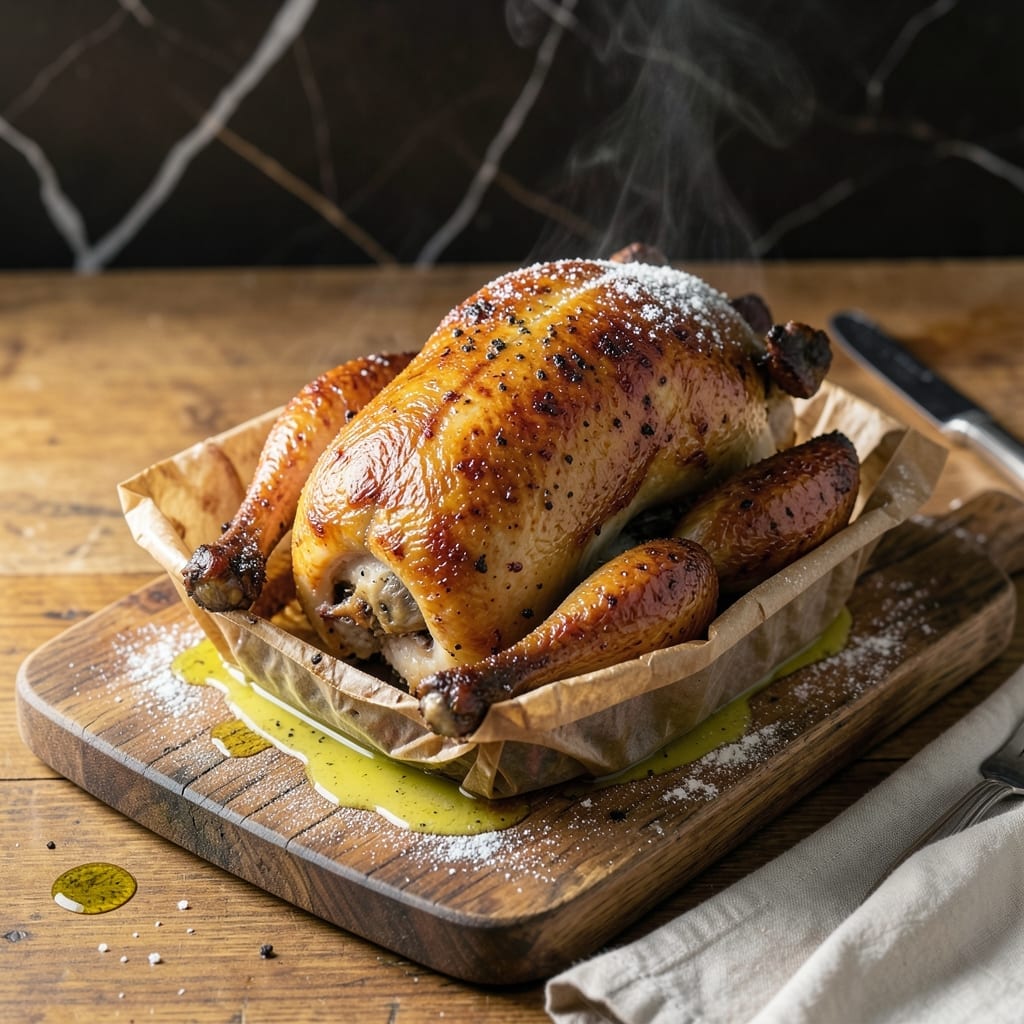
This oven-bag method delivers perfectly juicy roasted chicken with virtually no cleanup. The enclosed environment locks in moisture while allowing the skin to crisp beautifully.
I’ve tested this technique extensively, and it consistently produces tender, flavorful meat without basting or turning. Simply season the chicken, seal it in the bag, and let the oven do the work.
What you get is fall-off-the-bone tenderness with golden, crispy skin—no drying out, no mess. The bag captures all the natural juices, creating a built-in gravy base.
Ideal for busy weeknights or effortless entertaining, this method guarantees restaurant-quality results every time.
Ingredients for Roasted Chicken in Bag
A simple roster of quality ingredients produces restaurant-quality roasted chicken every time.
| Ingredient | Amount | Notes |
|---|---|---|
| Whole Chicken 🍗 | 4 lb | Giblets removed, patted dry |
| Oven Bag 🛍️ | 1 bag | Large size, for roasting |
| All-Purpose Flour 🌾 | 2 tbsp | For dusting bag |
| Unsalted Butter 🧈 | 4 tbsp | Melted, divided use |
| Kosher Salt 🧂 | 1 ½ tsp | Diamond Crystal preferred |
| Freshly Ground Black Pepper 🌶️ | 1 tsp | Coarse grind ideal |
| Garlic Cloves 🧄 | 6 cloves | Smashed, not minced |
| Fresh Rosemary Sprigs 🌿 | 4 sprigs | Whole sprigs preferred |
| Fresh Thyme Sprigs 🍃 | 4 sprigs | Whole sprigs preferred |
| Lemon 🍋 | 1 whole | Halved, for cavity |
| Yellow Onion 🧅 | 1 whole | Quartered, for cavity |
| Olive Oil 🫒 | 1 tbsp | For rubbing skin |
| Chicken Stock 🍲 | ½ cup | Low-sodium preferred |
| Carrots 🥕 | 3 whole | Peeled, cut into chunks |
| Celery Stalks 🥬 | 3 stalks | Cut into large pieces |
The chicken is the foundation—opt for a 4-lb bird for even cooking. Reynolds oven bags are widely available at most supermarkets, but any large oven-safe bag will work. For herbs, fresh rosemary and thyme provide superior aroma compared to dried. Look for sprigs with vibrant green leaves and no wilting. The butter should be unsalted to control seasoning precisely.
No fresh herbs? Dried rosemary and thyme at one-third the amount works in a pinch. If you’re out of lemon, orange halves add a different but equally bright citrus note. For the stock, homemade is ideal, but store-bought low-sodium works fine—Better Than Bouillon is a solid choice. The flour dusting prevents sticking, but cornstarch can substitute if needed.
Store the chicken in the fridge for up to 2 days before cooking, or freeze for 9-12 months. Fresh herbs keep wrapped in damp paper towels for about 1 week. The cooked chicken stays moist for 3-4 days refrigerated and freezes beautifully for 3 months.
Why You’ll Love This Recipe
- I’ll be real: the juicy meat makes killer sandwiches, soups, or tacos the next day. Budget-friendly and zero waste.
- No-Mess Magic: The oven bag does all the work—I just shake in flour, rub the chicken with butter and salt, and let it roast hands-free.
- Juicy Perfection: That butter and salt seep into every bite while the bag locks in moisture, so the meat stays tender, never dry.
- Sunday or Wednesday: Honestly, it’s my go-to for lazy weekends and rushed weeknights alike. One chicken, endless possibilities.
Step-by-Step Instructions for Roasted Chicken in a Bag
This method guarantees moist, flavorful chicken with minimal cleanup and maximum convenience.
Step 1: Prepare the Chicken and Aromatics
Pat the 4 lb Whole Chicken completely dry inside and out with paper towels. This step is crucial for achieving crispy skin. Season the cavity generously with 1.5 tsp Kosher Salt and 1 tsp Freshly Ground Black Pepper.
Stuff the cavity with the 1 whole Lemon (halved), 1 whole Yellow Onion (quartered), 6 cloves Garlic Cloves (smashed), 4 sprigs Fresh Rosemary Sprigs, and 4 sprigs Fresh Thyme Sprigs. These aromatics will infuse the meat with remarkable depth of flavor as it roasts.
Step 2: Prepare the Oven Bag
Place the 1 bag Oven Bag in a roasting pan or baking dish. Add the 2 tbsp All-Purpose Flour to the bag and shake it gently to coat the inside evenly. This prevents sticking and helps create a light, crispy exterior on the chicken.
Rub the outside of the chicken with 1 tbsp Olive Oil and the remaining Kosher Salt and Freshly Ground Black Pepper. Place the chicken breast-side up inside the floured oven bag.
Step 3: Add Vegetables and Seal the Bag
Arrange the 3 whole Carrots (peeled and cut into chunks) and 3 stalks Celery Stalks (cut into large pieces) around the chicken in the bag. Pour the 0.5 cup Chicken Stock into the bag, which will create steam to keep the chicken moist.
Seal the oven bag tightly according to the package instructions, ensuring no steam can escape. Cut four to six small slits in the top of the bag to allow excess steam to vent—this prevents the bag from bursting and helps the skin crisp up beautifully.
Step 4: Roast to Perfection
Preheat your oven to 375°F. Place the roasting pan with the bag in the oven and roast for 1 hour and 20 minutes to 1 hour and 30 minutes, or until the internal temperature of the thickest part of the thigh reaches 165°F on an instant-read thermometer.
The chicken is done when the juices run clear and the skin is golden brown. The oven bag method ensures even cooking and locks in moisture, so you don’t need to baste or turn the chicken during roasting.
Step 5: Rest and Serve
Carefully remove the roasting pan from the oven. Open the oven bag away from your face to avoid steam burns. Transfer the chicken to a cutting board and let it rest for 15 minutes before carving. This allows the juices to redistribute, ensuring every bite is tender and flavorful.
Drizzle the chicken with the remaining 4 tbsp Unsalted Butter (melted) for extra richness. Serve with the roasted carrots, celery, and pan juices for a complete, mess-free meal.
Pro Tips For Making Roasted Chicken In Bag
- Preheat the Bag: Shake 1 tablespoon of flour in the oven bag before adding the chicken—this prevents the bag from bursting and helps the skin crisp up.
- Butter Under Skin: Work your fingers under the chicken skin to spread softened butter evenly; I learned this the hard way—dry breast meat is no fun.
- Skip the Overcrowding: Resist the urge to stuff the bag with extra veggies—give the chicken room so it cooks evenly without steaming itself.
- Rest in Bag: Let the chicken rest 10 minutes in the unopened bag after roasting; it keeps everything juicy while you set the table.
Flavor Customization for These Flavors
Herb Infusions
Swap the rosemary and thyme for sage and marjoram for a more earthy profile. I also love using tarragon and parsley—add 5 sprigs of each to the cavity for a French-inspired twist. Fresh herbs always deliver the most vibrant flavors. 🌿
Citrus Variations
Replace the lemon with lime or orange halves for a different citrus note. For extra brightness, add 2 tbsp orange zest to the butter before rubbing it on the skin. The acidity helps tenderize the meat while adding a fresh aroma.
Spicy Kick
For heat lovers, add 1 tbsp smoked paprika and ½ tsp cayenne pepper to the flour before dusting the bag. Alternatively, tuck 2 chopped jalapeños and 3 crushed red pepper flakes into the cavity for a subtle, smoky heat. 🔥
Sweet and Savory
Drizzle 2 tbsp honey or maple syrup over the chicken before sealing the bag. This creates a beautiful glaze and balances the savory herbs. Pair it with 1 tsp ground cinnamon in the flour for a warm, aromatic touch.
Umami Boost
Add 4 dried shiitake mushrooms or 2 tbsp soy sauce to the cavity for a deep, savory depth. Mushrooms release their juices during cooking, infusing the meat with rich, earthy flavors. I often combine this with a splash of Worcestershire sauce.
Mediterranean Twist
Stuff the cavity with 10 pitted kalamata olives and 4 sun-dried tomatoes for bold Mediterranean flavors. Add 1 tsp dried oregano to the flour for an extra layer of complexity. This variation pairs perfectly with roasted potatoes. ✨
Nutrition Facts
Frequently Asked Questions
What temperature should the oven be set to?
Preheat your oven to 375°F for even cooking. This temperature allows the chicken to cook through while keeping the skin crispy.
How long does the chicken need to rest after cooking?
Let the chicken rest for 15 minutes before carving. This ensures the juices redistribute, making every bite tender and flavorful.
Can I use a different type of bag?
Stick to oven-safe roasting bags, as they’re designed for high heat. Avoid plastic bags not labeled for oven use, as they may melt or release harmful chemicals.
What if the bag bursts while cooking?
Cutting small slits in the top of the bag prevents this. If it happens, continue cooking but check for doneness early to avoid overcooking.

- Jollof Rice Sauce Recipe: West African Tomato and Spice Infusion - September 25, 2026
- Japanese Rice Soup Recipe: Umami-Rich Comfort in a Bowl - September 25, 2026
- Homemade Cream Of Rice Recipe: Silk-Smooth Breakfast in Minutes - September 25, 2026