
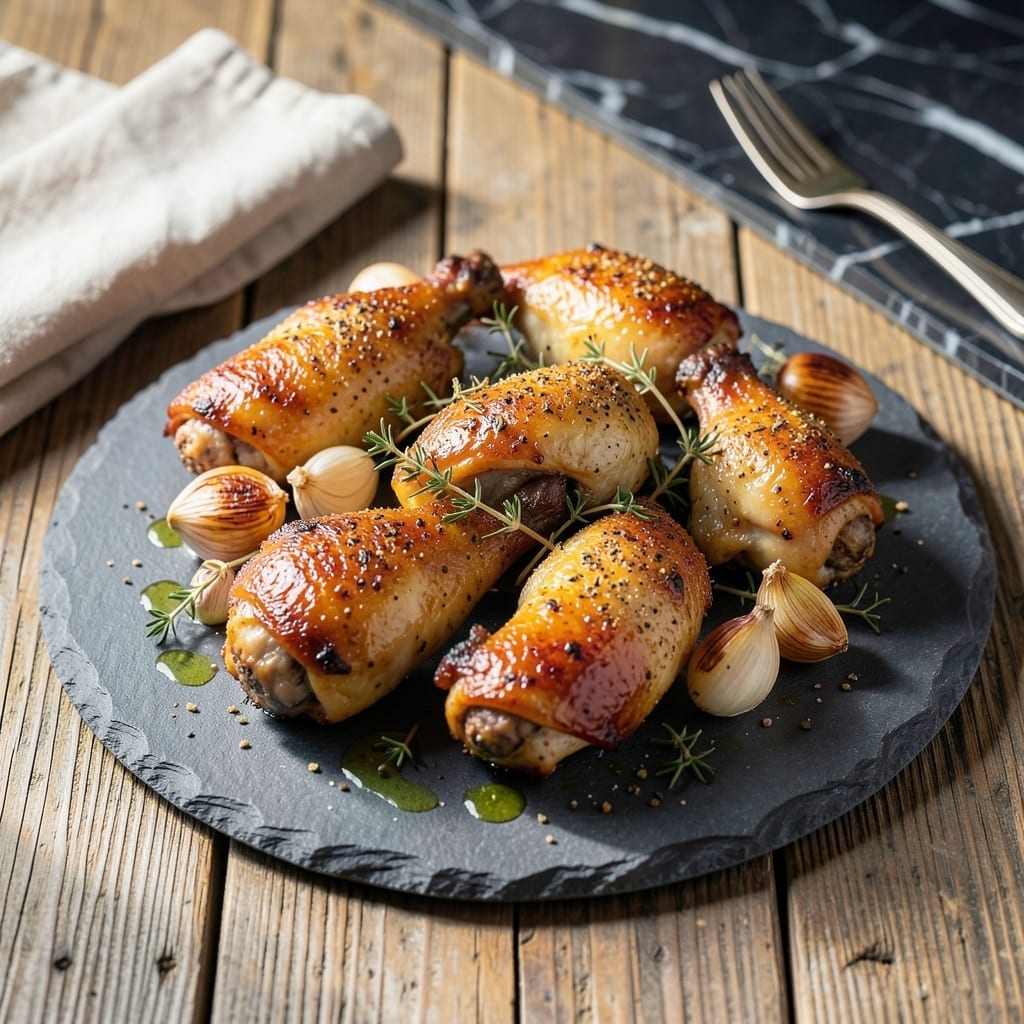
This method delivers crispy skin and juicy meat without fail, using a simple technique perfected over years of testing.
The secret lies in high heat and proper spacing—allowing hot air to circulate around each piece ensures even browning and tender meat.
Seasoning is straightforward but essential: salt, pepper, and herbs create a flavorful crust that enhances every bite.
By the time it comes out of the oven, you’ll have golden, shatteringly crispy skin with meat so juicy it nearly falls off the bone.
Ingredients for Roasted Chicken Parts
High heat, proper spacing, and a few herbs deliver that perfect crispy skin and juicy meat every time.
| Ingredient | Amount | Notes |
|---|---|---|
| Chicken Parts 🍗 | 3 ½ lb | Bone-in, skin-on, thighs and drumsticks |
| Kosher Salt 🧂 | 1 ½ tbsp | Diamond Crystal preferred for even coating |
| Freshly Ground Black Pepper 🌶️ | 1 tsp | Coarse grind for texture |
| Garlic Powder 🧄 | 1 tsp | Not garlic salt for pure flavor |
| Smoked Paprika 🌶️ | 1 tsp | For depth and subtle smokiness |
| Dried Thyme 🌿 | 1 tsp | Rubbed between fingers to release oils |
| Dried Rosemary 🍃 | 1 tsp | Crushed to enhance aroma |
| Olive Oil 🫒 | 2 tbsp | Extra-virgin for richness |
| Unsalted Butter 🧈 | 2 tbsp | Melted for basting |
| Fresh Lemon 🍋 | 1 whole | Zest and juice for brightness |
| Fresh Thyme Sprigs 🌿 | 4 sprigs | Optional garnish for serving |
| Fresh Rosemary Sprigs 🍃 | 2 sprigs | Optional garnish for serving |
The chicken parts are non-negotiable—bone-in, skin-on thighs and drumsticks give you that crispy skin and juicy meat the intro promises. Whole Foods or Costco have the best selection, but any grocery store will do. Look for pieces with intact skin (no tears) and a healthy pink color. If you see grayish meat or a sour smell, pass on it. Pat them dry before seasoning—this is critical for crispiness.
No smoked paprika? Regular paprika plus a pinch of cayenne works in a pinch. Fresh herbs can replace dried at three times the amount—use fresh thyme and rosemary leaves stripped from the stems. If you’re missing garlic powder, fresh minced garlic (about 2 cloves) is an upgrade. The butter can be swapped for ghee or avocado oil if avoiding dairy, but you’ll lose some richness.
Seasoned chicken can sit uncovered in the fridge for up to 24 hours before roasting—this actually improves flavor. Leftovers keep 4-5 days refrigerated, but the skin loses crispness. Reheat in a 400°F oven for 10-15 minutes to revive it. Not recommended for freezing as texture suffers.
Why You’ll Love This Recipe
- One Pan Wonder: I toss everything on a sheet pan and let the oven do the work—no fancy techniques, just chicken, salt, pepper, garlic powder, and smoked paprika.
- Smoky Depth: The smoked paprika gives it this rich, almost campfire-like flavor that makes every bite feel special.
- Meal Prep Magic: I roast a big batch on Sunday and use it in salads, tacos, or sandwiches all week long.
- Budget Stretcher: A family pack of chicken parts costs less than whole chickens sometimes, and it feeds us for days.
Step-by-Step Instructions for Roasted Chicken Parts
Here’s the method I use to guarantee perfectly crispy skin and juicy meat every time.
Step 1: Dry and Season the Chicken Parts
Pat all of the 3.5 lb Chicken Parts completely dry with paper towels—this is the foundation for crispy skin. Any moisture left on the surface will steam the skin during roasting instead of allowing it to crisp.
In a small bowl, combine the 1.5 tbsp Kosher Salt, 1 tsp Freshly Ground Black Pepper, 1 tsp Garlic Powder, 1 tsp Smoked Paprika, 1 tsp Dried Thyme, and 1 tsp Dried Rosemary. Rub this mixture evenly over every surface of the chicken parts, pressing it into the skin so it adheres well.
Step 2: Prepare the Roasting Pan and Coating
Position a rack in the center of your oven and preheat to 425°F. While the oven heats, drizzle the 2 tbsp Olive Oil over the bottom of a rimmed baking sheet or roasting pan.
Melt the 2 tbsp Unsalted Butter and add it to the baking sheet, tilting to coat the surface evenly. The combination of oil and butter creates the perfect environment for even browning. This step ensures the chicken won’t stick and promotes maximum crispiness.
Step 3: Roast Until Golden and Crisp
Arrange the chicken parts skin-side up on the prepared baking sheet, leaving space between each piece so air can circulate. Roast for 35-40 minutes, resisting the urge to flip or move the pieces.
You’ll know it’s ready when the skin turns a deep golden brown and the internal temperature reaches 175°F at the thickest part of the meat. The juices should run clear when pierced, and the skin should be audibly crisp when tapped.
Step 4: Finish with Fresh Lemon and Herbs
Remove the chicken from the oven and immediately squeeze the juice from the 1 whole Fresh Lemon over the hot pieces. This brightens the flavors and cuts through the richness of the skin.
Garnish with the 4 sprigs Fresh Thyme Sprigs and 2 sprigs Fresh Rosemary Sprigs for a fresh herbal note. Let the chicken rest for 5-10 minutes before serving to allow the juices to redistribute, ensuring every bite is moist and flavorful.
Pro Tips For Making Roasted Chicken Parts
- Pat Dry First: I learned this the hard way—skip this and your chicken steams instead of roasts. Use paper towels to thoroughly dry each piece before seasoning, so the skin gets crispy.
- Crank the Oven: Start at 425°F for the first 20 minutes, then drop to 375°F to finish. That initial blast of heat locks in juices and gives you that golden-brown crust.
- Don’t Crowd the Pan: Resist the urge to squeeze all the pieces in one tray. Give them space—about an inch apart—so they roast, not steam.
- Season Twice: Dust the chicken with garlic powder and smoked paprika right before it goes in the oven. A second sprinkle halfway through amps up the flavor without burning the spices.
Troubleshooting Great roasted chicken parts
Skin Not Crispy
If your skin isn’t crispy, the chicken likely wasn’t dry enough before seasoning. Pat each piece thoroughly with paper towels until no moisture remains. Also, check your oven temp—425°F is critical for that golden crunch. 🌡️
Uneven Cooking
Uneven cooking usually means crowded pieces. Leave 1-2 inches between each part on the baking sheet so hot air circulates. Rotate the pan halfway through if your oven has hot spots.
Dry Meat
Overcooking is the culprit here. Pull the chicken when it hits 175°F internal temperature—any higher and the meat dries out. Use a meat thermometer for accuracy, and always rest it for 5-10 minutes before serving.
Sticking to Pan
If pieces stick, your pan wasn’t properly coated. Use both 2 tbsp olive oil and 2 tbsp melted butter for a non-stick surface. A heavy-duty baking sheet also helps prevent this issue.
Seasoning Falls Off
Press the seasoning mix firmly into the skin so it adheres. If using fresh herbs instead of dried, remember they’re 3x less concentrated—adjust amounts accordingly. Let seasoned chicken sit 10-15 minutes before roasting for better adhesion.
Lack of Flavor
Don’t skip the lemon juice at the end—it brightens all the flavors. If the dish still tastes flat, increase the kosher salt slightly next time. Fresh herbs as garnish also add a final flavor boost. 💡
Nutrition Facts
Frequently Asked Questions
What’s the best oven temperature?
Use 425°F for perfectly crispy skin and juicy meat. This high heat ensures even browning without drying out the meat inside.
Can I use boneless chicken?
Not recommended—bone-in, skin-on parts deliver the best texture. Bones add flavor, while skin crispiness relies on the fat and moisture balance only this cut provides.
How do I keep the skin crispy after cooking?
Serve immediately after roasting. If storing, reheat in a 400°F oven for 10-15 minutes to restore crispiness. Microwaving will make the skin soggy.
Why rest the chicken before serving?
Resting for 5-10 minutes lets juices redistribute. Cutting too soon causes dry meat, as the juices escape onto the cutting board instead of staying in the meat.

- Mandhi Rice Recipe: Yemeni Spiced Lamb and Rice Feast - September 25, 2026
- Chuy’s Green Chili Rice Copycat Recipe: Spicy Southwest Flavor in Every Bite - September 25, 2026
- Beaten Rice Recipe: Fluffy Grains With Nutty Depth - September 25, 2026