
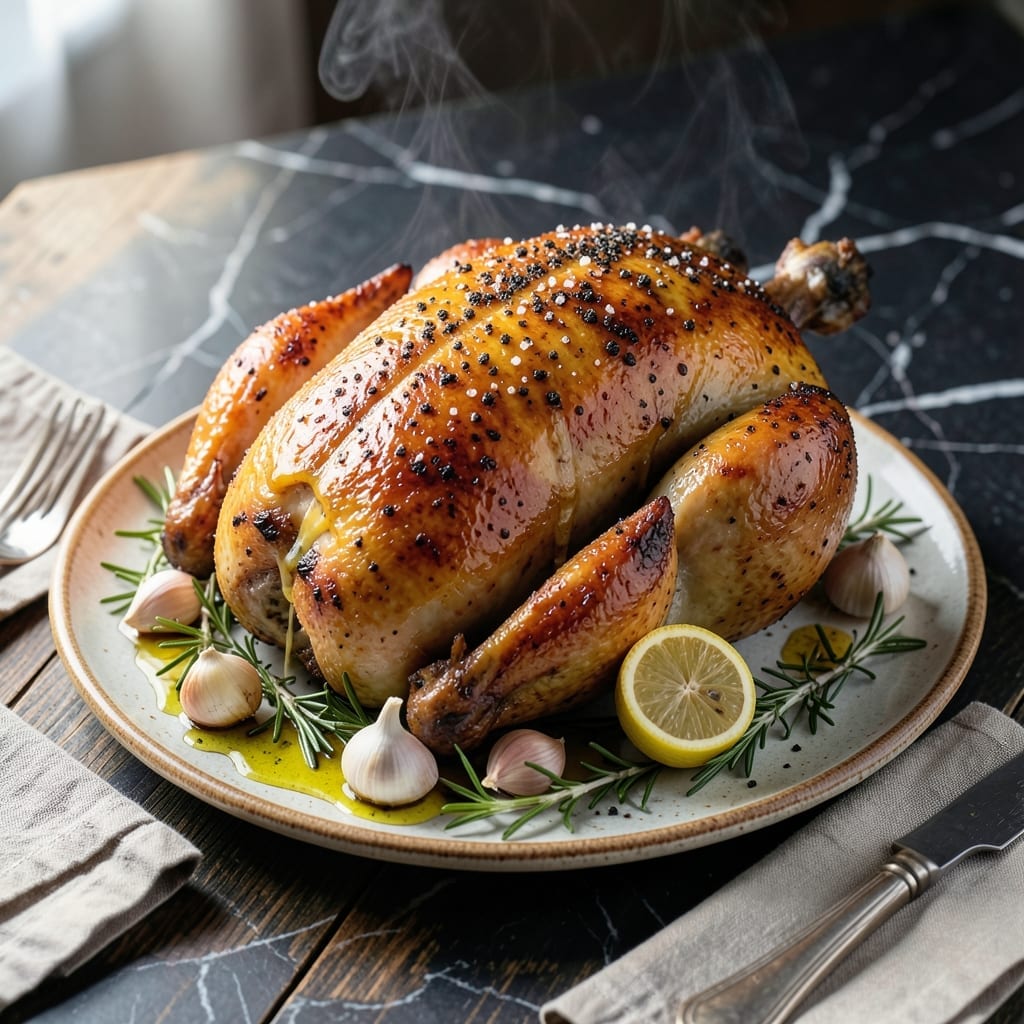
Perfecting roast chicken comes down to mastering the balance between golden brown skin and succulent meat. This method delivers both without fail, every single time.
The key lies in proper seasoning, precise oven temperature, and knowing exactly when to pull it from the heat. I’ve refined this technique through countless Sunday dinners, ensuring the skin crisps beautifully while the meat stays juicy.
What you’ll get is a centerpiece-worthy bird with crackling skin and tender flesh that falls off the bone. The aroma alone will gather everyone around the table before it’s even carved.
Pair it with roasted vegetables or a simple salad for a complete meal that feels special but requires minimal effort.
Ingredients for Roat Chicken
These carefully selected ingredients ensure golden skin and juicy meat for a perfect roast.
| Ingredient | Amount | Notes |
|---|---|---|
| Whole Chicken 🍗 | 4 lb | Giblets removed, patted dry |
| Unsalted Butter 🧈 | ½ cup | Softened to room temperature |
| Kosher Salt 🧂 | 1 ½ tbsp | Diamond Crystal preferred |
| Freshly Ground Black Pepper 🌶️ | 1 tsp | Coarsely ground for texture |
| Garlic Cloves 🧄 | 6 cloves | Minced into fine paste |
| Fresh Rosemary 🌿 | 2 tbsp | Finely chopped, stems discarded |
| Fresh Thyme 🍃 | 2 tbsp | Leaves stripped from stems |
| Lemon 🍋 | 1 whole | Zested and juiced |
| Yellow Onion 🧅 | 1 whole | Quartered for cavity |
| Carrots 🥕 | 3 whole | Peeled and chopped |
| Celery Stalks 🌿 | 3 pieces | Chopped into large pieces |
| Chicken Stock 💧 | ½ cup | Low-sodium preferred |
| Extra-Virgin Olive Oil 🫒 | 1 tbsp | For basting and crisping |
The chicken itself is paramount. Source a high-quality bird—I prefer air-chilled from Whole Foods or a trusted local butcher. Look for plump, moist skin and a clean, fresh aroma. Butter quality matters too—European-style has higher fat content, which translates to richer flavor and better browning. The herbs should be vibrant and fragrant; avoid any that look wilted or dry.
No fresh herbs? Dried can work at one-third the amount, but fresh delivers superior aroma and flavor. Short on garlic? Garlic powder at half the quantity in the butter mix is acceptable. If you can’t find a 4-pound bird, adjust cooking time accordingly—15 minutes per pound at 425°F is a reliable guide. The lemon can be swapped for lime or orange for a subtle variation.
Store the raw chicken in its original packaging on a plate in the coldest part of your fridge—use within 2 days or freeze for up to 9 months. Leftovers keep beautifully, wrapped tightly, for 4 days in the fridge or 3 months frozen.
Why You’ll Love This Recipe
- One Pan Magic: I just rub the chicken with butter, garlic, salt, and pepper, pop it in the oven, and let it do its thing.
- Garlic Butter Goodness: That butter and garlic combo makes the skin so crispy and flavorful, I could eat it plain.
- Feeds Everyone: It’s my go-to for Sunday dinner, but honestly, it’s just as good sliced up for sandwiches all week.
- Budget Stretcher: A whole chicken costs less than buying parts, and I get multiple meals out of it—leftovers taste even better.
Step-by-Step Instructions for Roast Chicken
These precise techniques ensure a perfectly browned exterior and consistently tender, flavorful meat.
Step 1: Prepare and Season the Whole Chicken
Pat the 4 lb Whole Chicken completely dry inside and out with paper towels. Any remaining moisture prevents proper browning. Season the cavity and exterior generously with 1.5 tbsp Kosher Salt and 1 tsp Freshly Ground Black Pepper, ensuring even coverage.
Rub the skin with 0.5 cup Unsalted Butter that has been softened to room temperature. This creates a rich, golden crust while keeping the meat moist. Let the seasoned bird sit uncovered in the refrigerator for 1 hour to allow the salt to penetrate and the skin to dry further.
Step 2: Aromatize the Cavity and Prepare the Roasting Pan
Stuff the cavity with 1 whole Lemon (zested and juiced), 6 cloves Garlic Cloves (minced into a fine paste), 1 whole Yellow Onion (quarterd), 2 tbsp Fresh Rosemary, and 2 tbsp Fresh Thyme. These aromatics infuse the meat with bright, herbal notes as it roasts.
Place the 3 whole Carrots (peeled and chopped) and 3 pieces Celery Stalks (chopped into large pieces) in the bottom of a roasting pan. These vegetables form a natural rack, elevating the chicken for even air circulation. Pour 0.5 cup Chicken Stock into the pan to create steam and prevent the drippings from burning.
Step 3: Roast at High Heat for Optimal Browning
Preheat the oven to 425°F. Place the chicken breast-side up on the vegetable bed in the roasting pan. Drizzle with 1 tbsp Extra-Virgin Olive Oil for additional crispness. Roast for 1 hour to 1 hour 15 minutes, or until the skin is deep golden brown and the juices run clear.
Baste the chicken with the pan juices every 20 minutes to promote even browning and enhance flavor development. The internal temperature should reach 165°F in the thickest part of the thigh when measured with an instant-read thermometer.
Step 4: Rest and Carve for Maximum Juiciness
Transfer the roasted chicken to a cutting board and tent loosely with foil. Let it rest for 15-20 minutes before carving. This critical step allows the juices to redistribute throughout the meat, ensuring every bite remains succulent.
Carve the chicken by first removing the legs and thighs, then slicing the breast meat against the grain. Serve the pieces arranged on a platter with the roasted vegetables. The skin should be crisp and deeply colored, while the meat remains tender and infused with the flavors of the herbs and aromatics.
Pro Tips For Making Roat Chicken
- Pat It Dry: Use paper towels to thoroughly dry the chicken skin—I learned this the hard way after ending up with soggy, pale skin instead of that crisp golden crust.
- Room Temp First: Let the chicken sit out for 30-45 minutes before roasting; it cooks more evenly and the butter-garlic rub spreads better over the skin.
- Butter Under Skin: Gently loosen the skin and rub softened butter, salt, and crushed garlic directly on the meat—this actually changes the outcome, giving you juicier meat and deeper flavor.
- Rest Before Carving: Give it a solid 15 minutes under foil after roasting; I used to rush this part and wondered why my chicken was dry.
Dietary Considerations for These Flavors
Gluten-Free Friendly
This dish is naturally gluten-free, making it safe for anyone with gluten sensitivities or celiac disease. The ingredients list contains no wheat, barley, or rye derivatives, and I always double-check my chicken stock to ensure it’s certified gluten-free. 💪
Dairy Considerations
The recipe includes 0.5 cup Unsalted Butter, which contains dairy. For a dairy-free version, swap the butter for olive oil or a plant-based alternative like Miyoko’s Cultured Vegan Butter. The skin will still crisp beautifully.
Low-Carb Option
This creation fits perfectly into low-carb or keto diets since it contains no added sugars or starchy ingredients. The carrots and onion contribute minimal carbs, but you can omit them or replace with celery and mushrooms for even fewer net carbs.
Allergen Notes
Be mindful of potential allergens in the ingredients. The chicken stock may contain soy or other additives, so always verify the label. If serving guests with allergies, I recommend making a custom batch of stock to avoid cross-contamination. ✨
Paleo Adaptations
For a paleo-friendly version, ensure your chicken stock is free of additives and processed sugars. Replace the butter with ghee or coconut oil. The rest of the ingredients—herbs, lemon, garlic—are already paleo-compliant.
Sodium Control
To reduce sodium, opt for low-sodium chicken stock and cut the Kosher Salt by half. You can always adjust seasoning at the table with flaky sea salt. The lemon and herbs will still pack plenty of flavor.
Nutrition Facts
Frequently Asked Questions
What temperature should the oven be set to?
Preheat your oven to 425°F for optimal browning and even cooking. This high heat ensures crispy skin while keeping the meat juicy.
How long should I let it rest after cooking?
Always rest the bird for 15-20 minutes before carving. This allows juices to redistribute, preventing dry meat when sliced.
Can I use dried herbs instead of fresh?
Yes, use 1/3 the amount of dried herbs. Fresh delivers better flavor, but dried works in a pinch.
What if the skin isn’t browning enough?
Baste every 20 minutes with pan juices and ensure the oven is fully preheated. A broiler finish for 2-3 minutes can help crisp it up.

- Jollof Rice Sauce Recipe: West African Tomato and Spice Infusion - September 25, 2026
- Japanese Rice Soup Recipe: Umami-Rich Comfort in a Bowl - September 25, 2026
- Homemade Cream Of Rice Recipe: Silk-Smooth Breakfast in Minutes - September 25, 2026