
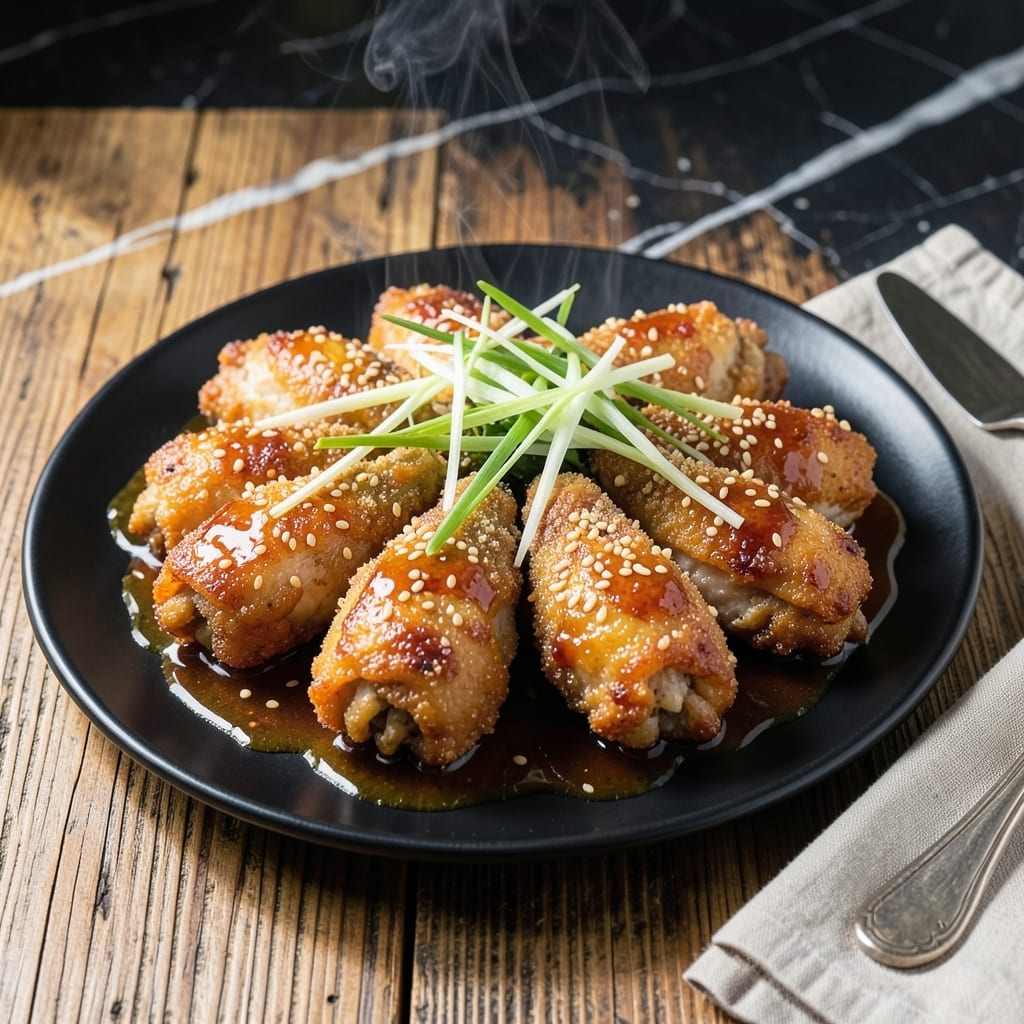
This sesame chicken delivers restaurant-quality results with a glossy honey glaze and satisfying crunch every time. The secret lies in a two-step frying process that locks in moisture while creating a crispy exterior.
I developed this method to ensure the coating stays perfectly crisp even after being tossed in the sticky sauce. The balance between sweet, savory, and nutty sesame flavors makes each bite irresistible.
By the time you plate this dish, you’ll have golden-brown chicken pieces coated in a thick, aromatic glaze with toasted sesame seeds adding the final texture. It’s a foolproof way to bring takeout flavor home.
Serve with steamed rice and steamed broccoli for a complete meal. Here’s how to make it.
Ingredients for Seasame Chicken
Pantry staples meet a few fresh picks for that takeout magic at home.
| Ingredient | Amount | Notes |
|---|---|---|
| Chicken Thighs 🍗 | 1 ½ lb | Boneless, skinless, cut into bite-sized |
| Cornstarch 🌾 | ½ cup | For crispy coating |
| All-Purpose Flour 🌾 | ½ cup | Balances cornstarch texture |
| Large Eggs 🥚 | 2 whole | Beaten for binding coating |
| Honey 🍯 | ½ cup | For sticky, glossy glaze |
| Soy Sauce 🫒 | ⅓ cup | Low-sodium preferred |
| Rice Vinegar 🍚 | 2 tbsp | Adds tangy balance |
| Sesame Oil 🫒 | 1 tbsp | Toasted for nutty flavor |
| Garlic Cloves 🧄 | 4 cloves | Minced for sauce |
| Fresh Ginger 🌿 | 1 tbsp | Grated, for depth |
| Sesame Seeds 🌰 | 3 tbsp | Toasted for garnish |
| Vegetable Oil 🫒 | 2 cups | For frying, neutral flavor |
| Salt 🧂 | 1 tsp | Kosher or sea salt |
| Black Pepper 🌶️ | ½ tsp | Freshly ground preferred |
| Red Pepper Flakes 🌶️ | ½ tsp | Optional for heat |
The chicken is everything here. Thighs stay juicier than breasts through the double-fry—grab them skinless and boneless from Costco for the best deal. Cornstarch is non-negotiable for that shatter-crisp coating (the good stuff, not the expired box in the back of your cabinet). For the sesame oil, Kadoya or Spector Organics have the best toasty flavor. Skip anything labeled ‘light’—it’s flavorless.
No honey? Maple syrup or agave works in a pinch (flavor shifts slightly but still sweet). Out of rice vinegar? Apple cider vinegar at half the amount—it’s stronger. Fresh ginger not on hand? Ground ginger at one-third the amount in a bind, but fresh is night-and-day better. For the soy sauce, Kikkoman or San-J Tamari (gluten-free) are solid. Short on sesame seeds? Crushed peanuts add a similar crunch.
Fry the chicken in batches so the oil stays hot—crowding drops the temp and makes greasy pieces. The glaze thickens as it cools, so serve immediately. Leftovers keep 3-4 days in the fridge but lose that crisp (still tasty though). Reheat in a dry skillet to revive some crunch.
Why You’ll Love This Recipe
- One Bowl Wonder: Honestly, I just dump the cornstarch, flour, and eggs in one bowl—no fancy prep, no extra dishes.
- Crispy Honey Glaze: That sticky-sweet honey coating on the crispy chicken thighs? I could eat it by the spoonful.
- Weeknight Hero: I’ve served this for last-minute dinners, potlucks, and even packed it for lunch the next day.
- Budget Stretcher: Chicken thighs stay cheap, and a little honey goes a long way to make it taste like takeout.
Step-by-Step Instructions for Sesame Chicken
Here’s how to get that perfect crispy coating and glossy honey glaze every time.
Step 1: Prep and Coat the Chicken
Cut the 1.5 lb Chicken Thighs into 1-inch pieces and pat them completely dry with paper towels. Season with the 1 tsp Salt and 0.5 tsp Black Pepper. This step is crucial—dry chicken means crispy coating, not soggy.
In a shallow bowl, whisk together the 0.5 cup Cornstarch and 0.5 cup All-Purpose Flour. In another bowl, beat the 2 whole Large Eggs until smooth. Dip each piece of chicken into the eggs first, letting excess drip off, then coat thoroughly in the cornstarch-flour mixture. Press gently so the coating adheres well. This double coating gives you that signature crunch.
Step 2: Fry to Golden Perfection
Heat the 2 cups Vegetable Oil in a large, deep skillet over medium-high heat until it reaches 350°F. To test readiness, drop in a pinch of the coating mix—it should sizzle immediately and float to the surface.
Working in batches to avoid crowding, fry the coated chicken for 4-5 minutes, turning occasionally, until golden brown and crispy on all sides. The coating should look like it’s bubbling slightly—that’s how you know it’s getting that perfect crunch. Transfer to a paper towel-lined plate to drain. Don’t skip the batch cooking; overcrowding lowers the oil temperature and makes chicken greasy.
Step 3: Make the Glossy Honey-Garlic Sauce
In a clean saucepan, combine the 0.5 cup Honey, 0.33 cup Soy Sauce, 2 tbsp Rice Vinegar, 1 tbsp Sesame Oil, minced 4 cloves Garlic Cloves, and grated 1 tbsp Fresh Ginger. Add the 0.5 tsp Red Pepper Flakes for a subtle kick. Simmer over medium heat for 3-4 minutes, stirring frequently, until the sauce thickens slightly and becomes syrupy.
You’ll notice the sauce darken and take on a beautiful gloss—this is the honey caramelizing. Keep an eye on it; honey can burn quickly. Once it coats the back of a spoon, remove from heat immediately. The aroma should be a perfect balance of sweet, salty, and garlicky.
Step 4: Toss and Garnish
Add all the fried chicken to the saucepan and toss gently to coat every piece evenly. The sauce should cling to the crispy coating, creating that signature sticky, glossy finish. Work quickly so the chicken stays crispy—if it sits too long in the sauce, it can turn soggy.
Transfer to a serving plate and sprinkle with the 3 tbsp Sesame Seeds while still hot. The sesame seeds will stick better to the warm, sticky glaze. Serve immediately while the chicken is still crispy and the sauce is at its glossiest. The contrast of textures—crunchy coating, tender chicken, and silky sauce—is what makes this dish irresistible.
Pro Tips For Making Seasame Chicken
- Double Coat the Chicken: Dip the chicken in egg, then flour, then egg again, then cornstarch—this extra layer makes the coating crispier and helps it hold onto the honey sauce better.
- Use Thighs, Not Breasts: Chicken thighs stay juicier when fried and hold up to the sweet-savory sauce without drying out like breasts can.
- Fry in Batches: Crowding the pan drops the oil temp, leading to soggy coating—I learned this the hard way after my first few greasy, limp attempts.
- Warm the Honey First: Microwave the honey for 10-15 seconds before mixing the sauce so it blends smoothly instead of clumping in cold liquid.
Common Mistakes When Making Perfect Results
Overcrowding the Pan
Frying too many chicken pieces at once drops the oil temperature below 350°F, resulting in greasy, soggy coating instead of crispy. I fry in batches of 8-10 pieces at a time in my 12-inch skillet. The oil should always sizzle when you add chicken.
Skipping the Drying Step
Wet chicken creates steam that prevents the coating from crisping properly. I always pat pieces completely dry with paper towels before dredging. Even a little moisture can ruin your texture. This takes 2 extra minutes but makes all the difference. 💡
Sauce Over-Reduction
Letting the honey sauce cook too long causes it to caramelize into hard candy that won’t coat the chicken. I pull it off heat as soon as it thickens enough to coat a spoon. This usually takes 3-4 minutes over medium heat.
Premature Sauce Toss
Adding chicken to the sauce too early makes it soggy. I wait until all pieces are fried and crispy before tossing. Work quickly—30 seconds of tossing is enough. The residual heat will thicken the sauce further as it clings to the chicken.
Neglecting Oil Temperature
Frying at too low a temperature (below 325°F) absorbs oil into the coating. I use a candy thermometer clipped to the pan. If you don’t have one, test with a wooden chopstick—it should bubble vigorously when dipped in hot oil. 🌡️
Incorrect Coating Ratio
Using too much flour makes the coating dense and bready rather than light and crispy. I stick to the 1:1 cornstarch to flour ratio. The cornstarch creates that shatter-crisp texture that makes this dish special.
Nutrition Facts
Frequently Asked Questions
Can I use chicken breast instead of thighs?
Yes, but thighs stay juicier. If using breast, reduce cooking time to 3-4 minutes per side to prevent dryness. The flavor will be milder but still delicious.
How do I keep the coating crispy longer?
Serve immediately on a wire rack to prevent steam buildup. Avoid covering or storing in an airtight container until completely cooled. Reheat in a 400°F oven for 5 minutes to revive crunch.
Can I make the sauce ahead of time?
Prepare the sauce up to 2 days ahead and store in the fridge. Reheat gently over low heat before tossing with freshly fried chicken. Stir in 1 tsp water if it thickens too much.
What’s the best oil for frying?
Use neutral oils like vegetable, canola, or peanut oil with a high smoke point. Avoid olive oil—it burns at frying temperatures. Maintain oil at 350°F throughout for perfect results.

- Jollof Rice Sauce Recipe: West African Tomato and Spice Infusion - September 25, 2026
- Japanese Rice Soup Recipe: Umami-Rich Comfort in a Bowl - September 25, 2026
- Homemade Cream Of Rice Recipe: Silk-Smooth Breakfast in Minutes - September 25, 2026