
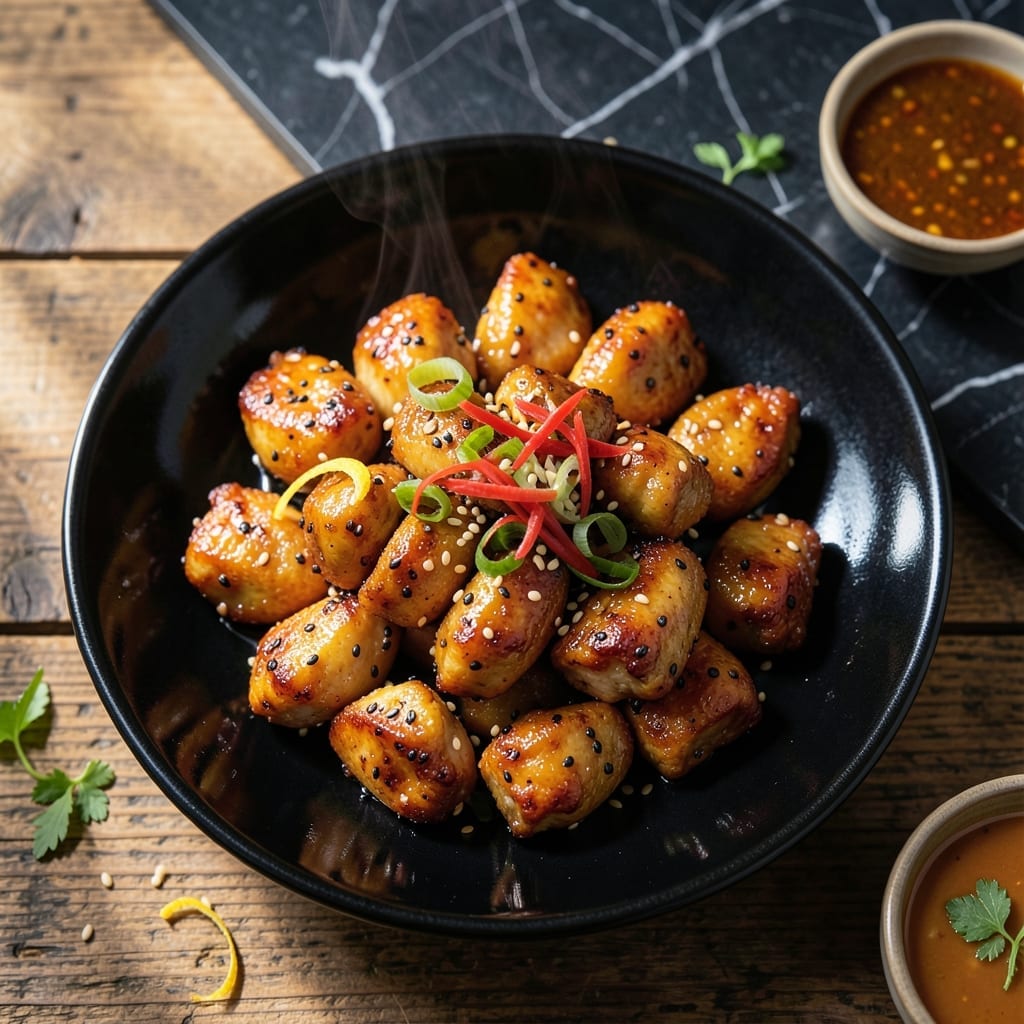
This sesame chicken delivers the classic takeout experience with a homemade touch that’s even better than delivery. The secret lies in achieving that perfect balance between tender chicken and a glossy, sticky glaze that clings to every bite.
I’ve refined this method to ensure the chicken stays juicy while the sauce caramelizes into a rich, nutty coating. A simple marinade and quick fry create a base that’s ready to soak up the sesame-infused sauce.
The result is a dish that’s both familiar and elevated—crispy on the outside, tender within, and finished with a sauce so flavorful it’ll have you reaching for seconds. No takeout menu required.
Serve over steamed rice to complete the meal. This is how to recreate that restaurant favorite at home.
Ingredients for Seaseme Chicken
Pantry staples plus a quick stop at the Asian market. Big flavor, minimal effort.
| Ingredient | Amount | Notes |
|---|---|---|
| Boneless Skinless Chicken Thighs 🍗 | 1 ½ lb | Cut into bite-sized pieces |
| Cornstarch 🌾 | ½ cup | For coating chicken |
| All-Purpose Flour 🌾 | ¼ cup | Lightly dredges chicken |
| Large Eggs 🥚 | 2 whole | Beaten for binding |
| Soy Sauce 🫙 | ⅓ cup | Low-sodium preferred |
| Rice Vinegar 🍚 | 3 tbsp | Adds signature tang |
| Honey 🍯 | ⅓ cup | Creates sticky glaze |
| Brown Sugar 🍚 | ¼ cup | Packed, for sweetness |
| Sesame Oil 🫒 | 1 tbsp | Toasted variety preferred |
| Garlic Cloves 🧄 | 4 cloves | Minced for sauce |
| Fresh Ginger 🌿 | 1 tbsp | Grated or minced |
| Vegetable Oil 🫒 | 1 cup | For frying chicken |
| Sesame Seeds 🌰 | 2 tbsp | Toasted for garnish |
| Green Onions 🧅 | 3 whole | Thinly sliced for serving |
| Red Pepper Flakes 🌶️ | ½ tsp | Optional for heat |
The chicken is the star—thighs stay juicier than breasts during frying. Look for skinless, boneless at any major grocery store (Costco has great bulk packs). Cornstarch is non-negotiable for that crispy coating (Bob’s Red Mill is my go-to). For the soy sauce, Kikkoman low-sodium keeps the dish from getting too salty while still packing that umami punch.
No honey? Maple syrup or agave works in a 1:1 swap. Out of rice vinegar? Apple cider vinegar in a pinch (slightly different tang). The sesame oil is key—Kadoya or La Tourangelle at Whole Foods have the good stuff. If you can’t find fresh ginger, ground ginger at one-third the amount will do (just add it directly to the sauce).
Sauce keeps 5 days in the fridge—great for meal prep. Chicken is best eaten fresh but reheats okay. Freeze cooked chicken and sauce separately for up to 3 months (the sesame seeds will soften when thawed, so add fresh ones when serving).
Why You’ll Love This Recipe
- One Bowl Wonder: I just dump the cornstarch, flour, eggs, and soy sauce in one bowl—no fancy prep, no extra dishes.
- Crispy Meets Savory: That cornstarch coating gives it a perfect crunch while the soy sauce keeps every bite packed with flavor.
- Weeknight MVP: Between us, this is my go-to for busy evenings when I need dinner fast but still want it to taste amazing.
- Budget Stretcher: Boneless thighs are cheap, and this recipe turns them into something so good no one guesses how little it cost.
Step-by-Step Instructions for Sesame Chicken
This method delivers that perfect crispy exterior with a sticky, glossy glaze every time.
Step 1: Coat and Fry the Chicken
Cut the 1.5 lb boneless skinless chicken thighs into 1-inch bite-sized pieces. In a bowl, whisk the 2 whole large eggs until smooth. In a separate shallow dish, combine the 0.5 cup cornstarch and 0.25 cup all-purpose flour.
Dip each piece of chicken into the beaten eggs, letting any excess drip off, then coat thoroughly in the cornstarch-flour mixture. Press gently to ensure full coverage. Heat the 1 cup vegetable oil in a large skillet over medium-high heat until shimmering. Fry the chicken in batches for 4-5 minutes, turning occasionally, until golden brown and crispy. Transfer to a paper towel-lined plate to drain.
Step 2: Sauté the Aromatics
Carefully remove all but 2 tablespoons of the oil from the skillet. Add the minced 4 cloves garlic cloves and grated 1 tbsp fresh ginger. Sauté over medium heat for 30-45 seconds until fragrant but not browned.
Here’s the thing—garlic burns quickly, so keep it moving. This step builds the flavor foundation for your glaze. The ginger should release its aroma, but don’t let it darken or it’ll turn bitter.
Step 3: Create the Sticky Glaze
Pour in the 0.33 cup soy sauce, 3 tbsp rice vinegar, 0.33 cup honey, 0.25 cup brown sugar, and 1 tbsp sesame oil. Stir well to combine. Increase the heat to medium-high and bring to a boil, then reduce to medium.
Let the mixture simmer for 3-4 minutes until it thickens and becomes syrupy. You’ll know it’s ready when it coats the back of a spoon and bubbles slow down. Stir in the 0.5 tsp red pepper flakes if you want a bit of heat.
Step 4: Toss and Garnish
Add the crispy chicken back to the skillet and toss to coat evenly in the glaze. Cook for an additional 1-2 minutes to let the chicken soak up all that sticky goodness. The glaze should cling to every piece, creating a glossy finish.
Transfer to a serving platter and sprinkle with the 2 tbsp sesame seeds and thinly sliced 3 whole green onions. Let it sit for 2 minutes to allow the glaze to set slightly before serving. The sesame seeds add a nutty crunch that contrasts perfectly with the tender chicken.
Pro Tips For Making Seaseme Chicken
- Double Coat the Chicken: Dip the thighs in egg, then dust with cornstarch and flour, but repeat the process for a thicker, crispier crust that holds up to frying.
- Use Thighs, Not Breasts: Boneless skinless chicken thighs stay juicy where breasts dry out—this is the one place where fat content actually changes the outcome.
- Fry in Batches: Crowding the pan drops the oil temp and gives you soggy coating instead of that golden, crackly shell you’re after.
- Drizzle Soy Late: Brush the soy sauce over the chicken after frying to keep the coating crisp; adding it earlier makes the crust steam and soften.
Health Benefits of This Recipe
Protein Powerhouse
This dish packs a serious protein punch with 1.5 lb chicken thighs providing about 45 grams of protein per serving. That’s nearly your entire daily requirement in one delicious meal. Protein is essential for muscle repair and keeps you full for hours. 💪
Healthy Fats Boost
The 1 tbsp sesame oil adds heart-healthy unsaturated fats, including sesamin and sesamol, antioxidants unique to sesame. These compounds help lower LDL cholesterol and support cardiovascular health.
Blood Sugar Benefits
While it contains 0.25 cup brown sugar and 0.33 cup honey, the fiber from 0.5 cup cornstarch and protein from chicken help slow sugar absorption. This creates a more balanced blood sugar response compared to many takeout versions.
Micronutrient Rich
The 4 cloves garlic and 1 tbsp fresh ginger aren’t just for flavor—they’re packed with immune-boosting compounds. Garlic contains allicin, while ginger provides gingerol, both with potent anti-inflammatory properties. 🌟
Low-Carb Option
Skip the rice and serve this over cauliflower rice to cut carbs significantly. You’ll still get all the flavor and protein with about 15g net carbs per serving instead of 45g. Perfect for those watching their carb intake.
Energy Boost
The combination of protein, healthy fats, and complex carbs provides sustained energy. I find this meal keeps me going through long afternoons without the crash that comes from high-sugar takeout options.
Nutrition Facts
Frequently Asked Questions
Can I use chicken breast instead of thighs?
Yes, but thighs stay juicier during frying. If using breasts, cut into 1-inch pieces and reduce frying time to 3-4 minutes to prevent dryness.
How do I make the sauce thicker?
Simmer the glaze for an extra 1-2 minutes until it coats the back of a spoon. For a quicker fix, mix 1 tsp cornstarch with water and stir into the sauce.
Can I bake the chicken instead of frying?
Toss coated chicken with 1 tbsp oil and bake at 400°F for 20-25 minutes, flipping halfway. It won’t be as crispy but still delicious.

- Jollof Rice Sauce Recipe: West African Tomato and Spice Infusion - September 25, 2026
- Japanese Rice Soup Recipe: Umami-Rich Comfort in a Bowl - September 25, 2026
- Homemade Cream Of Rice Recipe: Silk-Smooth Breakfast in Minutes - September 25, 2026