
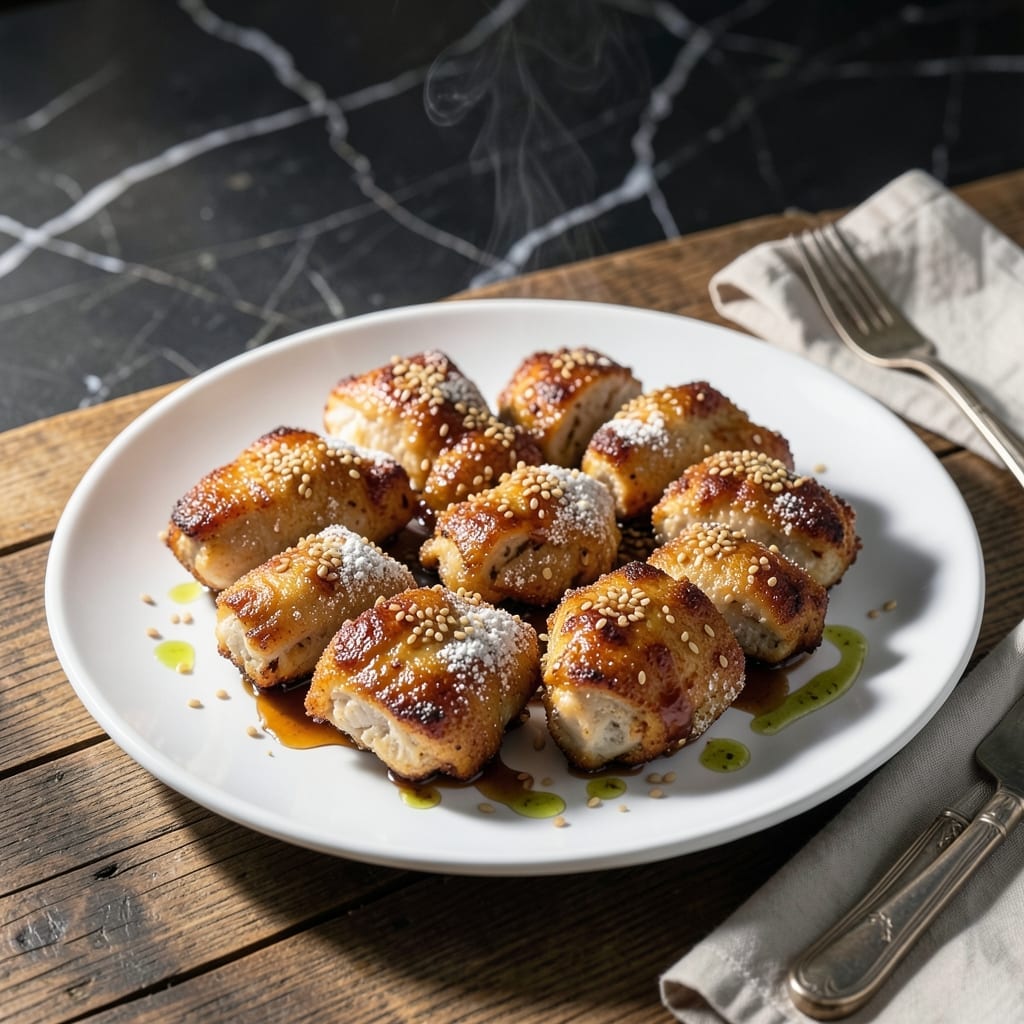
Achieving that perfect nutty crisp coating on sesame chicken requires precise timing and technique. This dish transforms simple ingredients into restaurant-quality results every time.
I developed this method during my years at The Smoky Pig, adapting classic Chinese takeout techniques for home kitchens. The key is double-coating the chicken and frying at exactly 350°F for maximum crunch.
The sauce balances sweet, savory, and nutty flavors without overpowering the crispy exterior. Each bite delivers tender chicken with a shatteringly crisp sesame crust that stays intact even after tossing.
Serve immediately over steamed rice with extra sesame seeds for garnish. The contrast between the crunchy coating and velvety sauce makes this dish unforgettable.
Ingredients for Seasme Chicken
Transform everyday ingredients into restaurant-worthy crispy sesame chicken with these essentials.
| Ingredient | Amount | Notes |
|---|---|---|
| Boneless Skinless Chicken Thighs 🍗 | 1 ½ lb | Cut into 1-inch pieces |
| All-Purpose Flour 🌾 | ¾ cup | For initial dredging |
| Large Eggs 🥚 | 2 whole | Beaten for egg wash |
| Cornstarch 🌾 | ½ cup | For crispy coating |
| Sesame Seeds 🌰 | ½ cup | Toasted for maximum flavor |
| Soy Sauce 🫒 | ¼ cup | Low-sodium preferred |
| Rice Vinegar 🍶 | 2 tbsp | Balances sweetness |
| Honey 🍯 | 3 tbsp | For sauce sweetness |
| Garlic Cloves 🧄 | 4 cloves | Minced for sauce |
| Fresh Ginger 🌿 | 1 tbsp | Grated for sauce |
| Sesame Oil 🫒 | 1 tbsp | Toasted for depth |
| Granulated Sugar 🍚 | 2 tbsp | Adjust to taste |
| Vegetable Oil 🫒 | 4 cups | For deep frying |
| Green Onions 🧅 | 4 whole | Thinly sliced for garnish |
| Kosher Salt 🧂 | 1 tsp | Plus more to taste |
The chicken quality is paramount for this preparation. Thighs remain juicier than breasts through the frying process, and bone-in, skin-on versions (deboned and skinned at home) offer superior flavor. For the sesame seeds, seek out freshly stocked bulk bins at natural food stores—the oils in older seeds can turn rancid. The cornstarch must be pure, without anti-caking agents, for optimal crispness.
Need to swap soy sauce? Tamari works in equal amounts, though it’s slightly thicker. Honey can be replaced with agave or maple syrup, but both lack the caramelized depth. For gluten-free, substitute rice flour for the all-purpose in the dredging step. The vegetable oil can be peanut or canola—just ensure a high smoke point for frying at 350°F.
The double-coated chicken must be fried immediately—don’t let it sit. Leftover sauce keeps 5 days refrigerated in an airtight container. For make-ahead, prep all components separately and combine just before serving to maintain that signature crispness (worth the extra minute).
Why You’ll Love This Recipe
- No-Fuss Coating: I just mix flour, eggs, and cornstarch—no fancy steps, just dip and fry.
- Crispy Sesame Crunch: The sesame seeds toast up golden, giving every bite that nutty, crunchy finish.
- Feeds the Crew: One batch makes enough for leftovers, and honestly, it reheats like a dream.
- Budget Hero: Chicken thighs stay cheap, and a bag of sesame seeds lasts me through five dinners.
Step-by-Step Instructions for Sesame Chicken
Here’s the method. Straightforward, tested, works every time.
Step 1: Prepare the Chicken and Sauce Base
Cut the 1.5 lb Boneless Skinless Chicken Thighs into 1-inch pieces and pat them completely dry. This ensures the coating adheres properly and creates maximum crispiness. Season the chicken with 1 tsp Kosher Salt.
In a small bowl, whisk together the 0.25 cup Soy Sauce, 2 tbsp Rice Vinegar, 3 tbsp Honey, 2 tbsp Granulated Sugar, minced 4 cloves Garlic Cloves, and grated 1 tbsp Fresh Ginger. Set this sauce base aside—it will develop deeper flavor as it sits.
Step 2: Create the Crispy Coating Station
Set up a breading station with three shallow dishes. Place the 0.75 cup All-Purpose Flour in the first dish. In the second, beat the 2 whole Large Eggs until fully homogenous. In the third, combine the 0.5 cup Cornstarch and 0.5 cup Sesame Seeds—this final layer is what gives the dish its signature nutty crunch.
Working in batches, dredge each piece of chicken in the flour, shaking off excess. Dip into the beaten eggs, letting any excess drip off. Finally, press each piece firmly into the cornstarch-sesame seed mixture, ensuring complete coverage. The pressure helps the coating adhere during frying.
Step 3: Deep-Fry to Golden Perfection
Heat the 4 cups Vegetable Oil in a deep, heavy-bottomed pot over medium-high heat to 350°F. Use a deep-fry thermometer for accuracy—oil temperature is critical for even cooking and preventing greasiness.
Fry the coated chicken in batches for 4-5 minutes until golden brown and cooked through. Avoid overcrowding the pot, which would lower the oil temperature and result in soggy coating. Transfer each batch to a wire rack set over a baking sheet to drain excess oil while maintaining crispness.
Step 4: Finish with Glossy Sauce and Garnish
Reheat the sauce base over medium heat in a small saucepan. Stir in the 1 tbsp Sesame Oil and bring to a gentle simmer. The sauce should thicken slightly and become glossy—this takes about 2-3 minutes.
Toss the fried chicken in the sauce until evenly coated. The sauce should cling to each piece, creating a beautiful sheen. Garnish with thinly sliced 4 whole Green Onions and serve immediately while the coating is at its crispiest. The contrast of textures—crunchy exterior, tender chicken, and silky sauce—is what makes this dish exceptional.
Pro Tips For Making Seasme Chicken
- Dry the Chicken: Pat the boneless skinless chicken thighs thoroughly dry with paper towels before dredging—excess moisture makes the coating slide right off. I learned this the hard way after my first few batches ended up gummy instead of crispy.
- Chill the Coated Chicken: After dredging in the flour, egg, and cornstarch, let the pieces rest in the fridge for 15 minutes. This helps the coating adhere better and keeps the sesame seeds from falling off during frying.
- Skip Cold Oil: Heat the oil to 350°F before adding the chicken—any cooler and the coating absorbs oil instead of crisping. After burning a batch by guessing, I now use a thermometer every time.
- Toast the Sesame Seeds: Lightly toast the sesame seeds in a dry pan for 1-2 minutes before pressing them into the chicken. It brings out their nutty flavor and gives the finished dish that extra depth. Sounds like a small step, but it actually changes the outcome.
Flavor Customization for These Flavors
Spicy Kick
Add 1 tsp red pepper flakes or 1 tbsp sriracha to the sauce base for heat lovers. This Georgia twist gives a pleasant warmth that balances the sweetness. I often add ½ tsp cayenne to the cornstarch coating for extra spice in every bite. 🌶️
Extra Nutty
For deeper sesame flavor, toast the seeds in a dry pan over medium heat for 2-3 minutes until golden. Use black sesame seeds for dramatic visual contrast and a slightly earthier taste. I keep a Lodge cast iron just for toasting seeds.
Citrus Bright
Stir 1 tbsp orange zest and 2 tbsp fresh juice into the finished sauce for a bright, fresh note. The acidity cuts through the richness while complementing the nuttiness. This works especially well with the honey in the original recipe.
Umami Boost
Enhance the sauce with 1 tbsp hoisin or 1 tsp fish sauce for extra depth. I learned this trick from Master Chef Chen—it adds complexity without overpowering the sesame. A pinch of MSG also works wonders.
Herbal Freshness
Finish with chopped cilantro or Thai basil instead of green onions. These herbs add a fresh, aromatic element that elevates the dish. I grow my own Thai basil at home for this exact purpose.
Sweet Heat
Swap honey for 3 tbsp chili crisp in the sauce for a spicy-sweet glaze. The crispy bits add texture too. This variation became a hit at The Smoky Pig last winter. Perfect for those who love bold flavors. 🔥
Nutrition Facts
Frequently Asked Questions
What’s the best oil for frying?
Use oils with a high smoke point like peanut, canola, or vegetable oil. These handle 350°F perfectly without burning. Avoid olive oil—its low smoke point makes it unsuitable for deep-frying.
Can I bake instead of frying?
Yes, but the texture differs. Bake at 400°F for 20-25 minutes, flipping halfway. The coating won’t be as crispy, but it’s a healthier option. Use a wire rack for even air circulation.
How do I keep the coating crispy?
Fry in small batches to avoid oil temperature drops. Drain on a wire rack, not paper towels, to prevent steam from softening the crust. Serve immediately for maximum crunch.
Can I use chicken breasts?
Yes, but thighs stay juicier. If using breasts, brine them first in saltwater for 30 minutes to prevent dryness. Cut into even pieces for consistent cooking.

- Jollof Rice Sauce Recipe: West African Tomato and Spice Infusion - September 25, 2026
- Japanese Rice Soup Recipe: Umami-Rich Comfort in a Bowl - September 25, 2026
- Homemade Cream Of Rice Recipe: Silk-Smooth Breakfast in Minutes - September 25, 2026