
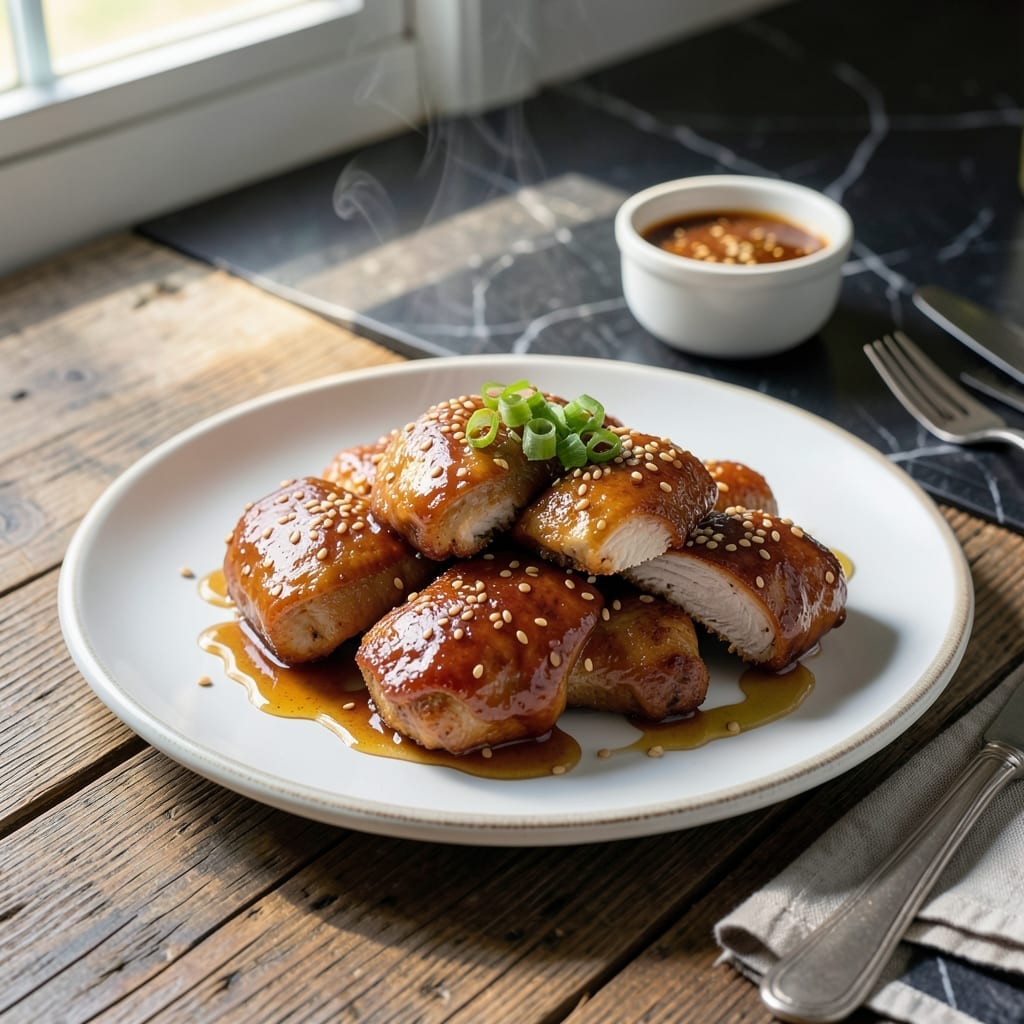
This sesame chicken delivers the classic takeout experience with a homemade touch, balancing sweet and savory flavors perfectly. The dish combines tender chicken pieces with a glossy, nutty sauce that coats every bite.
I’ve refined this method to ensure crispy yet juicy chicken every time, using a simple double-frying technique. The sauce comes together quickly with honey, soy, and toasted sesame oil for depth.
What sets this version apart is the texture contrast—crispy chicken meets silky sauce, finished with a sprinkle of sesame seeds. It’s a foolproof way to recreate a restaurant favorite.
Serve over steamed rice with steamed broccoli for a complete meal. This recipe stays true to tradition while being simple enough for weeknight cooking.
Ingredients for Seseme Chicken
Crispy chicken meets glossy sesame sauce with pantry staples and fresh aromatics.
| Ingredient | Amount | Notes |
|---|---|---|
| Boneless Chicken Thighs 🍗 | 1 ½ lb | Cut into bite-sized pieces |
| Cornstarch 🌾 | ½ cup | For coating chicken |
| All-Purpose Flour 🌾 | ¼ cup | For dredging chicken |
| Large Eggs 🥚 | 2 whole | Beaten for binding |
| Vegetable Oil 🫒 | 3 cups | For deep frying |
| Honey 🍯 | ½ cup | For sweetness in sauce |
| Soy Sauce 🫒 | ⅓ cup | Low-sodium preferred |
| Rice Vinegar 🫒 | 2 tbsp | For acidity in sauce |
| Toasted Sesame Oil 🫒 | 1 tbsp | For nutty depth |
| Garlic Cloves 🧄 | 3 cloves | Minced for sauce |
| Fresh Ginger 🌿 | 1 tbsp | Grated for sauce |
| Sesame Seeds 🌰 | 3 tbsp | Toasted for garnish |
| Green Onions 🧅 | 3 whole | Sliced for garnish |
| Kosher Salt 🧂 | 1 tsp | For seasoning chicken |
| Black Pepper 🌶️ | ½ tsp | Freshly ground |
The chicken thighs are non-negotiable here—they stay juicy through double-frying. Boneless, skinless from Costco or your regular supermarket work fine. For the sauce, real honey (not corn syrup) makes a difference, and toasted sesame oil is key for that authentic restaurant flavor. Fresh ginger and garlic should be bright and firm, not shriveled or dried out.
No honey? Maple syrup or agave work in a pinch. Swap chicken thighs for breasts (but they’ll be less tender). Tamari can replace soy sauce for gluten-free, and white vinegar in a 1:1 ratio substitutes for rice vinegar. The sesame seeds must be toasted—raw ones lack the nutty punch. No fresh ginger? Ground ginger at one-third the amount works.
The chicken is best eaten fresh, but leftovers keep 3-4 days in the fridge. Reheat in the oven to maintain crispiness. The sauce can be made ahead and stored for 1 week—just reheat gently before tossing with fried chicken.
Why You’ll Love This Recipe
- One Pan Magic: I just toss the chicken thighs in cornstarch and flour, fry them up, and boom—minimal cleanup, maximum satisfaction.
- Crispy Perfection: That cornstarch coating gives it this insane crunch while keeping the inside juicy. Honestly, it’s the little things.
- Weeknight Hero: Between us, this is my go-to for busy nights. Ready faster than takeout and way better.
- Budget Stretcher: Boneless thighs are cheap, and this recipe feeds my family of four with leftovers. I’ll be real: that’s a win.
Step-by-Step Instructions for Sesame Chicken
Master this classic technique for crispy, saucy chicken with professional results every time.
Step 1: Coat and Fry the Chicken
Cut the 1.5 lb boneless chicken thighs into 1-inch pieces and pat them dry with paper towels. This removes excess moisture so the coating adheres properly. Season the chicken with 1 tsp kosher salt and 0.5 tsp black pepper for balanced flavor.
Dredge the chicken pieces first in the 0.25 cup all-purpose flour, shaking off excess, then dip into the 2 beaten large eggs. Finally, coat thoroughly with the 0.5 cup cornstarch. The cornstarch creates an ultra-crispy exterior that stays crunchy even after saucing.
Heat the 3 cups vegetable oil in a deep pot to 350°F. Fry the chicken in batches for 4-5 minutes until golden brown and cooked through. Don’t overcrowd the pot—this lowers the oil temperature and leads to greasy chicken. Drain on a wire rack or paper towels.
Step 2: Build the Sesame Sauce
In a clean saucepan, combine the 0.5 cup honey, 0.33 cup soy sauce, 2 tbsp rice vinegar, 1 tbsp toasted sesame oil, minced 3 cloves garlic cloves, and 1 tbsp grated fresh ginger. The vinegar balances the sweetness while the sesame oil adds depth.
Bring the mixture to a gentle simmer over medium heat, stirring constantly. Let it cook for 2-3 minutes until slightly thickened and the garlic becomes fragrant. Watch carefully—honey burns easily. The sauce should coat the back of a spoon but still be pourable.
Step 3: Combine Chicken and Sauce
Add the crispy chicken to the saucepan with the warm sauce. Gently toss with a silicone spatula to coat every piece evenly. The sauce will bubble and thicken further as it clings to the hot chicken. Cook for 1-2 minutes until the chicken is fully glazed.
Here’s the thing—if the sauce seems too thick, add a splash of water to loosen it. If it’s too thin, let it reduce for another minute. You want it to glisten on the chicken without pooling at the bottom of the pan.
Step 4: Garnish and Serve Immediately
Transfer the sesame chicken to a serving platter. Sprinkle the 3 tbsp sesame seeds over the top while the sauce is still tacky so they adhere. Then scatter the sliced 3 whole green onions across the dish for freshness and color.
Serve immediately while the chicken is still crispy. The contrast of textures—tender chicken, crunchy coating, and sticky sauce—is what makes this dish special. Leftovers keep well for 2-3 days but lose some crispness, so reheat in a dry skillet to revive the texture.
Pro Tips For Making Seseme Chicken
- Use Thighs, Not Breasts: Boneless chicken thighs stay juicier than breasts when fried—after burning a few dry batches with white meat, I finally switched and never looked back.
- Double Dredge for Crisp: Dip the chicken in cornstarch first, then egg, then flour for that extra-crunchy coating that actually holds up to sauces.
- Oil Temp Matters: Heat the vegetable oil to 350°F before frying—any cooler and the coating soaks up grease like a sponge, any hotter and it burns before cooking through.
- Rest Before Saucing: Let the fried chicken rest 2-3 minutes on a rack before tossing in sesame sauce—this keeps the crust crisp instead of soggy.
Common Mistakes When Making Perfect Results
Overcrowding the Fryer
Frying too many chicken pieces at once drops the oil temperature below 350°F. This creates greasy, soggy chicken instead of crispy. I fry in 3 batches max for my 5-quart Dutch oven. 🔥
Skipping the Drying Step
Wet chicken causes the coating to slide right off during frying. Always pat pieces completely dry with paper towels before dredging. I use 3 layers of paper towels to absorb all moisture.
Sauce Temperature Control
Boiling the sauce too vigorously causes honey to burn and turn bitter. Keep it at a gentle simmer and stir constantly. The sauce should thicken enough to coat a spoon but still be pourable.
Insufficient Coating
Using only flour creates a dense crust. The cornstarch in this recipe is essential for that ultra-crispy texture. I press the cornstarch into the chicken to ensure full coverage before frying.
Premature Saucing
Adding chicken to cold sauce makes it absorb too much liquid and lose crispiness. Always combine hot, freshly fried chicken with warm sauce. I keep the sauce simmering on low while the last batch fries.
Ignoring Rest Time
Letting the coated chicken rest for 10 minutes before frying helps the coating adhere better. This prevents bare spots during cooking. I use this time to heat my oil and prep garnishes. 💡
Nutrition Facts
Frequently Asked Questions
Can I use chicken breasts instead of thighs?
You can, but thighs stay juicier. Breasts tend to dry out during frying. If using, reduce frying time to 3-4 minutes and consider brining first.
Why is my sauce too thin?
Simmer it longer to reduce and thicken. Add a cornstarch slurry (1 tbsp cornstarch + 1 tbsp water) for faster results. Stir constantly to prevent burning.
How do I make this gluten-free?
Swap soy sauce for tamari and use gluten-free flour. Ensure cornstarch is certified gluten-free. All other ingredients are naturally gluten-free.
Can I bake the chicken instead of frying?
Yes, bake at 400°F for 20-25 minutes, flipping halfway. It won’t be as crispy but still delicious. Spray with oil for better browning.

- Rice Paper Pancakes Recipe: Crispy Vietnamese Breakfast Delight - September 25, 2026
- Rice A Roni Pork Fried Rice Recipe: Quick Wok-Style Meal with Savory Bites - September 25, 2026
- Mandhi Rice Recipe: Yemeni Spiced Lamb and Rice Feast - September 25, 2026