
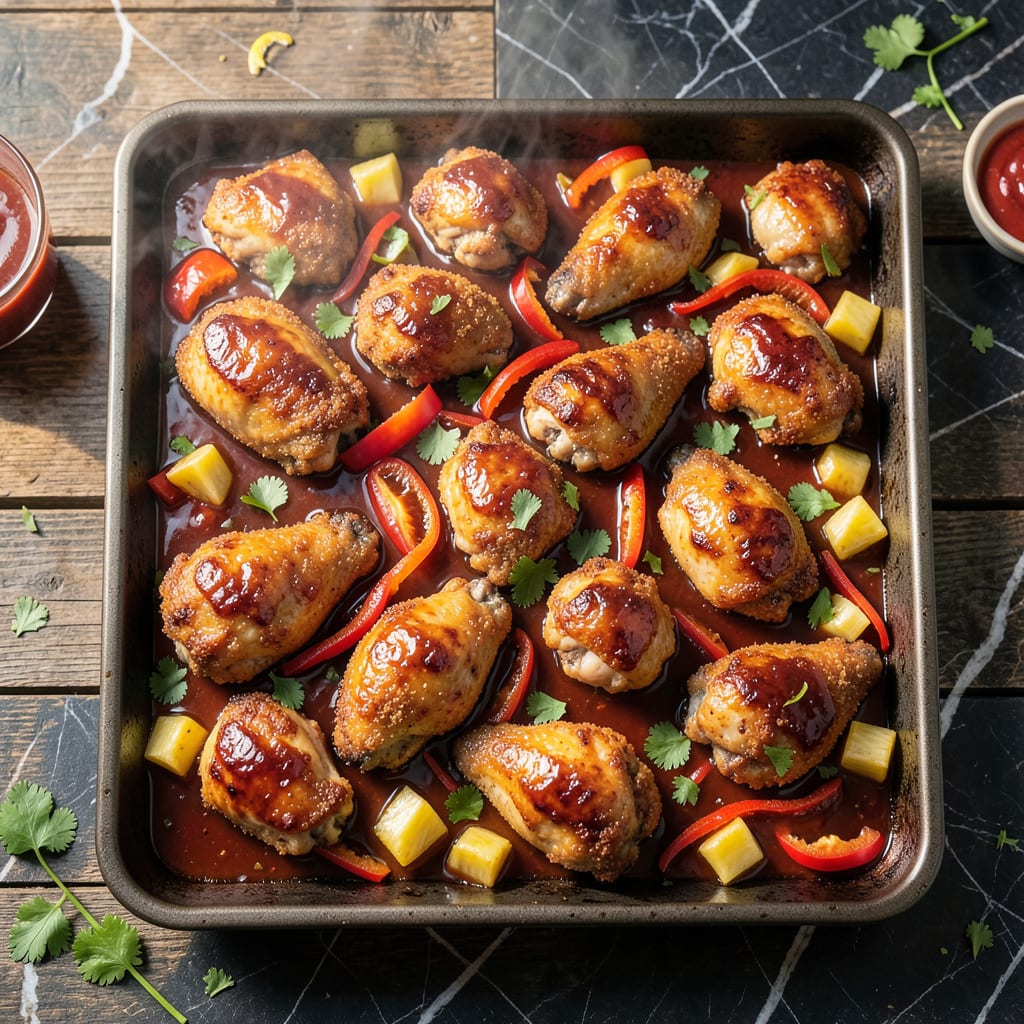
This sheet pan method delivers crispy chicken with a sticky sweet and sour glaze—all with minimal cleanup.
The high-heat roasting caramelizes the sauce while keeping the chicken tender inside. One tray, 30 minutes, and dinner is served.
Ingredients for Sheet Pan Sweet and Sour Chicken
Crispy chicken and a sticky glaze with minimal effort and maximum flavor.
| Ingredient | Amount | Notes |
|---|---|---|
| Chicken Thighs 🍗 | 1 ½ lb | Boneless, skinless, cut into bite-sized pieces |
| Cornstarch 🌾 | 2 tbsp | For coating chicken |
| Vegetable Oil 🫒 | 2 tbsp | For tossing chicken |
| Ketchup 🍅 | ½ cup | For glaze base |
| Rice Vinegar 💧 | ¼ cup | For tangy balance |
| Brown Sugar 🍚 | ¼ cup | Packed, for sweetness |
| Soy Sauce 🫒 | 2 tbsp | Low-sodium preferred |
| Garlic Cloves 🧄 | 3 cloves | Minced for glaze |
| Fresh Ginger 🌿 | 1 tbsp | Grated for depth |
| Red Bell Pepper 🌶️ | 1 whole | Seeded, cut into chunks |
| Pineapple Chunks 🍍 | 1 cup | Fresh or canned, drained |
| Green Onions 🧅 | 3 whole | Sliced for garnish |
| Salt 🧂 | ½ tsp | Kosher or sea salt |
| Black Pepper 🌶️ | ½ tsp | Freshly ground preferred |
| Sesame Seeds 🌾 | 1 tbsp | Toasted for garnish |
[recipeingredientscaler]
The chicken is the foundation. Boneless, skinless thighs stay juicier than breasts during high-heat roasting. Look for uniform thickness in the pieces for even cooking—trim any excess fat. Costco and Sam’s Club offer great bulk options if you’re feeding a crowd. For the cornstarch coating, Bob’s Red Mill is a reliable brand with consistent texture.
No rice vinegar? Apple cider vinegar at the same amount works in a pinch. Brown sugar can be swapped with coconut sugar or maple syrup (reduce liquid slightly). For a gluten-free version, tamari instead of soy sauce and ensure cornstarch is certified. If pineapple isn’t your thing, peaches or mango chunks add a nice twist.
This dish holds well for 3-4 days refrigerated in an airtight container. The glaze thickens as it cools—reheat in the oven to revive the crispiness. Freeze uncooked chicken pieces separately for up to 3 months.
Why You’ll Love This Recipe
- One Pan Magic: I toss everything on a sheet pan—chicken thighs, cornstarch for crispiness, and that tangy ketchup-vinegar glaze—then let the oven do the work.
- Sweet & Tangy Bite: The rice vinegar cuts through the ketchup’s sweetness so every bite is balanced, not cloying. Honestly, I could eat the sauce with a spoon.
- Weeknight MVP: Between us, this feeds my family of four with leftovers for lunch the next day. (Yes, even on a Tuesday night)
- Budget Hero: Chicken thighs stay juicy and cost half what breasts do, and I already have the rest in my pantry.
Step-by-Step Instructions for Sheet Pan Sweet and Sour Chicken
This one-tray method delivers crispy chicken with a glossy glaze and caramelized vegetables.
Step 1: Coat and Season the Chicken Thighs
Pat the 1.5 lb chicken thighs dry with paper towels and cut into bite-sized pieces. This removes excess moisture, which is essential for achieving that promised crispy texture. Place the pieces in a large bowl and season with 0.5 tsp salt and 0.5 tsp black pepper.
Sprinkle the 2 tbsp cornstarch over the chicken and toss to coat evenly. The cornstarch creates a light crust that crispens beautifully in the oven. Drizzle over the 2 tbsp vegetable oil and toss again until the pieces are uniformly coated and slightly glossy.
Step 2: Prepare the Sweet and Sour Glaze
In a separate bowl, whisk together the 0.5 cup ketchup, 0.25 cup rice vinegar, 0.25 cup brown sugar, and 2 tbsp soy sauce until smooth. The brown sugar should be packed to ensure proper sweetness and caramelization.
Add the minced 3 cloves garlic cloves and grated 1 tbsp fresh ginger to the glaze mixture. These aromatics deepen the flavor profile and balance the sweetness with a subtle warmth. Set the glaze aside while you prepare the vegetables.
Step 3: Arrange and Roast on the Sheet Pan
Preheat your oven to 425°F. Spread the coated chicken pieces on a large sheet pan, ensuring they are in a single layer with space between each piece. This spacing prevents steaming and ensures they crisp up properly.
Scatter the 1 whole red bell pepper (cut into chunks) and 1 cup pineapple chunks around the chicken. Roast for 15 minutes until the chicken begins to brown and the edges look crispy.
Step 4: Glaze and Finish
Remove the sheet pan from the oven and pour the prepared glaze evenly over the chicken and vegetables. Use a spatula to gently toss everything together, ensuring each piece is well coated. Return the pan to the oven.
Roast for an additional 10-12 minutes until the chicken is cooked through and the glaze has thickened and become glossy. The chicken should be golden brown and the vegetables should be tender with slightly caramelized edges.
Step 5: Garnish and Serve
Transfer the chicken and vegetables to a serving platter. Sprinkle with the sliced 3 whole green onions and 1 tbsp sesame seeds for added texture and visual appeal. The sesame seeds add a nutty crunch that complements the crispy chicken.
Let it rest for 2-3 minutes before serving to allow the glaze to set slightly. The chicken should have a crispy exterior with a tender interior, and the vegetables should be coated in a sticky, tangy-sweet glaze.
Pro Tips For Making Sheet Pan Sweet And Sour Chicken
- Coat Thighs Evenly: Toss chicken thighs in cornstarch until each piece looks dusty—about 2 tablespoons per pound. I learned this the hard way after ending up with patchy, unevenly crispy bits.
- Preheat the Pan: Get that sheet pan screaming hot in a 425°F oven for 10 minutes before adding the oil and chicken. Sounds like overkill, but it prevents the dreaded soggy-bottom syndrome.
- Skip the Overcrowding: Leave at least an inch between each piece of chicken, or they’ll steam instead of crisp. After burning three batches, I finally figured out that space is non-negotiable.
- Balance the Sauce: Use 3 parts ketchup to 1 part rice vinegar for the sauce—any more vinegar and it’ll taste harsh. My grandmother swore by this ratio, and she was right.
Troubleshooting This Recipe
Sauce Too Thin
If your glaze runs off the chicken, it likely needs more time to reduce. Return the sheet pan to the oven for an additional 5-7 minutes at 425°F. The high heat will evaporate excess liquid, thickening the sauce beautifully.
Chicken Not Crispy
Overcrowding causes steaming instead of crisping. Ensure pieces have 1-inch spacing on the pan. For extra crunch, broil for 2-3 minutes after glazing, but watch closely to prevent burning. 🔥
Pat the chicken very dry before coating with cornstarch. Any moisture will prevent the crust from forming properly.
Burnt Glaze
Brown sugar burns easily at high temperatures. Stir the glaze halfway through the final 10-12 minutes of roasting. If using a dark pan, reduce oven temp to 400°F to prevent scorching.
Bland Flavor
Boost the glaze with an extra 1 tbsp soy sauce or a pinch of red pepper flakes. Fresh ginger and garlic make a huge difference—don’t skip them. Taste the sauce before adding to the chicken and adjust seasoning.
Vegetables Too Soft
Add denser veggies like bell peppers 5 minutes after the chicken starts roasting. Pineapple can go in with the chicken since it holds up well. For crisper results, cut vegetables into larger chunks to prevent overcooking. 💡
Nutrition Facts
Frequently Asked Questions
Can I use chicken breasts instead of thighs?
Yes, but they may dry out more easily. Reduce cooking time to 12-15 minutes total and check internal temperature reaches 165°F. Thighs stay juicier.
How do I make the glaze thicker?
Simmer the sauce on the stovetop for 3-4 minutes before adding to the sheet pan. Alternatively, mix 1 tsp cornstarch with water and stir into the glaze.
What other vegetables work well?
Broccoli, snap peas, or carrots pair nicely. Add hard veggies 5 minutes early and delicate ones like bell peppers with the pineapple.
Can I prep this ahead of time?
Marinate chicken in glaze (without cornstarch) for up to 4 hours in the fridge. Coat with cornstarch just before cooking for maximum crispiness.

- Jollof Rice Sauce Recipe: West African Tomato and Spice Infusion - September 25, 2026
- Japanese Rice Soup Recipe: Umami-Rich Comfort in a Bowl - September 25, 2026
- Homemade Cream Of Rice Recipe: Silk-Smooth Breakfast in Minutes - September 25, 2026