
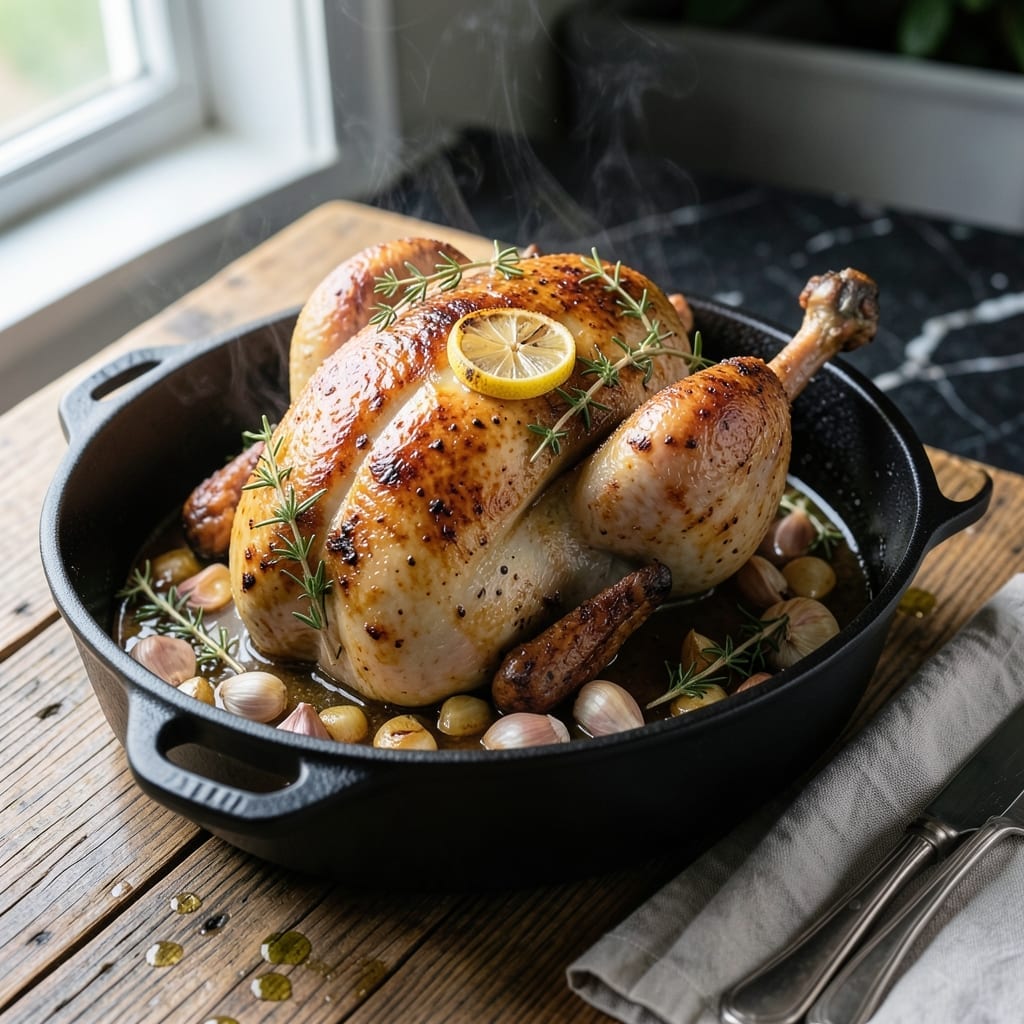
This Staub roast chicken delivers the ultimate balance of crispy skin and juicy meat every time. The heavy Dutch oven distributes heat evenly, ensuring perfect results without hot spots.
The secret lies in the technique: starting with a hot oven to render the fat, then finishing at lower heat to cook the meat through. This method locks in moisture while creating that coveted golden crust.
You’ll achieve restaurant-quality chicken with minimal effort. The Staub pot’s self-basting lid circulates steam, keeping the breast tender while the thighs cook to perfection.
Serve with roasted vegetables for a complete meal. This method works with any whole chicken, making it a reliable go-to for impressive dinners.
Ingredients for Staub Roast Chicken
Simple ingredients, extraordinary results. This dish starts with a whole chicken and pantry staples.
| Ingredient | Amount | Notes |
|---|---|---|
| Whole Chicken 🍗 | 4 lb | Pat dry before seasoning |
| Kosher Salt 🧂 | 1 tbsp | Diamond Crystal preferred |
| Black Pepper 🌶️ | 1 tsp | Freshly ground |
| Garlic Cloves 🧄 | 6 cloves | Smashed, unpeeled |
| Fresh Thyme 🌿 | 4 sprigs | Optional for aromatics |
| Fresh Rosemary 🌿 | 2 sprigs | Optional for aromatics |
| Lemon 🍋 | 1 whole | Halved for cavity |
| Yellow Onion 🧅 | 1 whole | Quartered for cavity |
| Olive Oil 🫒 | 1 tbsp | For skin crisping |
| Unsalted Butter 🧈 | 2 tbsp | Melted for basting |
| Carrots 🥕 | 3 whole | Cut into chunks |
| Celery Stalks 🌿 | 3 pieces | Cut into chunks |
| Yukon Gold Potatoes 🥔 | 1 lb | Halved or quartered |
The chicken matters most here. Look for a 4-pound bird with smooth, unblemished skin—organic or air-chilled if possible. Most supermarkets carry reliable options, but Whole Foods has great organic selections. Pat it completely dry before seasoning (this is non-negotiable for crispy skin). If you can, let it sit uncovered in the fridge overnight to dry the skin further.
No fresh herbs? Dried thyme and rosemary at one-third the amount work fine. Out of lemon? A splash of white wine in the cavity does the trick. The butter can be swapped for ghee or olive oil, but butter adds that classic flavor. For the vegetables, any root veggies you have will work—parsnips, turnips, or even sweet potatoes are great alternatives.
Leftovers keep beautifully. Store the chicken in an airtight container for up to 4 days, or freeze for 3 months. The vegetables reheat well too—just crisp the skin again under the broiler if needed. Always let the chicken rest before carving to keep it juicy.
Why You’ll Love This Recipe
- One Pan Magic: I just season the chicken, toss in garlic and thyme, and let the Staub do the rest—no flipping, no fuss.
- Herb-Kissed Crisp: The thyme and garlic work their way under the skin, giving every bite that deep, savory punch.
- Weeknight Hero: Between us, I’ve served this for Sunday supper and Tuesday takeout night—always disappears.
- Leftovers Gold: The meat stays juicy for days, so I shred it for sandwiches or toss it into pasta.
Step-by-Step Instructions for Roast Chicken in a Dutch Oven
This method guarantees perfectly crispy skin and juicy meat using your Staub Dutch oven.
Step 1: Prep and Season the Chicken
Pat the 4 lb Whole Chicken completely dry inside and out with paper towels. This step is crucial—moisture prevents crispy skin. Season generously with 1 tbsp Kosher Salt and 1 tsp Black Pepper, rubbing it into the skin and inside the cavity.
Let the chicken sit uncovered at room temperature for 30 minutes while you prep the aromatics. This allows the seasoning to penetrate and the meat to cook more evenly. Dry skin is your secret to that golden, crackling finish.
Step 2: Prepare Aromatics and Vegetables
Halve the 1 whole Lemon and quarter the 1 whole Yellow Onion. Stuff the cavity with these along with 6 cloves Garlic Cloves, 4 sprigs Fresh Thyme, and 2 sprigs Fresh Rosemary for maximum flavor infusion.
Cut the 3 whole Carrots, 3 pieces Celery Stalks, and 1 lb Yukon Gold Potatoes into even chunks. These will roast alongside the chicken, absorbing its juices. The uniform size ensures everything cooks at the same rate.
Step 3: Sear the Chicken in the Dutch Oven
Heat your Staub Dutch oven over medium-high heat and add 1 tbsp Olive Oil. When the oil shimmers, place the chicken breast-side down in the pot. Sear undisturbed for 5-7 minutes until the skin turns a deep golden brown.
Carefully flip the chicken and sear the other side for another 3-5 minutes. This initial sear locks in juices and creates a flavorful foundation. The skin should release easily from the pot when properly browned.
Step 4: Roast with Vegetables
Remove the chicken and add the prepared vegetables to the Dutch oven. Place the chicken breast-side up on top of the vegetables. Brush with 2 tbsp Unsalted Butter melted for extra richness and browning.
Cover with the lid and transfer to a preheated 375°F oven. Roast for 1 hour, then remove the lid and roast for another 20-30 minutes until the internal temperature reaches 165°F at the thickest part of the thigh.
The vegetables should be tender and caramelized, while the chicken skin achieves that promised crispy texture. Baste with the pan juices once or twice during the uncovered roasting for extra flavor.
Step 5: Rest and Serve
Transfer the chicken to a cutting board and let it rest for 15 minutes before carving. This allows the juices to redistribute throughout the meat, ensuring every bite is moist and flavorful.
Serve the chicken with the roasted vegetables arranged around it. The Dutch oven will have created a light pan sauce from the juices and butter—spoon this over the chicken and vegetables when serving for maximum flavor impact.
Pro Tips For Making Staub Roast Chicken
- Salt the Night Before: Dry-brine the chicken with kosher salt 12-24 hours ahead—it seasons deep into the meat and guarantees crispy skin in your Staub. I learned this the hard way after too many bland, soggy results.
- Pat It Bone-Dry: Use paper towels to thoroughly dry the chicken inside and out before seasoning. Sounds tedious, but it actually changes the outcome—wet skin steams instead of browning in that heavy Dutch oven.
- Don’t Crowd the Garlic: Tuck garlic cloves under the skin but space them out, or they’ll burn before the chicken finishes. After ruining a few batches with bitter, charred garlic, I now limit it to 4-5 cloves max.
- Start Hot, Finish Low: Sear the bird skin-side down in the Staub for 5 minutes on medium-high, then drop the heat to 375°F. This builds a crust fast without drying out the meat—my grandmother swore by this method.
Best Sauces and Condiments for This Recipe
Classic Pan Sauce
After removing the chicken, place your Staub Dutch oven on the stovetop over medium heat. Add 1 cup of low-sodium chicken broth and scrape up all those beautiful browned bits with a wooden spoon. Simmer for 5 minutes until reduced by half.
Herb Butter Glaze
Melt 4 tbsp unsalted butter with 2 tbsp fresh lemon juice and 1 tbsp chopped fresh thyme. This bright, herby sauce complements the crispy skin perfectly. I drizzle it over the chicken just before serving. 💫
Garlic Aioli
Mix ½ cup mayonnaise with 2 minced garlic cloves, 1 tbsp lemon juice, and a pinch of salt. This creamy sauce adds richness and cuts through the chicken’s savory notes. Serve on the side for dipping or drizzle lightly over the top.
Spicy Harissa
Combine 2 tbsp harissa paste with 1 tbsp olive oil and 1 tsp honey. This North African condiment adds a smoky, spicy kick that pairs beautifully with the juicy meat. Start with a small amount and adjust to taste.
I love how it adds complexity without overpowering the dish.
Creamy Gravy
For a comforting option, whisk 2 tbsp flour into the pan drippings, then gradually add 1½ cups milk. Simmer until thickened, about 3-5 minutes. Season with salt and pepper to taste. 💛
Nutrition Facts
Frequently Asked Questions
Do I need to preheat my Staub Dutch oven?
Yes, preheat it over medium-high heat for 5 minutes before searing. This ensures even browning and prevents sticking. The heavy cast iron retains heat beautifully for consistent cooking.
Can I use a different sized chicken?
A 3-5 lb bird works best. Adjust cooking time by 10-15 minutes per pound. Always use a meat thermometer to check for 165°F in the thickest part of the thigh.
Why rest the chicken before carving?
Resting for 15 minutes lets juices redistribute. Skipping this step causes dry meat as the juices spill out when cut. The internal temperature also rises 5-10°F during resting.
What if my skin isn’t crispy enough?
Return the chicken to the oven uncovered at 425°F for 5-10 minutes. For extra crunch, broil for 2-3 minutes watching closely to avoid burning.

- Jollof Rice Sauce Recipe: West African Tomato and Spice Infusion - September 25, 2026
- Japanese Rice Soup Recipe: Umami-Rich Comfort in a Bowl - September 25, 2026
- Homemade Cream Of Rice Recipe: Silk-Smooth Breakfast in Minutes - September 25, 2026