
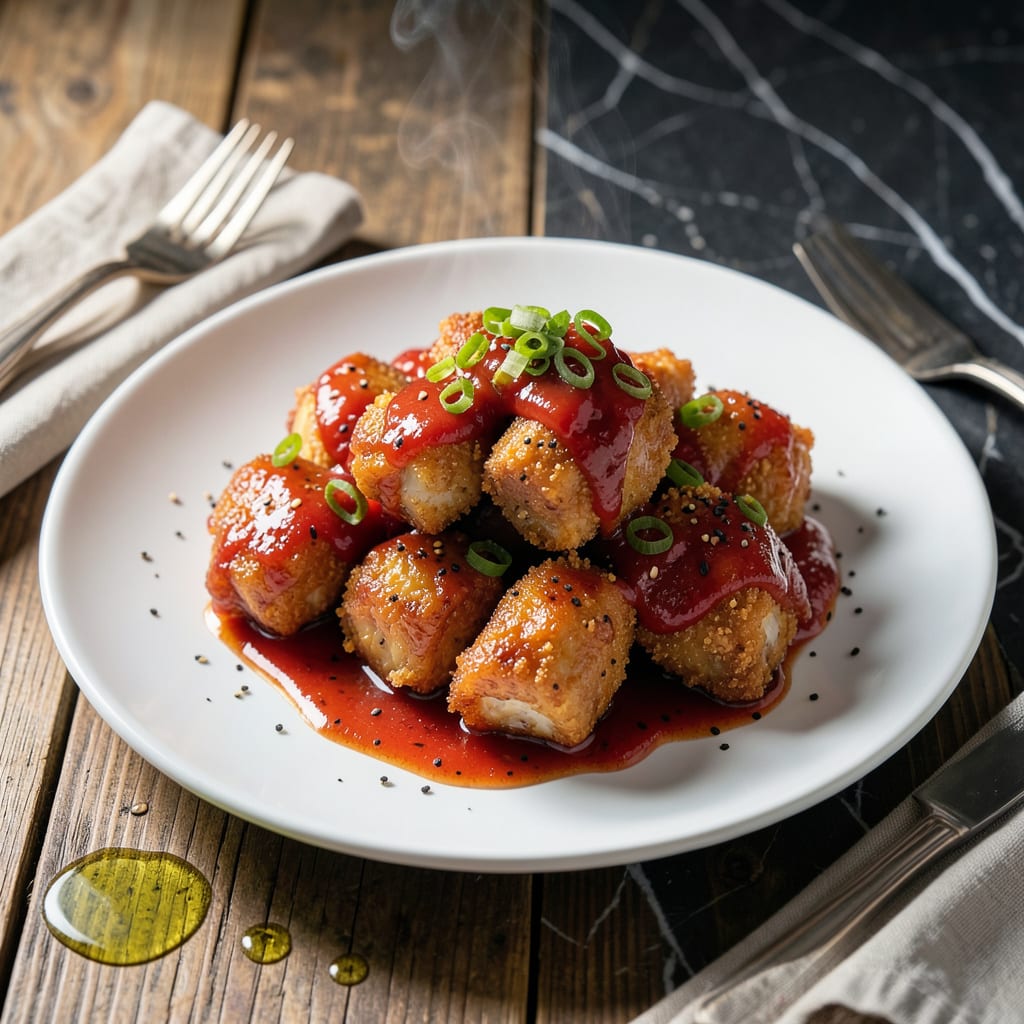
This recipe delivers crispy chicken coated in a glossy, tangy sauce that’s perfectly balanced between sweet and sour. The secret is a two-step cooking process that locks in moisture while creating that signature sticky glaze.
With simple ingredients and 30 minutes, you’ll achieve restaurant-quality results at home. The sauce clings to every piece, ensuring each bite bursts with bold, vibrant flavor.
Ingredients for Sticky Sweet and Sour Chicken
Simple ingredients deliver that crispy, tangy, restaurant-quality dish in just thirty minutes.
| Ingredient | Amount | Notes |
|---|---|---|
| Boneless, Skinless Chicken Thighs 🍗 | 1 ½ lb | Cut into 1-inch pieces |
| Cornstarch 🌾 | ½ cup | For coating chicken |
| All-Purpose Flour 🌾 | ¼ cup | Balances cornstarch texture |
| Granulated Sugar 🍚 | ½ cup | For sauce sweetness |
| Apple Cider Vinegar 🍏 | ⅓ cup | Adds tangy brightness |
| Ketchup 🍅 | ½ cup | Base for sauce |
| Soy Sauce 🥄 | 3 tbsp | Low-sodium preferred |
| Garlic Cloves 🧄 | 3 cloves | Minced finely |
| Fresh Ginger 🌿 | 1 tbsp | Peeled and grated |
| Vegetable Oil 🫒 | ¾ cup | For frying chicken |
| Red Bell Pepper 🌶️ | 1 whole | Diced into 1-inch pieces |
| Green Bell Pepper 🌶️ | 1 whole | Diced into 1-inch pieces |
| Pineapple Chunks 🍍 | 1 cup | Fresh or canned, drained |
| Salt 🧂 | 1 tsp | To taste |
| Black Pepper 🌶️ | ½ tsp | Freshly ground |
[recipeingredientscaler]
The chicken thighs are non-negotiable for that crispy texture—bone-in loses moisture during frying. Look for air-chilled thighs at Whole Foods for superior quality, though standard grocery store options work. Cornstarch is the key to that ultra-crisp coating, but ensure it’s pure cornstarch (some brands mix in wheat flour). The vegetable oil should have a high smoke point—peanut or avocado oil are great alternatives.
No apple cider vinegar? White vinegar in a pinch, though the flavor will be sharper. Ketchup can be swapped for tomato paste thinned with a little water, but the sweetness balance may shift. For a gluten-free version, tamari instead of soy sauce and rice flour for the dredge work beautifully. The bell peppers can be any color—substitute with carrots or zucchini if preferred.
The sauce thickens as it cools, so serve immediately. Leftovers keep for 3-4 days in the fridge, though the chicken may soften. Reheat in a 350°F oven for 10-12 minutes to revive crispness. Freeze sauce separately for up to 3 months.
Why You’ll Love This Recipe
- One Pan Magic: I just toss the chicken thighs in cornstarch and flour, fry them up, and let the vinegar-sugar glaze do the rest—minimal mess, maximum payoff.
- Flavor Bomb: Honestly, that sticky glaze with the tang of apple cider vinegar and the sweetness clinging to each piece? I could eat it straight off the spoon.
- Weeknight Hero: Between us, it’s my go-to when I need something the kids will actually eat without complaint (yes, even the picky one).
- Budget Stretch: Chicken thighs are cheap, the pantry staples do the heavy lifting, and leftovers taste even better the next day—if they last that long.
Step-by-Step Instructions for Sticky Sweet and Sour Chicken
Master the technique for crispy chicken coated in a glossy, tangy-sweet glaze with perfect texture contrast.
Step 1: Coat and Fry the Chicken for Maximum Crisp
Cut the 1.5 lb boneless, skinless chicken thighs into 1-inch pieces and pat them completely dry. This ensures the coating adheres properly and creates that essential crispy texture. In a shallow dish, combine the 0.5 cup cornstarch and 0.25 cup all-purpose flour with the 1 tsp salt and 0.5 tsp black pepper.
Dredge each piece of chicken in the cornstarch mixture, pressing lightly to create an even, thorough coating. Heat the 0.75 cup vegetable oil in a large skillet over medium-high heat until it shimmers. Fry the chicken in batches, without crowding, for 3-4 minutes per side until golden brown and crisp. Transfer to a paper towel-lined plate to drain excess oil.
Step 2: Sauté Aromatics and Vegetables for Depth
Carefully pour off all but 2 tablespoons of the oil from the skillet. Over medium heat, add the diced red bell pepper and diced green bell pepper. Sauté for 3-4 minutes until the edges begin to soften but the peppers retain some bite for texture contrast.
Add the minced garlic cloves and grated fresh ginger to the skillet. Stir constantly for 30 seconds until the aromatics become fragrant—this builds the flavor foundation for the sauce. Be careful not to let the garlic brown, as it can turn bitter.
Step 3: Create the Sticky Glaze and Coat the Chicken
In a small bowl, whisk together the 0.5 cup granulated sugar, 0.33 cup apple cider vinegar, 0.5 cup ketchup, and 3 tbsp soy sauce. Pour this mixture into the skillet with the vegetables and bring to a simmer over medium heat.
Add the 1 cup pineapple chunks and cook for 2-3 minutes until the sauce thickens slightly and becomes glossy. Return all the fried chicken to the skillet and toss gently to coat every piece evenly in the sticky glaze. Cook for an additional 1-2 minutes until the chicken is heated through and the sauce clings beautifully to each piece.
Step 4: Rest and Serve for Optimal Texture
Transfer the chicken and sauce to a serving platter. Let it rest for 2-3 minutes to allow the glaze to set slightly. This brief rest ensures the coating remains crisp while the sauce thickens enough to cling without running off.
Serve immediately while hot, with the sauce spooned over the top. The ideal result features chicken with a crisp exterior that gives way to tender meat, all coated in a balanced sweet-tangy glaze with visible bits of bell pepper and pineapple for color and texture contrast.
Pro Tips For Making Sticky Sweet And Sour Chicken
- Fry in Batches: Crowding the pan steams the chicken instead of frying it—use about 2 tablespoons of oil per batch and give each piece space. I learned this the hard way after ending up with soggy, sad chicken more than once.
- Velvet the Chicken: Toss the thighs in cornstarch before dredging in flour for that ultra-tender, restaurant-style coating. Sounds weird, but it works: the cornstarch keeps the meat juicy while the flour gives it crunch.
- Reduce the Sauce: Simmer the sugar and vinegar mixture until it thickens enough to coat the back of a spoon—about 5-7 minutes on medium heat. Skip this and you’ll have watery sauce instead of that sticky glaze everyone loves.
- Use Thighs, Not Breasts: Boneless, skinless chicken thighs stay moist and hold up to the bold sweet-sour flavors better than breasts, which can dry out. After burning three batches with dry chicken, I finally figured out the cut matters most.
Common Mistakes When Making sticky sweet and sour chicken
Overcrowding the Pan
Frying too many chicken pieces at once lowers the oil temperature, causing the chicken to steam instead of crisp. I fry in batches with 1 inch of space between each piece. This ensures even cooking and that perfect golden-brown crust.
Skipping the Drying Step
Wet chicken won’t crisp properly. I always pat the pieces completely dry with paper towels before dredging. This helps the cornstarch coating adhere better and prevents splattering when frying. 💡
Sauce Too Thin
If your sauce isn’t sticky, it likely needs more reduction time. I simmer the sauce for 3-4 minutes before adding the chicken back in. A cornstarch slurry (1 tsp cornstarch + 1 tbsp water) can thicken it quickly if needed.
Uneven Coating
For every piece to get that glossy finish, toss the chicken gently in the sauce until fully coated. I use tongs to flip each piece, ensuring the sauce clings evenly. This step takes 1-2 minutes over medium heat.
Burning the Garlic
Garlic burns easily and turns bitter. I add it last and cook for only 30 seconds until fragrant. If it starts browning, remove the pan from heat immediately to prevent overcooking. 🔥
Skipping the Rest
Letting the chicken rest for 2-3 minutes after coating allows the glaze to set. Without this, the sauce will slide off the chicken. I always serve it fresh for the best texture contrast.
Nutrition Facts
Frequently Asked Questions
Can I use chicken breast instead of thighs?
You can, but thighs stay juicier. If using breasts, reduce frying time to 2-3 minutes per side to prevent dryness. The flavor will be milder but still delicious.
How do I make the sauce thicker?
Simmer it longer before adding chicken. For a quick fix, mix 1 tsp cornstarch with 1 tbsp water, stir into the sauce, and cook for 1 minute. This creates a glossier finish.
Can I bake the chicken instead of frying?
Yes! Toss coated pieces with 2 tbsp oil and bake at 400°F for 18-20 minutes, flipping halfway. The texture will be slightly different but still crispy.
What’s the best way to reheat leftovers?
Use an oven at 350°F for 10-12 minutes to restore crispness. Microwaving makes the coating soggy. Store leftovers in an airtight container for up to 3 days.

- Jollof Rice Sauce Recipe: West African Tomato and Spice Infusion - September 25, 2026
- Japanese Rice Soup Recipe: Umami-Rich Comfort in a Bowl - September 25, 2026
- Homemade Cream Of Rice Recipe: Silk-Smooth Breakfast in Minutes - September 25, 2026