
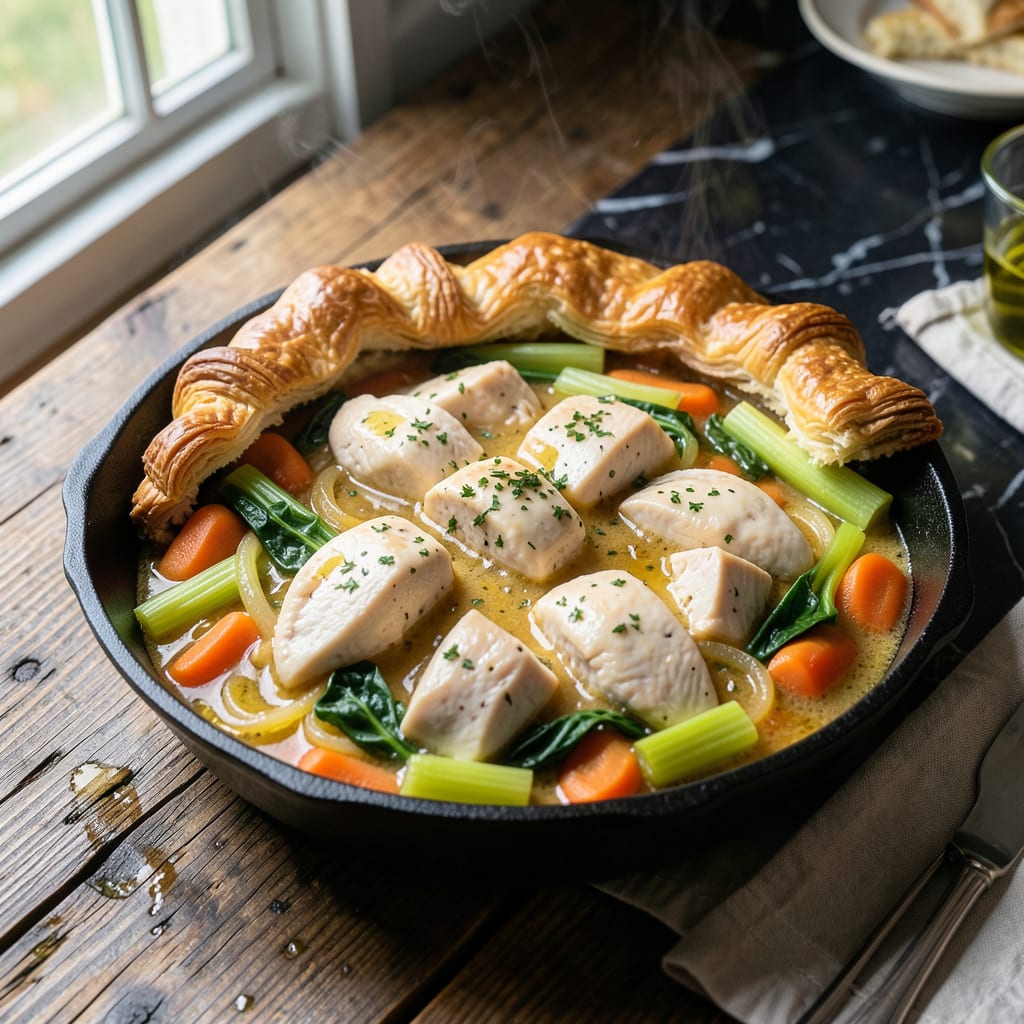
There’s nothing like a warm, creamy chicken pot pie to bring comfort to any meal. This one-pot version simplifies the classic without sacrificing flavor or texture.
By cooking everything in a single skillet, you’ll achieve a golden crust, tender chicken, and a rich, velvety filling that delivers all the comfort of the traditional dish with minimal cleanup.
Ingredients for Stove Top Chicken Pot Pie
Pantry staples and a few fresh picks make this skillet magic happen.
| Ingredient | Amount | Notes |
|---|---|---|
| Boneless Skinless Chicken Breasts 🍗 | 1 ½ lb | Cut into 1-inch cubes |
| Unsalted Butter 🧈 | ½ cup | Divided for cooking and crust |
| All-Purpose Flour 🌾 | ¾ cup | Plus extra for dusting |
| Yellow Onion 🧅 | 1 whole | Medium, finely diced |
| Carrots 🥕 | 2 whole | Medium, peeled and diced |
| Celery Stalks 🌿 | 2 whole | Diced for classic flavor |
| Garlic Cloves 🧄 | 3 cloves | Minced for depth |
| Dried Thyme 🍃 | 1 tsp | Or 1 tbsp fresh |
| Chicken Broth 💧 | 2 cups | Low-sodium preferred |
| Whole Milk 🥛 | 1 cup | Full-fat for creaminess |
| Frozen Peas 🌱 | 1 cup | No need to thaw |
| Salt 🧂 | 1 tsp | Or to taste |
| Black Pepper 🌶️ | ½ tsp | Freshly ground |
| Refrigerated Pie Crust 🥧 | 1 sheet | Or homemade if preferred |
[recipeingredientscaler]
The chicken is the star here—boneless, skinless breasts stay tender and cook fast. I grab mine from Costco for bulk savings, but any grocery store works. Look for pieces that are similar in size so they cook evenly. The veggies (onion, carrots, celery) are your flavor base—fresh is best, but frozen works in a pinch (just thaw and drain first).
No thyme? Poultry seasoning at half the amount gets you close. Short on milk? Half-and-half or cream makes it even richer (don’t tell anyone). Swap the peas for corn or green beans if that’s what’s in the freezer. The pie crust can be store-bought puff pastry for extra flakiness—just roll it out thinner so it cooks through.
Leftovers reheat like a dream—cover with foil to keep the crust crisp. Keeps 3-4 days in the fridge, freezes for 2 months. I always make extra filling and freeze it crustless for lazy dinners later.
Why You’ll Love This Recipe
- One Pot Magic: I love that it all comes together in a single skillet—no extra bowls or baking dishes to wash.
- Rich Homestyle Taste: The butter and flour create a velvety sauce that coats the tender chicken and sweet carrots.
- Weeknight Hero: Honestly, it’s my go-to for busy evenings when I need something hearty fast.
- Feeds the Family: One batch makes enough for dinner tonight and lunches tomorrow—no waste, no stress.
Step-by-Step Instructions for Stove Top Chicken Pot Pie
This one-pot method delivers all the comfort of classic chicken pot pie right in your skillet.
Step 1: Sauté Aromatics and Brown Chicken
Heat 2 tablespoons of the unsalted butter in a large deep skillet over medium-high heat. Add the diced yellow onion, carrots, and celery stalks. Cook for 5-6 minutes until the vegetables soften and the onion turns translucent.
Add the boneless skinless chicken breasts cut into 1-inch cubes, salt, and black pepper. Cook for 6-7 minutes until the chicken is lightly browned on all sides and no longer pink inside. The chicken will finish cooking in the next steps, so don’t worry if it’s not fully done yet.
Stir in the minced garlic cloves and dried thyme, cooking for 30 seconds until fragrant. This builds the flavor foundation for your filling.
Step 2: Create the Creamy Filling
Sprinkle the all-purpose flour over the chicken and vegetable mixture. Stir well to coat everything evenly, then cook for 1 minute to remove the raw flour taste. This creates a roux that will thicken your filling.
Slowly pour in the chicken broth and whole milk, stirring constantly. Bring the mixture to a simmer and cook for 5-6 minutes until the sauce thickens enough to coat the back of a spoon. The sauce should be creamy and rich, not thin or watery.
Add the frozen peas and stir to combine. Taste and adjust seasoning with additional salt and black pepper if needed. The filling should be well-seasoned and hearty.
Step 3: Top with Pie Crust and Finish
Unroll the refrigerated pie crust and place it over the filling, tucking the edges down slightly into the skillet. Cut a few small slits in the center of the crust to allow steam to escape. This prevents the crust from becoming soggy underneath.
Melt the remaining unsalted butter and brush it evenly over the pie crust. This adds flavor and helps the crust brown beautifully. Cover the skillet and cook over medium-low heat for 10-12 minutes until the crust is golden brown and the filling is bubbling at the edges.
Remove from heat and let it rest for 5 minutes before serving. This allows the filling to set slightly, making it easier to serve neat portions. Each serving should have a generous portion of creamy filling topped with a crisp, golden crust.
Pro Tips For Making Stove Top Chicken Pot Pie
- Pre-Cook the Chicken: Poach or sauté the chicken breasts first, then shred—this keeps them from turning rubbery while the sauce thickens in the pan.
- Bloom the Flour: After melting the butter, cook the flour for 1-2 minutes until golden—this removes the raw taste and builds a richer base for your gravy.
- Cut Carrots Small: Dice the carrots into ¼-inch pieces so they soften quickly in the sauce; whole slices stay crunchy and undercooked by the time the pie is done.
- Use Cold Butter: When making the topping, cut in cold unsalted butter—it creates flaky layers instead of a dense, biscuit-like crust.
Pro Cooking Tips for Perfect Results
Perfect Your Roux
For the creamiest filling, cook your flour-butter mixture for a full 1 minute after adding the flour. This removes the raw taste and builds a solid base. I use all-purpose flour for this—it creates just the right thickness without being too heavy. 💡
Layer Flavors Right
Bloom your dried thyme and minced garlic in the butter before adding liquids. This 30-second step unlocks their full aroma. I always use fresh garlic—it makes a noticeable difference in the depth of flavor.
Thicken Like a Pro
When adding your chicken broth and whole milk, pour slowly while stirring constantly. This prevents lumps in your sauce. The mixture should coat the back of a spoon—if it’s too thin, simmer 2-3 minutes longer.
Crust Perfection
Brush the pie crust with melted butter before cooking for a golden, flaky finish. Cut 3-4 small slits in the center to let steam escape. I prefer refrigerated pie crust for convenience, but puff pastry adds extra flakiness.
Heat Control
After adding the crust, reduce heat to medium-low to prevent burning. Cover the skillet to trap heat and ensure the crust cooks through evenly. Check at 10 minutes—it should be golden brown and bubbling. 🔥
Rest Before Serving
Let the pie rest for 5 minutes off heat. This lets the filling set slightly so it doesn’t run out when sliced. I serve mine straight from the skillet for that rustic, homey presentation.
Nutrition Facts
Frequently Asked Questions
Can I use pre-cooked chicken to save time?
Yes! Use 2 cups of cooked, diced chicken. Add it with the peas at the end to warm through. This cuts cooking time by 10-12 minutes while keeping the dish just as flavorful.
What if my filling is too thin?
Simmer uncovered for 2-3 extra minutes. If still thin, mix 1 tablespoon cornstarch with cold water, stir into filling, and cook for 1 minute until thickened.
Can I make this ahead of time?
Assemble completely but don’t cook the crust. Refrigerate up to 24 hours, then cook as directed, adding 2-3 minutes to the covered time.
How can I make the crust extra crispy?
Uncover the skillet for the last 2 minutes of cooking. Brush with extra melted butter and sprinkle with 1 teaspoon coarse salt before serving.

- Jollof Rice Sauce Recipe: West African Tomato and Spice Infusion - September 25, 2026
- Japanese Rice Soup Recipe: Umami-Rich Comfort in a Bowl - September 25, 2026
- Homemade Cream Of Rice Recipe: Silk-Smooth Breakfast in Minutes - September 25, 2026