
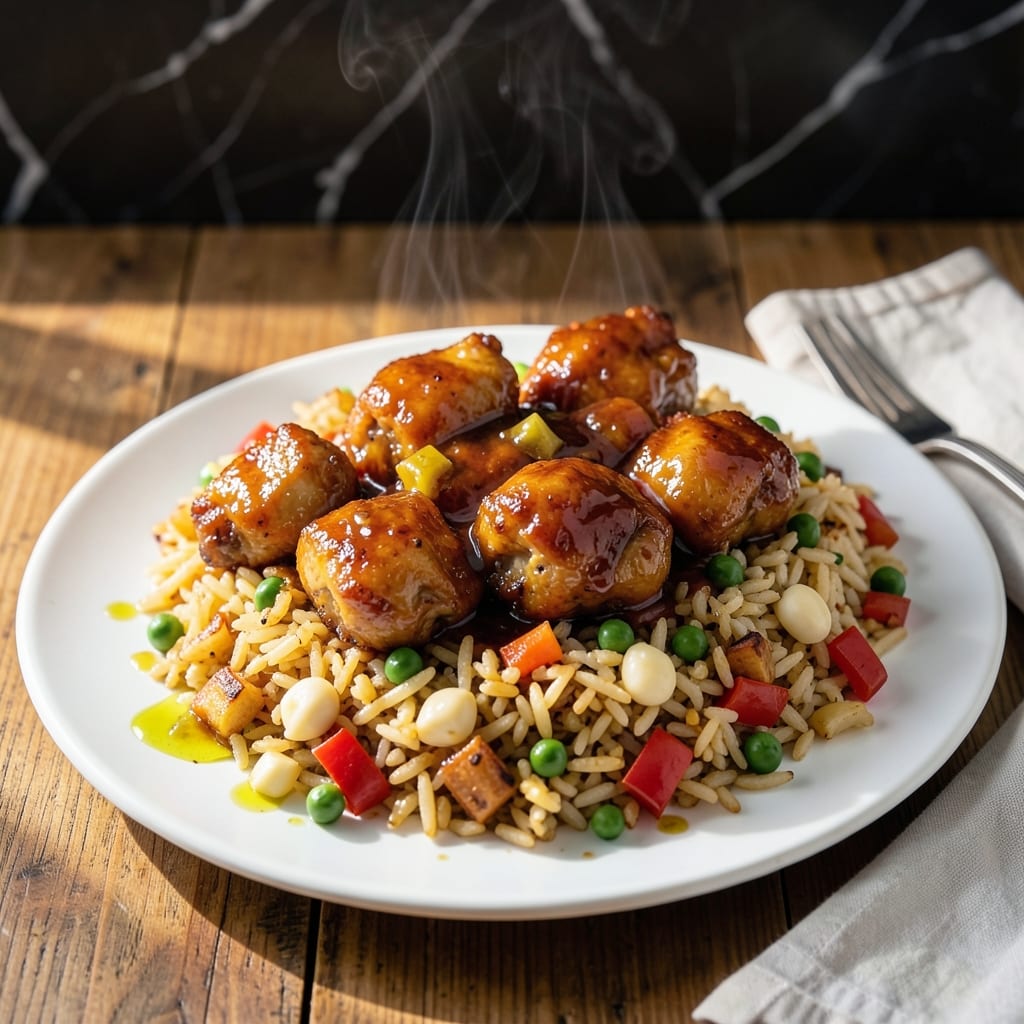
This dual delight brings restaurant-quality Chinese takeout to your kitchen with perfect balance of sweet, tangy, and savory flavors. I developed this method after countless attempts to replicate my favorite takeout version.
The chicken stays crispy while the sauce clings beautifully, and the fried rice achieves that signature wok-seared texture. Each component complements the other without overwhelming the plate.
You’ll achieve that ideal contrast of tender chicken pieces, glossy sauce, and fluffy rice studded with vegetables. The dish comes together faster than delivery, with better flavor and fresher ingredients.
Serve immediately for the best texture and temperature contrast between the hot chicken and room-temperature rice.
Ingredients for Sweet and Sour Chicken and Fried Rice
Pantry staples and a quick grocery run. Nothing exotic, just bold flavors waiting to happen.
| Ingredient | Amount | Notes |
|---|---|---|
| Boneless, Skinless Chicken Thighs 🍗 | 1 ½ lb | Cut into 1-inch pieces |
| Cornstarch 🌾 | ½ cup | For coating chicken |
| Large Eggs 🥚 | 2 whole | Lightly beaten for egg wash |
| All-Purpose Flour 🌾 | ¼ cup | For dredging chicken |
| Vegetable Oil 🫒 | 1 ½ cups | For deep frying chicken |
| White Sugar 🍚 | ½ cup | For sweet and sour sauce |
| White Vinegar 💧 | ½ cup | For tangy balance |
| Ketchup 🍅 | ¾ cup | For sauce base |
| Soy Sauce 🥄 | 2 tbsp | Low-sodium preferred |
| Garlic Cloves 🧄 | 4 cloves | Minced for sauce |
| Cooked Long-Grain White Rice 🍚 | 4 cups | Day-old, chilled |
| Frozen Mixed Vegetables 🥕 | 1 ½ cups | Peas, carrots, corn blend |
| Green Onions 🧅 | 4 whole | Thinly sliced for garnish |
| Ginger Root 🌿 | 1 tbsp | Freshly grated for sauce |
| Salt 🧂 | 1 tsp | Kosher or sea salt |
The chicken is the star here. Thighs stay juicier than breasts for frying—look for skinless, boneless at Costco or your butcher. For that crispy coating, cornstarch is non-negotiable (it’s what gives takeout that signature crunch). Day-old rice is key for fried rice—fresh rice turns to mush. Most grocery stores have pre-cooked rice in the refrigerated section if you’re in a hurry.
No cornstarch? Arrowroot powder works at a 1:1 ratio. Swap ketchup for tomato paste plus a little extra sugar if that’s what you’ve got. The frozen veggie mix can be fresh—just dice small so everything cooks evenly. Low-sodium soy sauce keeps the dish from getting too salty, but regular works in a pinch (just taste as you go).
Leftovers keep 3-4 days in the fridge, but the chicken loses crispiness. Reheat in a skillet to revive the texture. Sauce thickens as it cools—a splash of water thins it right out. Freeze the sauce separately for up to 3 months.
Why You’ll Love This Recipe
- One Pan Meal: I love that I can cook the chicken and rice together in the same pan, with just vegetable oil and a quick sear on the thighs.
- Sweet & Tangy Bite: The cornstarch coating gives the chicken that perfect crispy edge before it soaks up the sweet and sour sauce—so good.
- Feeds My Crew: Between us, this recipe stretches easily for leftovers, and the egg-fried rice part is always a hit with my picky eaters.
- Budget Winner: Honestly, chicken thighs and pantry staples like flour and eggs keep this dish cheap but still feel like a treat.
Step-by-Step Instructions for Sweet and Sour Chicken and Fried Rice
Two takeout favorites come together with this foolproof method for crispy chicken and flavorful rice.
Step 1: Coat and Fry the Chicken to Golden Perfection
Cut the 1.5 lb Boneless, Skinless Chicken Thighs into 1-inch pieces and pat them dry. In a shallow dish, whisk together the 2 whole Large Eggs and 1 tsp Salt. In another dish, combine the 0.5 cup Cornstarch and 0.25 cup All-Purpose Flour.
Dip each chicken piece into the egg mixture, letting any excess drip off, then dredge in the cornstarch-flour mixture, pressing gently to adhere. Heat the 1.5 cups Vegetable Oil in a deep skillet to 350°F and fry the chicken in batches for 4-5 minutes until golden brown and crispy. Drain on a wire rack.
Step 2: Prepare the Sweet and Sour Sauce
In a saucepan, combine the 0.5 cup White Sugar, 0.5 cup White Vinegar, 0.75 cup Ketchup, and 2 tbsp Soy Sauce. Bring to a simmer over medium heat, stirring until the sugar dissolves and the mixture thickens slightly, about 3-4 minutes.
While the sauce heats, mince the 4 cloves Garlic Cloves and grate the 1 tbsp Ginger Root. Stir these into the sauce and let it simmer for an additional 1 minute to meld the flavors. The sauce should coat the back of a spoon and have a glossy sheen.
Step 3: Toss the Chicken in Sauce
Pour the sweet and sour sauce over the fried chicken in a large bowl. Toss gently to coat every piece evenly. The sauce should cling to the crispy exterior without making it soggy. Let it sit for 2-3 minutes to allow the flavors to penetrate the chicken.
If the sauce seems too thick, add a splash of water to thin it slightly. The chicken should be glossy and vibrant with a perfect balance of sweet and tangy flavors.
Step 4: Stir-Fry the Rice with Vegetables
In a large skillet or wok, heat 1 tablespoon of the reserved Vegetable Oil over high heat. Add the 1.5 cups Frozen Mixed Vegetables and stir-fry for 3-4 minutes until heated through and slightly charred.
Add the 4 cups Cooked Long-Grain White Rice, breaking up any clumps, and stir-fry for another 2-3 minutes until the rice is hot and slightly crispy. Season with a pinch of Salt if needed.
Step 5: Serve with Garnish
Divide the fried rice among plates and top with the sweet and sour chicken. Garnish with the thinly sliced 4 whole Green Onions for a pop of color and freshness. Serve immediately while the chicken is still crispy and the rice is hot.
The combination of crispy, saucy chicken and flavorful fried rice creates a satisfying meal that tastes just like your favorite takeout.
Pro Tips For Making Sweet And Sour Chicken And Fried Rice
- Velocity Fry the Chicken: Crank the oil to 375°F before the chicken hits the pan—any lower and the coating absorbs oil instead of crisping. I learned this the hard way after pulling out soggy nuggets from lukewarm oil.
- Double Coat the Thighs: Dip the chicken in cornstarch first, then egg, then flour for a shatteringly crisp shell that holds up to the saucy rice. Skip the flour and the coating slides right off.
- Rest the Fried Batches: Spread the first batch on a rack, not paper towels, so steam doesn’t turn the crust into a sad, chewy blanket. Five minutes of airflow keeps it crunchy until serving.
- Use Day-Old Rice: Fresh rice turns to mush in the wok—make the rice the night before and refrigerate it uncovered so the grains dry out and fry up separate and fluffy.
Health Benefits of This sweet and sour chicken and fried rice
Protein Powerhouse
The chicken thighs in this creation provide high-quality protein—about 25 grams per 3-ounce serving—essential for muscle maintenance and repair. Thighs offer more iron and zinc than breast meat, supporting your immune system. I always choose thighs for their juiciness and rich flavor. 💪
Energy Boost
This dish delivers complex carbohydrates from the rice, providing sustained energy. The 4 cups of long-grain white rice offers a significant portion of your daily B vitamins, which help convert food into usable energy for your body.
Vitamin-Rich Veggies
The 1.5 cups frozen mixed vegetables pack a punch with vitamins A and C, especially from the carrots and peas. These nutrients support vision health and immune function, making this meal as nourishing as it is delicious.
Healthy Fats Balance
While the dish is fried, using vegetable oil provides heart-healthy unsaturated fats. The eggs in the chicken coating add choline, which supports brain health. Balance is key—enjoy this as part of a varied diet.
Low-Calorie Option
Each serving contains roughly 500-600 calories, making it a reasonable indulgence. To lighten it further, I sometimes bake the chicken at 400°F for 20 minutes instead of frying. This cuts calories while keeping the crispy texture. ✨
Antioxidant Benefits
The garlic and ginger in the sauce offer anti-inflammatory properties. Garlic is known for its heart health benefits, while ginger aids digestion. Together, they add depth of flavor and a wellness boost to every bite.
Nutrition Facts
Frequently Asked Questions
Can I use chicken breast instead of thighs?
Yes, but thighs stay juicier. If using breasts, reduce frying time to 3-4 minutes to prevent dryness. Brining the chicken for 30 minutes in saltwater first helps keep it tender.
How do I keep the chicken crispy after saucing?
Toss the chicken in sauce just before serving. If prepping ahead, store chicken and sauce separately, then combine in a hot pan for 1-2 minutes to restore crispness.
What if my sauce is too thin?
Simmer it longer over medium heat until thickened. Alternatively, mix 1 tsp cornstarch with 1 tbsp water and stir into the sauce. It should coat the back of a spoon when ready.
Can I make this with brown rice?
Use cooked, chilled brown rice and stir-fry for 4-5 minutes to crisp it up. The texture will be chewier, but the flavor works perfectly.

- Jollof Rice Sauce Recipe: West African Tomato and Spice Infusion - September 25, 2026
- Japanese Rice Soup Recipe: Umami-Rich Comfort in a Bowl - September 25, 2026
- Homemade Cream Of Rice Recipe: Silk-Smooth Breakfast in Minutes - September 25, 2026