
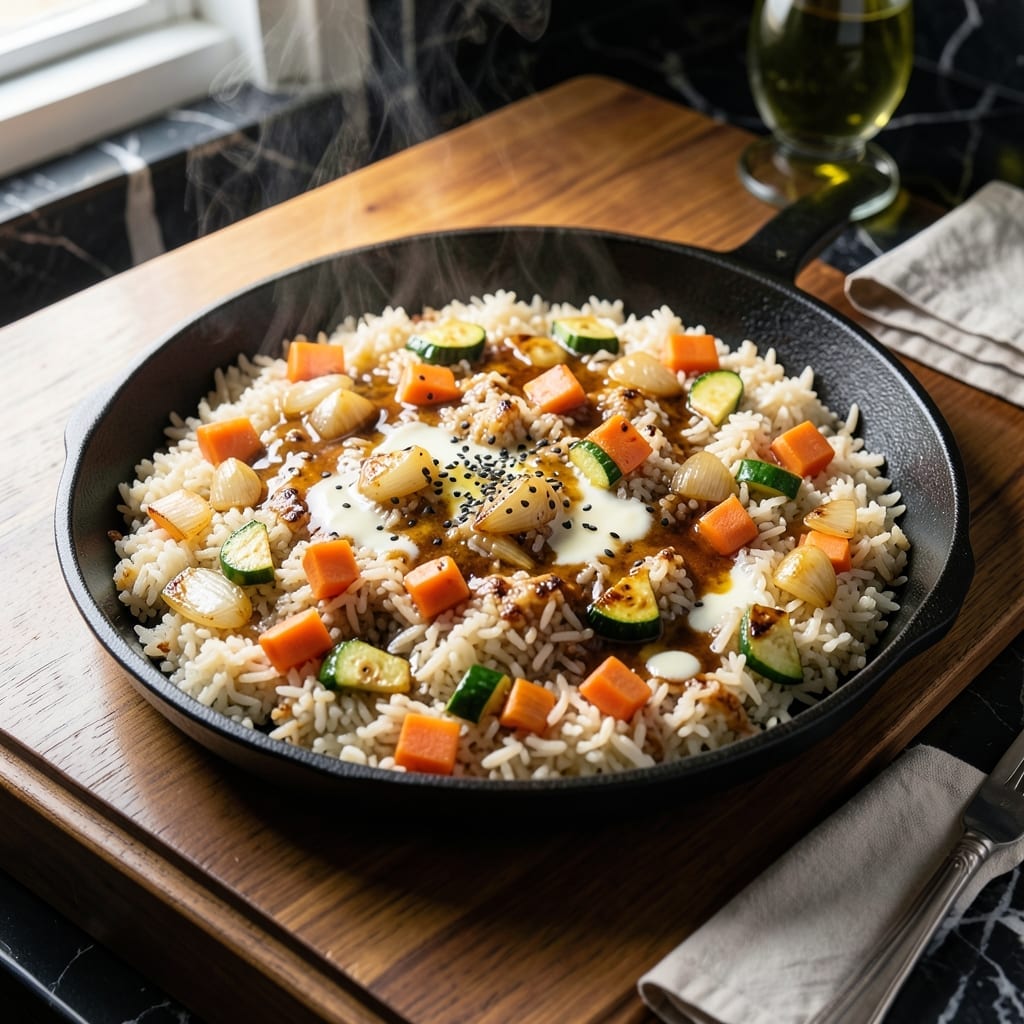
This hibachi-style fried rice brings the restaurant experience to your kitchen with its signature savory soy glaze and perfectly charred bits. The secret lies in using day-old rice and cooking it on high heat for that authentic teppanyaki texture.
I’ve refined this method to capture the smoky depth of a teppanyaki grill, using simple ingredients like soy sauce, butter, and fresh vegetables. The rice gets a crispy, slightly caramelized exterior while staying fluffy inside.
What sets this dish apart is the balance of flavors—the umami-rich soy glaze, the sweetness of the onions, and the subtle smokiness from the high-heat sear. It pairs perfectly with grilled proteins or stands alone as a satisfying meal.
Ready in under 20 minutes, this fried rice delivers restaurant-quality taste with minimal effort. Here’s how to make it at home.
Ingredients for Teppanyaki Rice
Restaurant-quality ingredients for authentic hibachi-style fried rice at home.
| Ingredient | Amount | Notes |
|---|---|---|
| Day-Old Cooked White Rice 🍚 | 4 cups | Cold, preferably overnight |
| Soy Sauce 🫒 | ⅓ cup | Low-sodium preferred |
| Unsalted Butter 🧈 | 3 tbsp | Divided for cooking stages |
| Yellow Onion 🧅 | 1 whole | Medium, finely diced |
| Carrots 🥕 | 2 whole | Medium, finely diced |
| Zucchini 🥒 | 1 whole | Medium, finely diced |
| Garlic Cloves 🧄 | 3 cloves | Minced for aromatic base |
| Large Eggs 🥚 | 2 whole | Lightly beaten for scrambling |
| Green Onions 🧅 | 3 whole | Thinly sliced for garnish |
| Sesame Oil 🫒 | 1 tbsp | Toasted for finishing |
| White Pepper 🌶️ | ½ tsp | Ground for authentic flavor |
| Diamond Crystal Kosher Salt 🧂 | 1 tsp | Or to taste |
The rice is non-negotiable—day-old, cold, and dry is what gives you that signature teppanyaki texture. Use jasmine or short-grain white rice; freshly cooked rice will turn to mush. For the soy sauce, Kikkoman low-sodium is my go-to (consistent flavor, widely available). The butter should be unsalted so you control the seasoning. Costco’s organic butter is a great value for the quantity.
No day-old rice? Spread freshly cooked rice on a sheet pan and refrigerate for 1 hour to dry it out. Out of carrots? Peas or corn work well (frozen is fine, no need to thaw). Want extra richness? Add 1 tbsp of toasted sesame oil at the end. The white pepper is traditional, but black pepper at half the amount substitutes fine. For a vegetarian version, skip the eggs and add extra diced zucchini.
This keeps 3-4 days in the fridge—reheat in a skillet with a splash of water to revive. The butter can be frozen for 3 months, and soy sauce lasts indefinitely. Prep all veggies before cooking; this moves fast on high heat. (worth the extra minute)
Why You’ll Love This Recipe
- One Pan Wonder: I just toss day-old rice with onions, carrots, and butter—no fancy equipment, no stress.
- Buttery Soy Magic: The combo of rich butter and soy sauce makes every bite ridiculously good.
- Weeknight Lifesaver: I throw this together when I’m starved and short on time. (Yes, even on a Tuesday night)
- Leftovers Reinvented: Honestly, it’s the best way to use up that extra rice and veggies sitting in my fridge.
Step-by-Step Instructions for Hibachi-Style Fried Rice
Master the teppanyaki technique with precise timing and temperature control for authentic results.
Step 1: Sauté Aromatics and Vegetables
Heat 1 tbsp of the 3 tbsp Unsalted Butter in a large skillet or wok over medium-high heat until melted and foaming. Add the 1 whole Yellow Onion, 2 whole Carrots, and 1 whole Zucchini, all finely diced, and stir-fry for 4-5 minutes until the vegetables soften and the onion becomes translucent.
Add the 3 cloves Garlic Cloves and continue cooking for 30-60 seconds until fragrant. The garlic should sizzle but not brown—this prevents bitterness. Season with 0.5 tsp White Pepper and 1 tsp Diamond Crystal Kosher Salt to enhance the vegetables’ natural sweetness.
Step 2: Scramble the Eggs
Push the vegetables to one side of the pan and add the remaining 2 tbsp Unsalted Butter. Once melted, pour in the 2 whole Large Eggs, lightly beaten. Scramble quickly with a spatula, breaking the curds into small, even pieces as they set—this should take 1-2 minutes.
Combine the scrambled eggs with the vegetables, ensuring even distribution. The eggs should be fully cooked but still moist, creating a rich base for the rice.
Step 3: Incorporate Rice and Soy Glaze
Add the 4 cups Day-Old Cooked White Rice, breaking up any clumps with your spatula. Cold rice is essential—it fries up fluffy instead of mushy. Stir-fry for 3-4 minutes until the rice is heated through and begins to crisp slightly.
Drizzle the 0.33 cup Soy Sauce evenly over the rice. Toss continuously for 2-3 minutes until the rice is uniformly coated and the edges display a light caramelization. The soy sauce should create a glossy, savory sheen without making the rice soggy.
Step 4: Finish and Garnish
Remove the pan from heat and stir in the 1 tbsp Sesame Oil. This adds a nutty aroma and depth of flavor characteristic of teppanyaki cooking. Taste and adjust seasoning if needed, though the soy sauce and salt should provide sufficient flavor.
Transfer to a serving platter and top with the 3 whole Green Onions, thinly sliced. The green onions add a fresh, crisp contrast to the rich, savory rice. Serve immediately while hot, with the rice grains distinct and slightly crisp at the edges.
Pro Tips For Making Teppanyaki Rice
- Chill the Rice: Use day-old rice straight from the fridge—it’s drier and fries up fluffier. I learned this the hard way after my first few batches turned mushy.
- Dice Veggies Small: Cut the onion and carrots into tiny, even pieces so they cook quickly and evenly. Anything bigger than a pea will throw off the texture.
- Crank the Heat: Get your pan or griddle screaming hot before adding the rice—this is how you get that signature teppanyaki crispness. About 2 minutes on high should do it.
- Salt the Butter: Since the recipe calls for unsalted butter, add a pinch of salt when you melt it into the rice. Otherwise, the dish can taste flat, even with soy sauce.
Troubleshooting This Dish
Rice Too Soft
If your rice turns mushy, you likely used fresh rice. Always use day-old, cold rice straight from the fridge. Fresh rice holds too much moisture, which steams rather than fries. Spread cooked rice on a tray and refrigerate for 1 hour to dry it out quickly. 💡
Bland Flavor
Under-seasoned rice usually needs more soy sauce or salt. Taste as you cook and adjust with Diamond Crystal Kosher Salt. Don’t skip the white pepper—it adds authentic depth without overpowering.
Burnt Garlic
Garlic burns fast over medium-high heat. Add it only after vegetables soften, and cook for 30-60 seconds max. Burnt garlic turns bitter and ruins the dish. Keep it moving constantly.
Eggs Too Dry
Scrambled eggs should be moist, not rubbery. Cook them over medium-high heat for just 1-2 minutes, breaking curds into small pieces. Remove from heat while still slightly underdone—they’ll finish cooking when mixed with hot rice.
Sticky Rice Clumps
Break up rice clumps before adding to the pan. Use your spatula to press and flatten the rice against the hot surface, creating crispy bits. If rice sticks, your pan may not be hot enough—wait until butter foams before adding ingredients.
Uneven Coloring
For that signature caramelized look, ensure your pan is hot enough before adding rice. Stir-fry continuously for 2-3 minutes after adding soy sauce, tossing to coat every grain evenly. A well-seasoned cast iron skillet works best for even browning.
Nutrition Facts
Frequently Asked Questions
Why use day-old rice for fried rice?
Day-old rice is drier, which prevents mushiness when stir-fried. Fresh rice contains excess moisture that steams instead of frying, resulting in a soft texture. For best results, use cold, dry rice straight from the fridge.
Can I substitute other vegetables?
Peas, corn, or bell peppers work well. Frozen veggies are fine too—no need to thaw. Just ensure they’re finely diced for even cooking at medium-high heat.
How do I prevent burnt garlic?
Add garlic only after the vegetables soften, and cook for 30-60 seconds max. Garlic burns quickly, so keep it moving constantly to avoid bitterness.
Can I make this ahead of time?
Yes! This dish keeps for 3-4 days in the fridge. Reheat in a skillet with a splash of water to restore moisture and crispness.

- Jollof Rice Sauce Recipe: West African Tomato and Spice Infusion - September 25, 2026
- Japanese Rice Soup Recipe: Umami-Rich Comfort in a Bowl - September 25, 2026
- Homemade Cream Of Rice Recipe: Silk-Smooth Breakfast in Minutes - September 25, 2026