
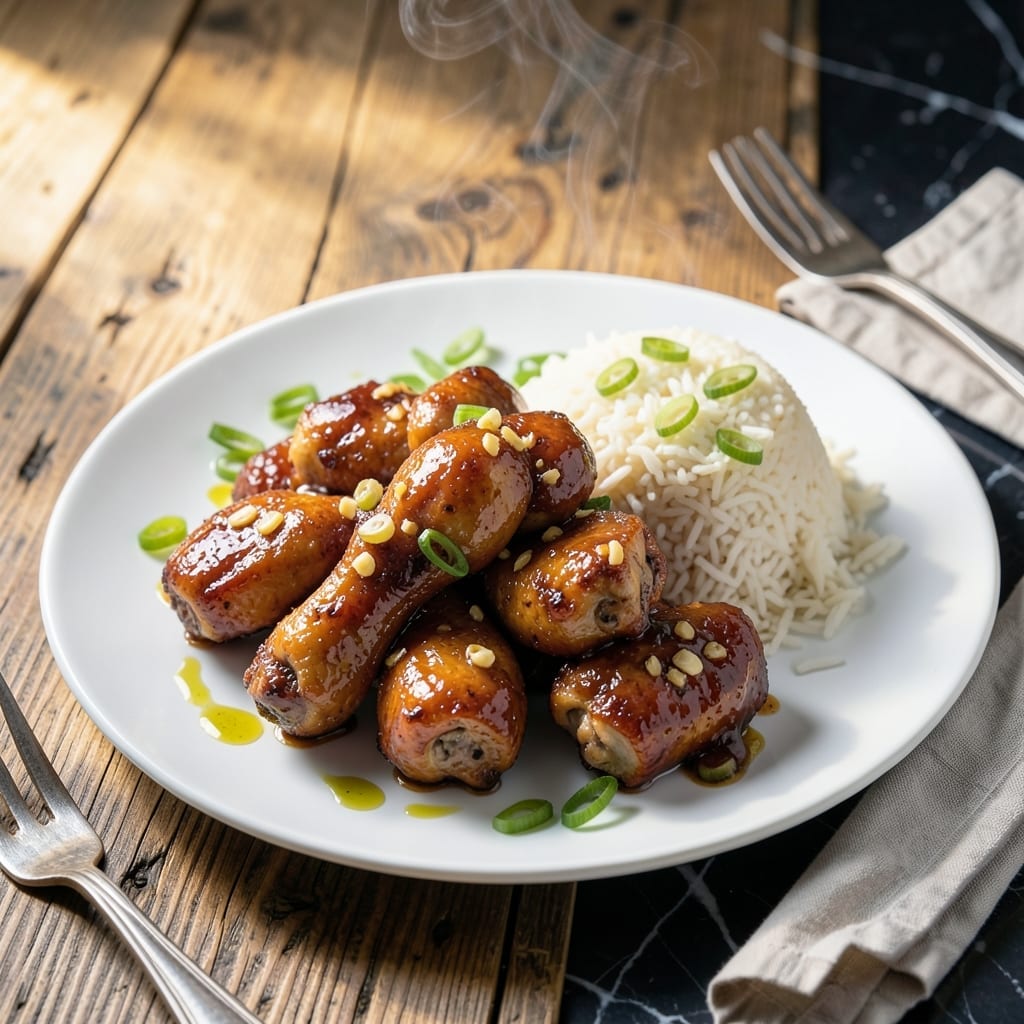
Achieving perfectly glazed teriyaki chicken at home is simpler than you think. This method delivers restaurant-quality results with minimal effort and maximum flavor.
The secret lies in a balanced sauce that caramelizes beautifully on the chicken, creating that signature sticky glaze. I’ve refined this technique to ensure consistent results every time.
You’ll get tender chicken pieces coated in a glossy, flavorful sauce that’s both sweet and savory. The recipe comes together quickly, making it ideal for busy weeknights.
Serve it over rice with steamed vegetables for a complete meal. Here’s how to make this dish exactly right.
Ingredients for Teriaki Chicken
Restaurant-quality teriyaki chicken starts with these balanced, flavorful ingredients for that signature sticky glaze.
| Ingredient | Amount | Notes |
|---|---|---|
| Boneless, Skinless Chicken Thighs 🍗 | 1 ½ lb | Cut into bite-sized pieces |
| Soy Sauce 🥢 | ½ cup | Low-sodium preferred for balance |
| Brown Sugar 🍚 | ⅓ cup | Packed, light or dark |
| Honey 🍯 | ¼ cup | Substitute maple syrup if needed |
| Fresh Garlic Cloves 🧄 | 3 cloves | Minced finely for even flavor |
| Fresh Ginger Root 🌿 | 1 tbsp | Peeled and grated |
| Rice Vinegar 🍶 | 2 tbsp | Unseasoned for authentic taste |
| Sesame Oil 🫒 | 1 tbsp | Toasted for depth of flavor |
| Cornstarch 🌾 | 1 tbsp | Mixed with water for slurry |
| Water 💧 | 2 tbsp | For cornstarch slurry |
| Vegetable Oil 🫒 | 1 tbsp | Neutral flavor for cooking |
| Green Onions 🧅 | 3 whole | Thinly sliced for garnish |
| Sesame Seeds 🌰 | 1 tbsp | Toasted for garnish |
| Jasmine Rice 🍚 | 2 cups | Uncooked, for serving |
The chicken thighs are non-negotiable for tender, juicy results—boneless and skinless ensure even cooking. Soy sauce quality matters here; Kikkoman or San-J deliver consistent flavor. Fresh ginger and garlic (from the produce section, not jars) provide the aromatic base that defines authentic teriyaki. Look for firm, smooth ginger root without wrinkles for the best grated texture.
Swapping chicken breasts? They work but dry out faster—brine them first or reduce cooking time by 2-3 minutes. No honey? Maple syrup or agave at a 1:1 ratio maintains sweetness. For gluten-free, tamari instead of soy sauce works perfectly. Rice vinegar can be swapped with apple cider vinegar in a pinch, though the flavor profile shifts slightly.
The sauce can be prepped 2 days ahead and stored in the fridge. Cooked chicken keeps 3-4 days refrigerated or freezes for 3 months. Toast sesame seeds just before serving—they lose crunch quickly. Always bring soy sauce to room temperature before mixing for even incorporation.
Why You’ll Love This Recipe
- One Pan Meal: I just toss the chicken thighs with the soy sauce, honey and garlic, then let the oven do the work.
- Sweet-Savory Magic: That sticky glaze from the brown sugar and honey with the deep umami of soy? Ridiculously good.
- Feeds a Crowd: I make a big batch on Sunday and we eat it for lunch all week—no complaints.
- Budget Friendly: Chicken thighs are cheap, and that sauce stretches flavors without stretching my wallet.
Step-by-Step Instructions for Teriyaki Chicken
This method delivers perfectly glazed, tender chicken with minimal effort and maximum flavor.
Step 1: Prepare the Chicken and Cook the Jasmine Rice
Cut the 1.5 lb Boneless, Skinless Chicken Thighs into 1-inch bite-sized pieces. I prefer thighs here because their higher fat content keeps them juicy even with the long cooking time in the sauce. While you work, start the 2 cups Jasmine Rice—it should be ready by the time the dish is finished.
Pat the chicken pieces dry with paper towels to ensure they brown properly. Season lightly with salt and pepper. This preparation step ensures even cooking and better sauce adhesion, which is crucial for achieving that signature sticky glaze.
Step 2: Create the Teriyaki Sauce Base
In a small bowl, whisk together the 0.5 cup Soy Sauce, 0.33 cup Brown Sugar, 0.25 cup Honey, minced 3 cloves Fresh Garlic Cloves, grated 1 tbsp Fresh Ginger Root, and 2 tbsp Rice Vinegar. I use low-sodium soy sauce to control the saltiness—this allows the other flavors to shine without overpowering the dish.
The brown sugar and honey create a balanced sweetness, while the ginger and garlic add depth. The rice vinegar provides a subtle tang that cuts through the richness. Stir until the brown sugar is fully dissolved—this typically takes 1-2 minutes of vigorous whisking.
Step 3: Cook the Chicken and Build the Glaze
Heat the 1 tbsp Vegetable Oil in a large skillet over medium-high heat until it shimmers. Add the chicken pieces in a single layer and cook undisturbed for 3-4 minutes until they develop a golden-brown sear on the bottom. Flip and cook for another 2-3 minutes.
Reduce heat to medium and pour the sauce mixture over the chicken. Add the 1 tbsp Sesame Oil and stir to coat every piece. Simmer for 8-10 minutes, stirring occasionally, until the chicken is cooked through and the sauce has thickened slightly.
Step 4: Thicken the Sauce and Finish
In a small bowl, mix the 1 tbsp Cornstarch with the 2 tbsp Water to create a slurry. Pour this into the skillet with the chicken and sauce. Stir well and cook for an additional 2-3 minutes until the sauce transforms into a thick, glossy glaze that clings to the chicken.
You’ll know it’s ready when the sauce coats the back of a spoon and the chicken pieces are fully enrobed. The glaze should be sticky but still pourable—not so thick it becomes gummy. Taste and adjust seasoning if needed, though the balance should be perfect.
Step 5: Garnish and Serve
Transfer the chicken and sauce to a serving platter or individual bowls over the cooked 2 cups Jasmine Rice. Sprinkle with thinly sliced 3 whole Green Onions and toasted 1 tbsp Sesame Seeds for color and crunch. The contrast of the vibrant green onions and nutty sesame seeds against the dark glaze is visually stunning.
Serve immediately while the glaze is still glossy and warm. The chicken should be tender with a perfect balance of sweet, salty, and umami flavors in every bite. Any leftovers reheat beautifully, though the glaze may thicken further—just add a splash of water and warm gently.
Pro Tips For Making Teriaki Chicken
- Sear First, Sauce Later: I learned this the hard way—sear the chicken thighs in a hot pan until golden before adding the teriyaki sauce, or you’ll end up with steamed, pale meat instead of that caramelized crust.
- Mince the Garlic Fine: Fresh garlic cloves can burn if left in big chunks, so mince them finely and cook just until fragrant—about 30 seconds—to avoid bitter bits ruining your sauce.
- Skip the Overcrowding: Resist the urge to cram all the thighs in one pan; give them space so they brown instead of boil in their own juices.
- Thicken the Sauce Fast: After removing the chicken, crank the heat to medium-high and let the soy sauce, brown sugar, and honey reduce for 2-3 minutes—it’ll coat the back of a spoon when ready.
Health Benefits of This teriaki chicken
Protein Powerhouse
This dish packs a serious protein punch with 1.5 lb chicken thighs providing about 35 grams of protein per serving. Protein is essential for muscle repair and growth, making this a great post-workout meal. I always feel satisfied and energized after eating it. 💪
Balanced Energy Source
The combination of brown sugar and honey provides natural carbohydrates that give you sustained energy. Unlike refined sugars, these complex carbs release energy slowly, helping you stay full and focused for hours after your meal.
Rich in Antioxidants
Fresh garlic and ginger are packed with antioxidants that support your immune system. Garlic contains allicin, while ginger has gingerol—both compounds help combat inflammation and oxidative stress in your body.
Heart-Healthy Fats
Chicken thighs contain monounsaturated fats, which are beneficial for heart health. The sesame oil adds polyunsaturated fats, including omega-6 fatty acids, which can help lower bad cholesterol levels when consumed in moderation.
Low-Calorie Satisfaction
Each serving of this dish contains roughly 400-450 calories, making it a balanced option for those watching their intake. The protein and fiber from the ingredients help promote feelings of fullness, reducing the urge to snack later. 🥗
Essential Vitamins
This recipe provides important B vitamins like B6 and B12 from the chicken, which are vital for brain function and red blood cell production. The green onions garnish adds a boost of vitamin K, important for bone health and blood clotting.
Nutrition Facts
Frequently Asked Questions
Can I use chicken breasts instead of thighs?
Yes, but they dry out faster. Brine them first or reduce cooking time by 2-3 minutes. Thighs are recommended for juicier results.
How do I make the sauce thicker?
Mix 1 tbsp cornstarch with 2 tbsp water to create a slurry. Stir it into the sauce and simmer for 2-3 minutes until glossy.
Can I prepare the sauce ahead of time?
The sauce keeps well in the fridge for 2 days. Just whisk before using to recombine any settled ingredients.
What’s the best way to store leftovers?
Store in an airtight container for 3-4 days in the fridge or freeze for up to 3 months. Reheat gently with a splash of water.

- Jollof Rice Sauce Recipe: West African Tomato and Spice Infusion - September 25, 2026
- Japanese Rice Soup Recipe: Umami-Rich Comfort in a Bowl - September 25, 2026
- Homemade Cream Of Rice Recipe: Silk-Smooth Breakfast in Minutes - September 25, 2026