
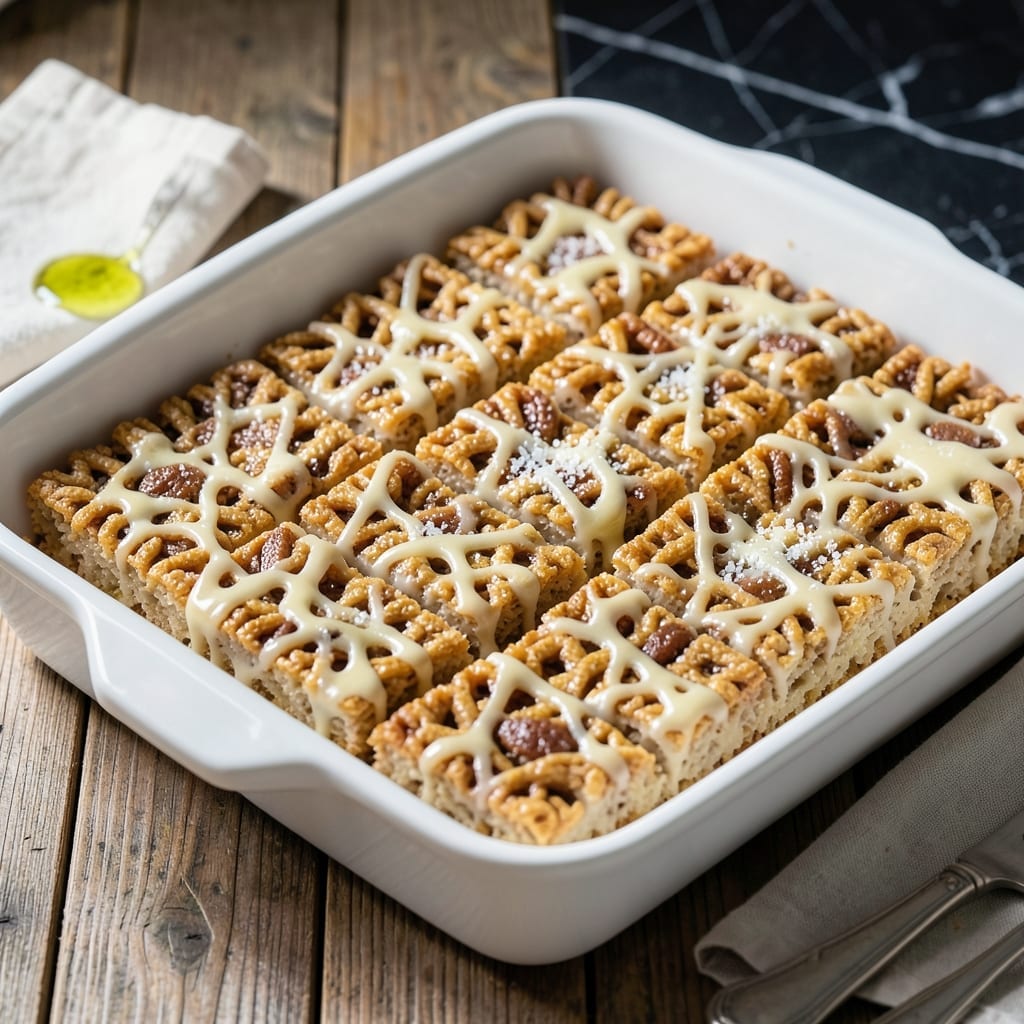
This is the definitive version of a childhood classic that sets the standard for all others.
Achieving the perfect balance of crispy edges and gooey centers comes down to precise timing and one simple technique. The marshmallows melt into a smooth, glossy coating that binds every piece of cereal without turning rock-hard as it sets.
What results is a treat with that signature snap when you break it, and a melt-in-your-mouth quality that makes it impossible to eat just one piece. The texture is consistent throughout, with no dry spots or overly sticky sections.
One batch makes enough to share, though you may not want to.
Ingredients for The Best Rice Krispie
Six ingredients. One bowl. The best batch you’ve ever made.
| Ingredient | Amount | Notes |
|---|---|---|
| Rice Krispies Cereal 🥣 | 6 cups | Fresh for maximum crispness |
| Mini Marshmallows ⚪ | 10 cups | Fresh for best melt |
| Unsalted Butter 🧈 | ½ cup | For smooth marshmallow melt |
| Vanilla Extract 🌿 | 1 tsp | Pure extract for best flavor |
| Fine Sea Salt 🧂 | ¼ tsp | Balances sweetness perfectly |
| Cooking Spray 🧴 | 1 can | For greasing pan |
The marshmallows are everything here. Jet-Puffed or Kraft mini marshmallows melt the smoothest—avoid the generic store brands, which can be grainy. The butter should be unsalted so you control the salt level. I always use Land O’Lakes (the good stuff in the gold wrapper). For the cereal, Kellogg’s Rice Krispies have the right snap—off-brands get soggy faster.
No mini marshmallows? Regular marshmallows work at half the volume—just chop them roughly so they melt evenly. Want extra flavor? Swap 1 tsp of the vanilla for almond extract. The salt might seem optional, but don’t skip it—it cuts the sweetness and makes the flavors pop. If you’re out of cooking spray, butter the pan generously (worth the extra minute).
These keep at room temp in an airtight container for 3 days (if they last that long). Freeze for up to 6 weeks—thaw at room temp before slicing. The texture’s best the day they’re made, though.
Why You’ll Love This Recipe
- 5-Minute Magic: I can have these ready before the kids finish arguing over who gets the last marshmallow.
- Buttery Vanilla Bliss: That hint of vanilla and sea salt turns the melty marshmallow-butter mix into something ridiculously good.
- Party or Pajamas: Honestly, I’ve served them at birthdays and also eaten the whole batch in my sweatpants at 10pm.
- Pennywise Perfection: A box of cereal and a bag of mini marshmallows feed a crowd for under ten bucks.
Step-by-Step Instructions for Rice Krispie Treats
Here’s the proven technique that guarantees perfect texture every single time.
Step 1: Grease and Measure All Ingredients
Begin by liberally coating a 9×13-inch baking pan with the cooking spray, including the sides and bottom. I use a paper towel to spread it evenly, ensuring no sticky spots. This preparation prevents the finished treats from sticking and makes cutting easier later.
Measure out the 6 cups Rice Krispies Cereal into a large bowl and set aside. Having everything ready before you start melting is crucial because the marshmallow mixture sets quickly once it’s off the heat.
Step 2: Melt Butter and Marshmallows to Silky Smoothness
In a large pot, melt the 0.5 cup Unsalted Butter over low heat. Once fully melted, add all 10 cups Mini Marshmallows and stir constantly with a silicone spatula. The key here is patience—keep the heat low to prevent scorching.
Continue stirring until the mixture is completely smooth with no visible marshmallow lumps, about 8-10 minutes. You’ll notice the mixture becomes glossy and pulls away slightly from the sides of the pot when it’s ready. Remove from heat immediately to prevent overcooking.
Step 3: Add Flavor Enhancers and Incorporate Cereal
Working quickly, stir in the 1 tsp Vanilla Extract and 0.25 tsp Fine Sea Salt. The vanilla adds depth of flavor that elevates these from simple to spectacular, while the salt perfectly balances the sweetness.
Immediately add the 6 cups Rice Krispies Cereal to the pot. Using the same spatula, gently fold the cereal into the marshmallow mixture until every piece is evenly coated. Be thorough but don’t overmix—the goal is to maintain the cereal’s crisp texture.
Step 4: Press and Shape with Precision
Transfer the mixture to your prepared pan. Using the spatula or buttered hands (to prevent sticking), gently press the mixture into an even layer. I find that lightly moistening my hands with water helps prevent sticking while allowing me to press firmly enough to compact the treats without crushing the cereal.
Press down until the top is smooth and the treats are uniformly about 1-inch thick. Don’t press too hard—you want them dense enough to hold together but still light and airy. Let them cool at room temperature for 30 minutes until firm enough to cut.
Step 5: Cut and Serve for Maximum Impact
Once fully set, use a sharp knife to cut into 12 equal squares. For clean cuts, I run the knife under hot water between each slice. The treats should have a glossy sheen on top with a slightly crisp exterior and a gooey, marshmallow-filled interior.
Serve immediately for the best texture contrast—the exterior maintains its structure while the interior remains wonderfully soft. These keep well in an airtight container for up to 3 days, though they’re always best when fresh.
Pro Tips For Making The Best Rice Krispie
- Melt Butter Low: Use medium-low heat when melting the butter with marshmallows—I learned this the hard way after scorching two batches trying to rush it.
- Press While Warm: Work quickly to press the mixture into the pan while it’s still warm and sticky; waiting even 5 minutes makes it harder to shape.
- Use Fresh Marshmallows: Skip the stale ones; fresh mini marshmallows melt smoother and give that perfect gooey texture you want.
- Salt the Butter: Add a pinch of fine sea salt directly to the melted butter before mixing—this distributes the flavor better than sprinkling it on top.
Regional Styles of This Dish
Southern Comfort
In the South, we add 1 cup chopped pecans to the cereal before mixing with marshmallows. Toast them first in a dry skillet over medium heat for 3-4 minutes to bring out their natural oils. This adds a delightful crunch that contrasts beautifully with the gooey texture. 💛
Midwest Classic
The Midwest stays true to the original but often uses regular marshmallows cut into quarters. Some bakers also add 1 tsp cinnamon to the melted butter for a warm, spiced note. The result is a slightly softer treat with a hint of autumn spice.
West Coast Twist
California bakers love incorporating ½ cup dried cranberries or ½ cup chocolate chips into the mix. The tartness of cranberries balances the sweetness, while chocolate chips add pockets of melted richness. I prefer Ghirardelli semi-sweet chips for this variation.
Northeast Tradition
In New England, it’s common to see these treats pressed into mini cupcake liners for individual servings. Some bakers also add 1 tsp almond extract instead of vanilla for a more complex flavor profile. The cupcake version makes them perfect for school events or parties.
Texas Bold
Everything’s bigger in Texas, and that includes the treats. Lone Star bakers often use 12 cups cereal with 16 cups marshmallows for an extra-thick pan. Some even add 1 tsp espresso powder to deepen the chocolate flavor when making the cocoa variation.
Pacific Northwest
With an abundance of local berries, Pacific Northwest bakers often add ½ cup freeze-dried raspberries to the cereal mixture. The berries rehydrate slightly from the warm marshmallow mixture, adding a subtle fruity tang that complements the sweetness perfectly.
Nutrition Facts
Frequently Asked Questions
Can I use regular marshmallows instead of mini?
Yes! Use 5 cups regular marshmallows chopped into quarters for even melting. They take slightly longer to dissolve, so keep the heat low and stir constantly to avoid burning.
Why did my treats turn out hard?
Overcooking the marshmallow mixture is the main culprit. Remove from heat as soon as it’s smooth. Pressing too firmly into the pan can also make them dense—keep it light.
How do I store them to keep them fresh?
Keep in an airtight container at room temperature for up to 3 days. For longer storage, freeze for up to 6 weeks and thaw before serving.
Can I add chocolate chips without melting them?
Yes, fold in ½ cup chocolate chips after mixing the cereal. The residual heat will soften them slightly without fully melting. Use high-quality chips for best results.

- Rice A Roni Pork Fried Rice Recipe: Quick Wok-Style Meal with Savory Bites - September 25, 2026
- Mandhi Rice Recipe: Yemeni Spiced Lamb and Rice Feast - September 25, 2026
- Chuy’s Green Chili Rice Copycat Recipe: Spicy Southwest Flavor in Every Bite - September 25, 2026