
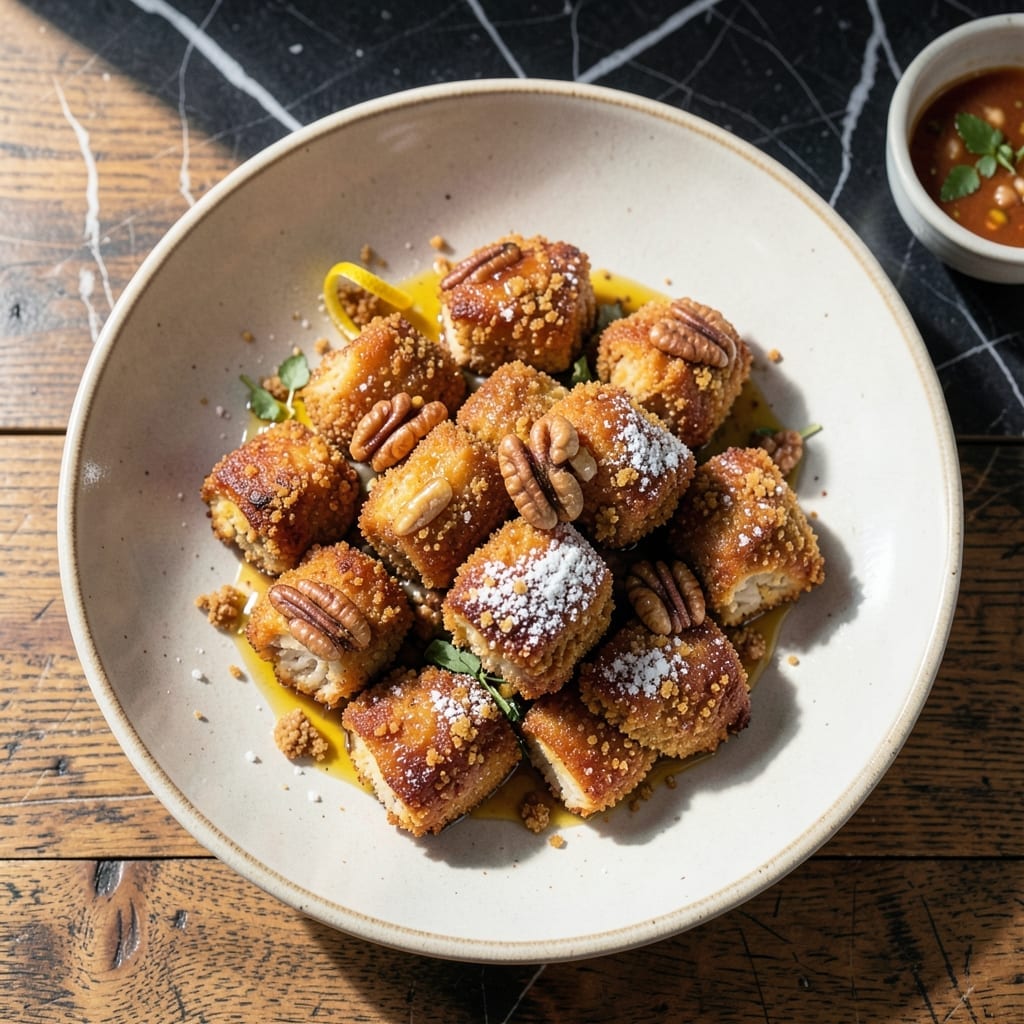
This recipe transforms simple chicken into a restaurant-quality dish with a crispy walnut coating and irresistible sweet-savory sauce. The walnuts provide a rich, nutty crunch that perfectly complements the tender chicken.
The secret lies in the double-coating technique, which ensures every piece stays extra crispy even after being tossed in the sauce. It’s a method I’ve refined to guarantee consistent results every time.
You’ll end up with golden-brown chicken pieces coated in a glossy, flavorful sauce that clings perfectly. The contrast between the crunchy exterior and juicy interior makes this dish truly special.
Serve it hot for the best texture and flavor. Here’s how to make it at home.
Ingredients for Walnut Chicken
Transform simple chicken with these restaurant-quality ingredients for crispy, saucy perfection.
| Ingredient | Amount | Notes |
|---|---|---|
| Chicken Breasts 🍗 | 1 ½ lb | Boneless, skinless, cut into bite-sized pieces |
| Walnuts 🌰 | 1 ½ cups | Chopped, toasted for maximum crunch |
| All-Purpose Flour 🌾 | 1 cup | For first coating layer |
| Large Eggs 🥚 | 2 whole | Beaten for binding coating |
| Panko Breadcrumbs 🍞 | 1 cup | For crispy outer coating |
| Cornstarch 🌽 | ¼ cup | For extra crispiness |
| Soy Sauce 🥫 | ⅓ cup | Low-sodium preferred for balance |
| Honey 🍯 | ¼ cup | For sweet-savory glaze |
| Rice Vinegar 💧 | 2 tbsp | Adds tangy brightness to sauce |
| Garlic Cloves 🧄 | 3 cloves | Minced for aromatic base |
| Fresh Ginger 🌿 | 1 tbsp | Peeled and grated |
| Vegetable Oil 🫒 | 1 cup | For frying, neutral flavor |
| Sesame Oil 🫒 | 1 tsp | Toasted, for finishing flavor |
| Green Onions 🧅 | ½ cup | Thinly sliced for garnish |
| Salt 🧂 | 1 tsp | Kosher or sea salt preferred |
| Black Pepper 🌶️ | ½ tsp | Freshly ground for best flavor |
The walnuts are non-negotiable here—California walnuts from Costco or Whole Foods offer the best freshness and crunch. Toast them in a dry pan until fragrant (about 5 minutes) to intensify their rich, nutty flavor. For the chicken, boneless, skinless breasts work best for even cooking and maximum crispiness. Opt for air-chilled chicken (often labeled at Trader Joe’s) for superior texture and moisture retention.
No walnuts? Pecans or almonds (chopped) provide similar crunch. For a gluten-free version, swap all-purpose flour for cornstarch at a 1:1 ratio. Soy sauce can be replaced with tamari or coconut aminos for dietary needs. The honey is key for that signature sweet-savory balance, but maple syrup or agave can substitute in a pinch. Panko breadcrumbs are ideal, but regular breadcrumbs work if toasted first for extra crispiness.
Store raw chicken in its original packaging (or a sealed container) in the coldest part of the fridge for up to 2 days. Toasted walnuts keep for 1 week in an airtight container at room temperature. The finished dish is best served immediately but reheats well in a 350°F oven for 10-12 minutes to restore crispiness.
Why You’ll Love This Recipe
- One Pan Meal: I love that everything—from coating the chicken to toasting the walnuts—happens in one skillet.
- Crunchy Satisfaction: That double-crisp layer from panko and walnuts makes every bite ridiculously good.
- Weeknight Hero: Honestly, it’s my go-to for busy Tuesdays when I need dinner fast but still impressive.
- Budget Stretcher: Chicken breasts and walnuts go a long way, and leftovers taste just as fresh the next day.
Step-by-Step Instructions for Walnut Chicken
Master the technique for crispy, golden chicken with a rich nutty texture and glossy glaze.
Step 1: Prepare and Bread the Chicken
Cut the 1.5 lb chicken breasts into 1-inch pieces. Season with 1 tsp salt and 0.5 tsp black pepper. Set up a breading station with three shallow bowls: one with 1 cup all-purpose flour, one with the 2 whole large eggs beaten, and one with 1 cup panko breadcrumbs mixed with 0.25 cup cornstarch.
Dredge each piece first in flour, shaking off excess, then dip in egg, letting any excess drip off. Finally, coat thoroughly in the panko-cornstarch mixture, pressing gently to adhere. This triple coating ensures maximum crunch and prevents the crust from falling off during frying.
Step 2: Toast the Walnuts and Fry the Chicken
In a dry skillet over medium heat, toast the 1.5 cups walnuts for 5-7 minutes until fragrant and golden brown, stirring frequently to prevent burning. Transfer to a plate and let cool, then chop roughly for texture.
In a large, deep skillet heat 1 cup vegetable oil to 350°F. Working in batches to avoid crowding, fry the breaded chicken for 4-5 minutes until golden brown on all sides and cooked through. Drain on a wire rack set over a baking sheet to maintain crispiness.
Step 3: Create the Sweet-Savory Sauce
In a small saucepan, combine 0.33 cup soy sauce, 0.25 cup honey, 2 tbsp rice vinegar, 3 cloves minced garlic cloves, and 1 tbsp grated fresh ginger. Simmer over medium-low heat for 3-4 minutes until slightly thickened and the raw garlic aroma mellows.
The sauce should coat the back of a spoon but still be pourable. Taste and adjust seasoning if needed, though the soy sauce provides ample saltiness. Keep warm while you finish the chicken.
Step 4: Assemble and Garnish
Toss the fried chicken with the toasted walnuts in a large bowl. Pour the warm sauce over the chicken and walnuts, gently tossing until everything is evenly coated. The sauce should cling to the crispy exterior without making it soggy.
Drizzle with 1 tsp toasted sesame oil for depth and sprinkle with 0.5 cup thinly sliced green onions for freshness and color. Serve immediately while the chicken is at its crispiest and the sauce is still glossy and warm.
Pro Tips For Making Walnut Chicken
- Pound the Chicken: Slice the chicken breasts horizontally, then pound to an even 1/2-inch thickness—I learned this the hard way after too many dry, chewy bites from uneven pieces.
- Toast the Walnuts: Spread walnuts on a baking sheet and toast at 350°F for 8-10 minutes until fragrant. Sounds tedious, but it actually changes the outcome by bringing out their nuttiness.
- Skip Cold Eggs: Let the eggs sit at room temperature for 10 minutes before dredging. Cold eggs make the coating clump and slide right off the chicken.
- Double Dredge: Dip the chicken in flour, then egg, then panko, and repeat the egg and panko once more. This isn’t the prettiest method, but it’s the tastiest—guarantees extra crunch.
Make-Ahead Tips for This Recipe
Prep the Chicken
Cut and bread the chicken up to 12 hours before cooking. Keep the breaded pieces on a tray lined with parchment, covered loosely with plastic wrap. Refrigerate until ready to fry—this actually helps the coating adhere better during cooking. 💡
Toast Walnuts Early
Toast the 1.5 cups walnuts up to 2 days ahead and store in an airtight container at room temperature. This saves time on cooking day while ensuring maximum crunch. I prefer toasting in a dry skillet over medium heat for 5-7 minutes.
Make the Sauce
The sweet-savory sauce can be prepared 3 days in advance and refrigerated. Reheat gently before using, adding a splash of water if it thickens too much. The flavors deepen as it sits, and it keeps well in a sealed jar.
Fry in Batches
If frying ahead, cook the chicken fully, then drain on a wire rack. Reheat in a 375°F oven for 8-10 minutes to restore crispiness. Avoid microwaving, as it will make the coating soggy.
Assemble Last
Toss the chicken with walnuts and sauce just before serving. This prevents the coating from absorbing too much liquid and losing its crunch. I always garnish with fresh green onions for brightness.
Storage Tips
Store any leftovers in an airtight container in the fridge for up to 3 days. Reheat in the oven at 350°F for 10-12 minutes to maintain texture. Freezing isn’t recommended, as it affects the crispiness. 💛
Nutrition Facts
Frequently Asked Questions
Can I use chicken thighs instead of breasts?
Yes! Chicken thighs work well and often stay juicier. Just trim excess fat and cut into 1-inch pieces. The cooking time remains about 4-5 minutes in 350°F oil.
What if my sauce is too thin?
Simmer it longer over medium-low heat until it coats the back of a spoon. You can also mix 1 tsp cornstarch with water and stir in for quicker thickening.
How do I keep the coating crispy?
Drain fried pieces on a wire rack, not paper towels. Toss with sauce and walnuts just before serving to prevent sogginess.
Can I bake instead of fry?
Yes, bake at 400°F for 15-20 minutes, flipping halfway. Spray with oil first for extra crispiness.

- Jollof Rice Sauce Recipe: West African Tomato and Spice Infusion - September 25, 2026
- Japanese Rice Soup Recipe: Umami-Rich Comfort in a Bowl - September 25, 2026
- Homemade Cream Of Rice Recipe: Silk-Smooth Breakfast in Minutes - September 25, 2026