
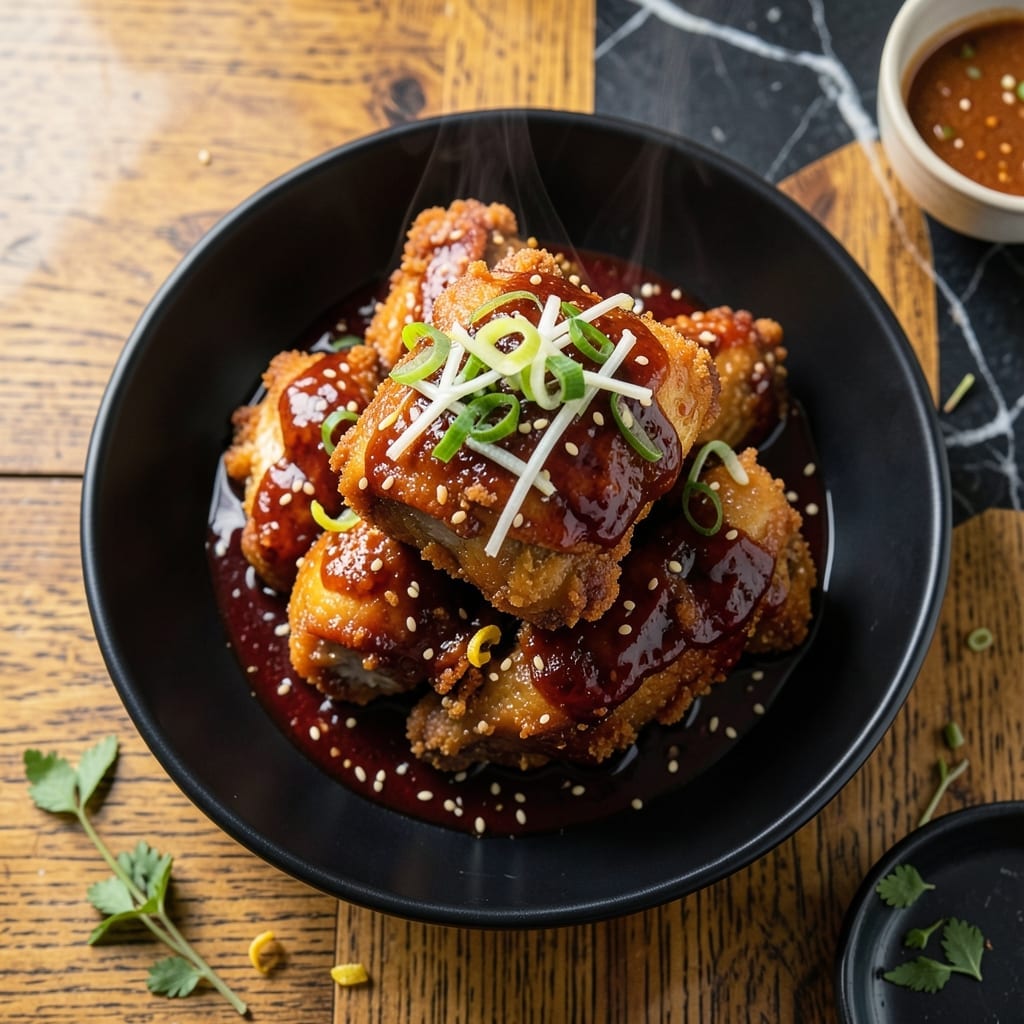
This Korean-style wet fried chicken delivers an irresistible combination of double-crisped texture and bold flavor that sets it apart from traditional methods. The technique involves a two-step frying process that creates an ultra-crunchy exterior while maintaining juicy, tender meat inside.
What makes this dish special is the thin, wet batter that adheres perfectly to the chicken, creating those signature craggy, crispy edges. The marinade infuses every bite with savory, slightly sweet notes that balance the dish’s satisfying crunch.
By the time it comes out of the oil, you’ll have chicken pieces with a shatteringly crisp exterior and moist, flavorful meat that stays hot and delicious even after cooling slightly. The contrast between textures makes each bite addictive.
Serve immediately with pickled radishes or a side of steamed rice to complete the experience. This method ensures professional results every time.
Ingredients for Wet Fried Chicken
Double-crisped Korean chicken requires a precise blend of bold marinades and ultra-crispy coatings for that signature texture.
| Ingredient | Amount | Notes |
|---|---|---|
| Chicken Thighs 🍗 | 2 lb | Boneless, skin-on, cut into bite-sized pieces |
| Potato Starch 🥔 | ½ cup | For ultra-crispy coating |
| All-Purpose Flour 🌾 | ½ cup | For batter structure |
| Cold Water 💧 | ¾ cup | Ice cold for batter |
| Soy Sauce 🫒 | 3 tbsp | Low-sodium preferred |
| Gochujang 🌶️ | 2 tbsp | Korean chili paste |
| Honey 🍯 | 2 tbsp | For sweetness and shine |
| Rice Vinegar 🍚 | 1 tbsp | For tangy balance |
| Garlic Cloves 🧄 | 4 cloves | Minced for marinade |
| Fresh Ginger 🌿 | 1 tbsp | Grated for depth |
| Vegetable Oil 🫒 | 4 cups | For deep frying |
| Sesame Oil 🫒 | 1 tsp | For finishing aroma |
| Toasted Sesame Seeds 🌿 | 1 tbsp | For garnish |
| Green Onions 🧅 | 3 whole | Thinly sliced for garnish |
| Kosher Salt 🧂 | 1 tsp | For seasoning |
The chicken is non-negotiable here—bone-in, skin-on thighs deliver the juiciest results with that perfect crisp-to-meat ratio. Korean markets often carry pre-cut pieces, but any Asian grocery or Whole Foods will have what you need. For potato starch, Bob’s Red Mill is widely available and consistent. The gochujang is key—look for Sempio or CJ brands for authentic heat and depth.
No gochujang? Sriracha plus a touch of miso gets you 70% there (not perfect, but passable). Out of potato starch? Cornstarch works at a 1:1 swap, though the crunch won’t be quite as shatteringly crisp. The honey can be subbed with brown sugar dissolved in a splash of water. For the oil, peanut or canola can replace vegetable oil—just ensure a high smoke point.
The battered chicken holds well at room temp for 10 minutes before frying, but don’t let it sit longer or it’ll lose its crisp potential. Leftovers? Re-crisp in a 400°F oven for 8-10 minutes. The sauce keeps for 5 days refrigerated—great for dipping or drizzling over rice later.
Why You’ll Love This Recipe
- Minimal Effort: I just mix potato starch, flour, and cold water—no fancy prep or marinating time.
- Sticky, Crispy Magic: The soy sauce in the wet batter gives it that addictive sweet-savory crunch.
- Weeknight Hero: Honestly, it’s my go-to for busy evenings when I need dinner fast.
- Leftovers? No Problem: The coating stays crispy even reheated, so I pack extras for lunch the next day.
Step-by-Step Instructions for Korean-Style Wet Fried Chicken
Master the double-frying technique for ultra-crispy exterior and juicy interior with this method.
Step 1: Marinate the Chicken
In a large bowl, whisk together the 3 tbsp Soy Sauce, 2 tbsp Gochujang, 2 tbsp Honey, 1 tbsp Rice Vinegar, minced 4 cloves Garlic Cloves, and 1 tbsp Fresh Ginger until smooth. Add the 2 lb Chicken Thighs and turn to coat evenly.
Cover and refrigerate for at least 30 minutes, or up to 4 hours for deeper flavor penetration. This marinade not only seasons the chicken but also tenderizes it, ensuring each bite is packed with savory, spicy, and slightly sweet notes characteristic of Korean cuisine.
Step 2: Prepare the Wet Batter
In a separate bowl, combine the 0.5 cup Potato Starch, 0.5 cup All-Purpose Flour, and 1 tsp Kosher Salt. Gradually whisk in the 0.75 cup Cold Water until the batter is smooth and lump-free. The potato starch is essential here—it’s what gives the coating its signature crispness.
The batter should be thin enough to coat the back of a spoon but thick enough to cling to the chicken. If it’s too thick, add a splash more cold water. Chilled batter adheres better to the chicken and creates a lighter, airier crust when fried.
Step 3: First Fry for Even Cooking
Heat the 4 cups Vegetable Oil in a deep, heavy-bottomed pot to 325°F. Working in batches to avoid crowding, dip each piece of marinated chicken into the batter, letting any excess drip off, then carefully lower into the hot oil.
Fry for 6-7 minutes until the chicken is light golden brown and cooked through. The internal temperature should reach 165°F. Drain on a wire rack set over a baking sheet to maintain crispness. This first fry ensures the chicken is fully cooked while setting the foundation for the final crispy coating.
Step 4: Second Fry for Maximum Crispiness
Increase the oil temperature to 375°F. Return the chicken to the pot in batches and fry for an additional 2-3 minutes until deep golden brown and ultra-crispy. This second fry at a higher temperature creates the double-crisped texture that defines this dish.
Drain again on the wire rack. The chicken should have an audibly crisp crust that shatters when bitten into. Be sure to maintain the oil temperature between batches to ensure consistent results—overcrowding or fluctuating heat leads to greasy, unevenly cooked pieces.
Step 5: Finish and Garnish
Transfer the fried chicken to a large bowl. Drizzle with 1 tsp Sesame Oil and toss gently to coat evenly. This adds a nutty aroma that complements the savory and spicy notes of the marinade.
Garnish with 1 tbsp Toasted Sesame Seeds and thinly sliced 3 whole Green Onions for a pop of color and freshness. Serve immediately while hot and crispy, with extra gochujang or soy sauce on the side for dipping if desired.
Pro Tips For Making Wet Fried Chicken
- Use Ice-Cold Water: Soak the chicken in ice-cold water for 10 minutes before dredging—it tightens the meat so the coating sticks better and fries crispier.
- Double Dredge: Dip the thighs in potato starch first, then flour, then back in starch for that extra-shatter crust that holds up to the sauce.
- Skip Overcrowding: Fry in batches with at least an inch between pieces, or the steam will turn your crispy coating soggy before it even finishes cooking.
- Rest Before Saucing: Let the fried chicken drain on a rack for 2-3 minutes before tossing in soy sauce, so the coating stays crunchy instead of absorbing the liquid.
Make-Ahead Tips for This wet fried chicken
Marinade Prep Ahead
Mix your marinade the night before and store it in an airtight container in the fridge. The flavors meld beautifully overnight, and your chicken will be ready to coat in the morning. I always prep this the evening before for maximum flavor infusion. 💡
Batter Preparation
Combine your potato starch and all-purpose flour in a bowl the night before, then store it covered at room temperature. In the morning, just add the cold water and whisk. This saves time and ensures your starch is at the perfect temperature.
Chicken Prep
Cut your chicken thighs into bite-sized pieces the day before and store them in the marinade. This not only saves time but also allows the flavors to penetrate deeper. Just
Frying in Batches
If you’re cooking for a crowd, fry your chicken in batches and keep the finished pieces warm in a 200°F oven on a wire rack. This maintains crispness while you finish frying. I’ve found this works perfectly for up to 30 minutes. 🔥
Reheating Leftovers
To revive leftover chicken, spread pieces on a baking sheet and warm in a 400°F oven for 8-10 minutes. This brings back the crispiness almost to fresh-fried perfection. Avoid microwaving, as it will make the coating soggy.
Sauce Storage
Any extra marinade or sauce keeps well in the fridge for up to 5 days. I love having it on hand to drizzle over rice or use as a dipping sauce. Just give it a good stir before using, as the ingredients may settle.
Nutrition Facts
Frequently Asked Questions
Why use potato starch instead of regular flour?
Potato starch creates an extra-crispy, shatteringly thin coating that regular flour can’t match. It also absorbs less oil, keeping your chicken lighter and crunchier.
Can I use chicken breast instead of thighs?
Thighs are ideal for their juiciness and fat content, but boneless breasts work if cut into small pieces. Reduce first frying time to 5-6 minutes to prevent drying.
How do I keep the chicken crispy after frying?
Always drain on a wire rack, never paper towels. For serving later, keep warm in a 200°F oven on a rack for up to 30 minutes.
What if my batter is too thick or thin?
Thin batter? Add more starch/flour. Too thick? Stir in ice cold water 1 tablespoon at a time until it coats like heavy cream.

- Jollof Rice Sauce Recipe: West African Tomato and Spice Infusion - September 25, 2026
- Japanese Rice Soup Recipe: Umami-Rich Comfort in a Bowl - September 25, 2026
- Homemade Cream Of Rice Recipe: Silk-Smooth Breakfast in Minutes - September 25, 2026