
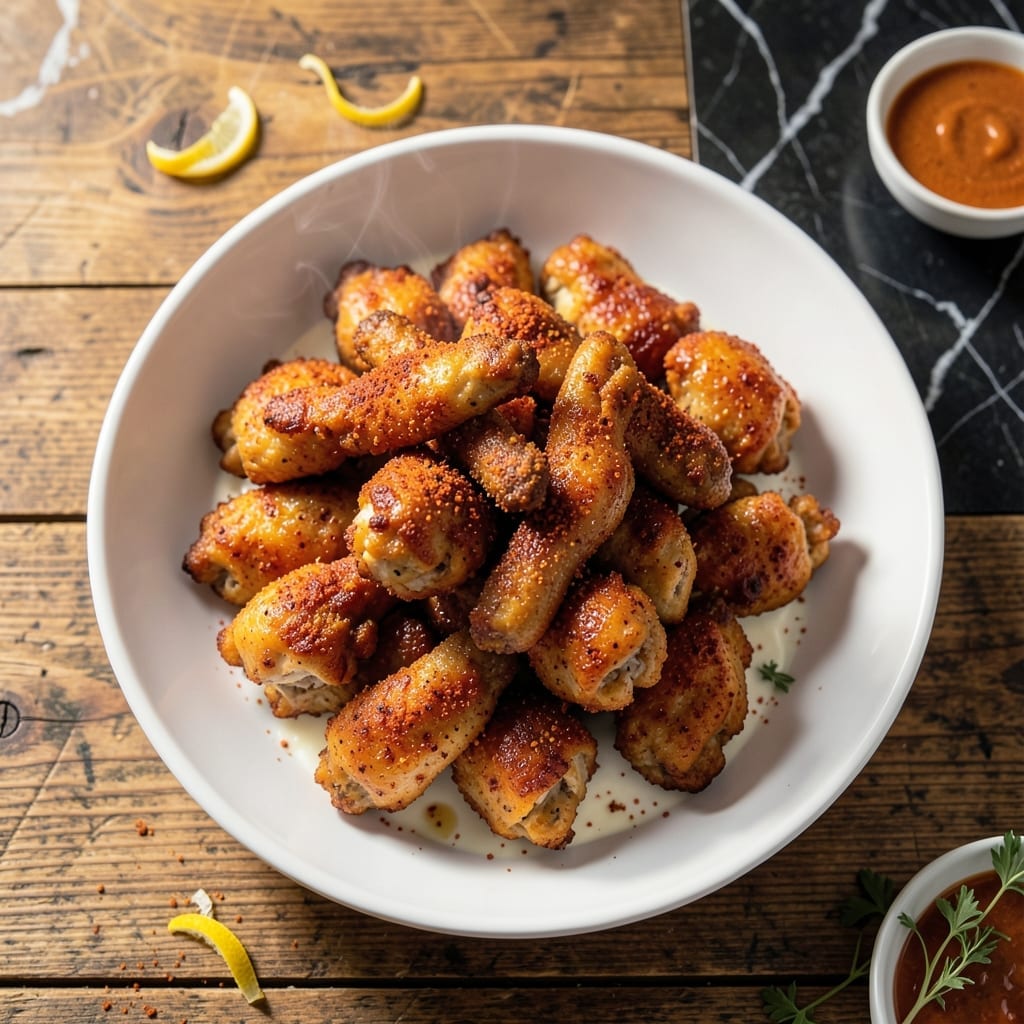
Recreating that signature Zaxby’s crispiness at home is absolutely achievable with the right technique and spice blend. This recipe delivers the crispy, golden exterior and juicy interior that made the original famous.
The secret lies in a double-dredge method and precise frying temperature. I’ve tested this approach repeatedly to ensure it produces restaurant-quality results every time. The spice blend captures that familiar, slightly sweet heat.
By following these steps carefully, you’ll achieve chicken with a shatteringly crispy crust that stays intact even after resting. The meat remains tender and flavorful, just like the fast-food favorite.
Serve with your preferred dipping sauce for the full experience. The process takes about 45 minutes from start to finish.
Ingredients for Zaxby’s Chicken
Pantry staples and a few key spices create that iconic crispy, flavorful chicken at home.
| Ingredient | Amount | Notes |
|---|---|---|
| Chicken Thighs 🍗 | 2 lb | Boneless, skinless, cut into strips |
| Buttermilk 🥛 | 2 cups | Full-fat for best results |
| All-Purpose Flour 🌾 | 2 cups | For initial dredge |
| Cornstarch 🌾 | ½ cup | For extra crispiness |
| Paprika 🌶️ | 2 tbsp | Sweet variety for color |
| Garlic Powder 🧄 | 1 tbsp | Freshly ground preferred |
| Onion Powder 🧅 | 1 tbsp | Fine grind for even coating |
| Salt 🧂 | 1 tbsp | Diamond Crystal kosher preferred |
| Black Pepper 🌶️ | 1 tsp | Freshly ground for boldness |
| Cayenne Pepper 🔥 | ½ tsp | Adjust to heat preference |
| Vegetable Oil 🫒 | 4 cups | For deep frying (peanut oil works too) |
| White Sugar 🍚 | 1 tbsp | Balances the spice blend |
| Dried Thyme 🌿 | 1 tsp | Crushed for better distribution |
| Dried Oregano 🍃 | 1 tsp | Mediterranean variety preferred |
The chicken quality is non-negotiable here. Boneless, skinless thighs deliver the juiciest results—breasts dry out too fast. Source from Costco or Whole Foods for consistent sizing. Buttermilk must be full-fat (the low-fat version lacks the acidity needed for tenderizing). For the flour, King Arthur all-purpose is the gold standard for even coating.
No buttermilk? Whole milk plus 1 tbsp vinegar per cup works in a pinch. Swap cornstarch for arrowroot if needed, but don’t skip it—it’s what gives that shatter. Smoked paprika can replace sweet for deeper flavor. Cayenne can be reduced or omitted for less heat. The oil must have a high smoke point—peanut oil is ideal if you’re not allergic.
Uncooked dredged chicken can sit in the fridge for up to 2 hours before frying. Leftover cooked chicken stays crispy for 1 day in the fridge (reheat in the oven). The spice blend keeps in an airtight container for 3 months.
Why You’ll Love This Recipe
- Minimal Effort: I soak the thighs in buttermilk the night before, then it’s just dredge and fry.
- Crave-Worthy Crunch: That paprika-spiked flour and cornstarch mix gives it the signature crispy outside, tender inside.
- Feeds the Crew: One batch fills a platter for game night, and the leftovers make killer sandwiches the next day.
- Budget Winner: Chicken thighs stay cheap, and a little flour goes a long way—my wallet thanks me every time.
Step-by-Step Instructions for Zaxby’s Style Chicken
Master the technique for achieving that signature crispy exterior with perfectly seasoned, juicy meat inside.
Step 1: Marinate the Chicken Thighs in Buttermilk
Begin by cutting the 2 lb Chicken Thighs into even strips. Submerge them completely in 2 cups Buttermilk in a large bowl. The buttermilk’s acidity tenderizes the meat while adding moisture, which is essential for achieving juicy chicken beneath the crispy coating.
Cover and refrigerate for at least 4 hours, or ideally overnight. This extended marinating time allows the buttermilk to penetrate deeply, ensuring every bite is flavorful and tender. Stir the mixture once or twice during marination to redistribute the liquid.
Step 2: Prepare the Seasoned Dredge Mixture
In a large, shallow dish, whisk together the 2 cups All-Purpose Flour, 0.5 cup Cornstarch, 2 tbsp Paprika, 1 tbsp Garlic Powder, 1 tbsp Onion Powder, 1 tbsp Salt, 1 tsp Black Pepper, 0.5 tsp Cayenne Pepper, 1 tbsp White Sugar, 1 tsp Dried Thyme, and 1 tsp Dried Oregano.
The cornstarch is the secret to extra crunch, while the sugar balances the heat from the cayenne. Whisk thoroughly to break up any lumps and ensure even distribution of spices. This blend must be uniform to guarantee consistent flavor in every bite.
Step 3: Dredge and Rest the Chicken
Remove the chicken strips from the buttermilk, allowing excess to drip off. Dredge each piece in the flour mixture, pressing firmly to adhere. Shake off any loose flour—this prevents clumping during frying and ensures a smooth, even coating.
Place the dredged chicken on a wire rack set over a baking sheet. Rest for 10-15 minutes at room temperature. This step lets the coating dry slightly, which helps it crisp up quickly once it hits the hot oil. The rack allows air circulation, preventing sogginess on the underside.
Step 4: Deep-Fry to Golden Perfection
Heat the 4 cups Vegetable Oil in a deep, heavy-bottomed pot to 350°F. Use a deep-fry thermometer to monitor the temperature carefully—too cool, and the chicken will absorb oil; too hot, and the outside will burn before the inside cooks.
Fry the chicken in batches to avoid overcrowding, which lowers the oil temperature. Cook for 6-8 minutes per batch, turning occasionally, until the coating is deep golden brown and the internal temperature reaches 165°F. Drain on a clean wire rack or paper towels to maintain crispiness.
Pro Tips For Making Zaxby’S Chicken
- Brine in Buttermilk: Soak the chicken thighs in buttermilk for at least 4 hours—I learned this the hard way after my first batch turned out dry and bland.
- Double Dredge: Dip the chicken in flour, then buttermilk, then flour again for that extra-crispy crust. Sounds tedious, but it actually changes the outcome.
- Hot Oil Check: Test your oil with a pinch of flour before frying—if it sizzles immediately, it’s ready. After burning three batches, I finally figured out the right temperature matters most.
- Add Cornstarch: Mix a little cornstarch into your flour dredge (about 2 tablespoons) for a crunchier coating. My grandmother swore by this, and she was right.
Perfect Pairings for This zaxbys chicken
Signature Sauces
Zaxby’s is famous for its dipping sauces, and Tongue Torch is my top pick for this chicken. Its vinegar-based heat with a touch of sweetness complements the spice blend perfectly. I also love Wimpy Sauce for a milder, tangy option with a hint of mustard.
Classic Southern Sides
Serve with crinkle-cut fries for the full fast-food experience—I use Ore-Ida frozen fries baked at 425°F for 20 minutes. For a fresher take, try cole slaw with a creamy vinegar dressing to cut through the richness.
Lighter Pairings
A crisp iceberg wedge salad with buttermilk ranch dressing adds freshness. I toss 4 cups shredded iceberg with ½ cup ranch and ¼ cup shredded carrots. The cool crunch balances the heat beautifully. 🥗
Drink Recommendations
Nothing beats an ice-cold sweet tea with this meal—brew Luzianne tea bags with 1 cup sugar per gallon. For beer lovers, a light lager like Miller Lite cleanses the palate without overpowering the flavors. 🍺
Comfort Food Extras
Add Texas toast for a hearty meal. Butter thick-sliced white bread, sprinkle with garlic powder, and toast at 375°F for 5 minutes. The buttery crunch pairs perfectly with the crispy chicken.
Kid-Friendly Options
For younger palates, serve with apple slices and ketchup for dipping. I arrange 1 sliced apple per plate with a 2 tbsp ketchup portion. It’s a simple way to add freshness to the meal.
Nutrition Facts
Frequently Asked Questions
Can I use chicken breasts instead of thighs?
Thighs are recommended for juiciness, but breasts work if pounded to ½-inch thickness. Reduce frying time to 5-6 minutes to prevent drying out.
What if I don’t have a deep fryer?
Use a deep, heavy pot with 2 inches of oil. Maintain 350°F with a thermometer. Avoid shallow pans—splattering is dangerous.
How do I keep the coating crispy?
Drain on a wire rack, not paper towels. Store in a single layer in the oven at 200°F until serving. Avoid stacking.
Can I bake instead of frying?
Bake at 400°F for 20-25 minutes on a wire rack. Spray with oil first for extra crispiness. Results won’t be identical but still tasty.

- Jollof Rice Sauce Recipe: West African Tomato and Spice Infusion - September 25, 2026
- Japanese Rice Soup Recipe: Umami-Rich Comfort in a Bowl - September 25, 2026
- Homemade Cream Of Rice Recipe: Silk-Smooth Breakfast in Minutes - September 25, 2026