
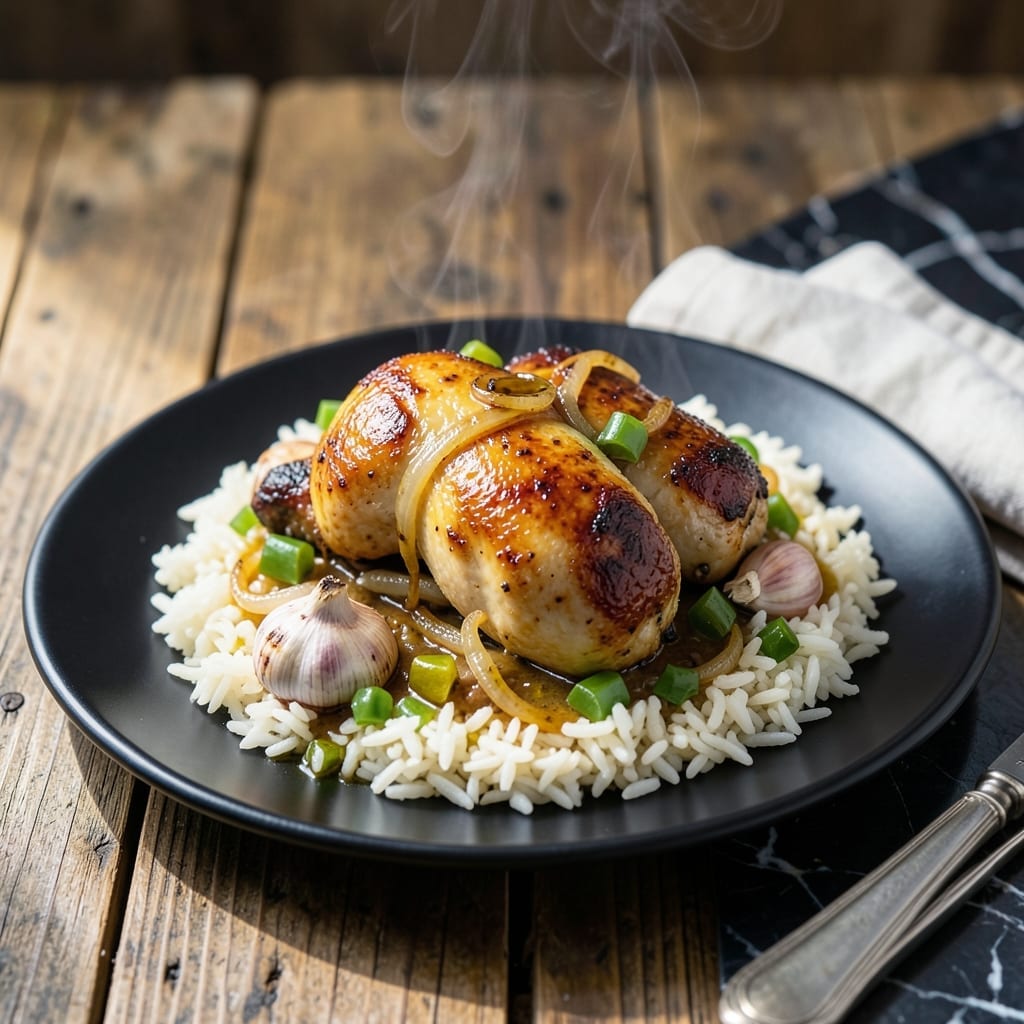
This one-pot creation brings restaurant-quality comfort straight to your kitchen table without the fuss. I developed this method to streamline the process while maximizing flavor in every bite.
The beauty lies in its simplicity: chicken and rice cook together, absorbing a rich blend of spices and broth. This one-pot approach means fewer dishes and more time to enjoy the meal you’ve made.
You’ll end up with tender chicken pieces nestled in perfectly cooked rice, all infused with savory depth. The result is pure, heartwarming comfort that feels like a hug on a plate.
Ideal for busy weeknights or lazy weekends when you crave something satisfying. Here’s how to make it.
Ingredients for A Chef’s Life Chicken and Rice
Bone-in thighs, fragrant rice, and a handful of aromatics create this hearty one-pot wonder.
| Ingredient | Amount | Notes |
|---|---|---|
| Bone-In Chicken Thighs 🍗 | 2 lb | Skin-on for extra flavor |
| Long-Grain White Rice 🍚 | 1 ½ cups | Rinsed until water runs clear |
| Chicken Broth 💧 | 3 cups | Low-sodium preferred |
| Yellow Onion 🧅 | 1 whole | Medium, finely diced |
| Garlic Cloves 🧄 | 4 cloves | Minced for depth of flavor |
| Green Bell Pepper 🌶️ | 1 whole | Diced, seeds removed |
| Dried Thyme 🌿 | 1 tsp | Crushed between fingers |
| Smoked Paprika 🌶️ | 1 tsp | Adds subtle smokiness |
| Bay Leaf 🍃 | 1 whole | Removed before serving |
| Kosher Salt 🧂 | 1 ½ tsp | Diamond Crystal preferred |
| Freshly Ground Black Pepper 🌶️ | 1 tsp | Coarse grind ideal |
| Olive Oil 🫒 | 2 tbsp | Extra-virgin for best results |
| Fresh Flat-Leaf Parsley 🌿 | ¼ cup | Chopped, for garnish |
| Lemon 🍋 | 1 whole | Zested and juiced |
The chicken thighs are non-negotiable here—bone-in, skin-on gives you that deep, savory flavor and keeps the meat juicy. I always grab them from Whole Foods or a trusted butcher, but any supermarket with good turnover works. Look for thighs that are plump and have a good amount of marbling. The rice should be long-grain white; jasmine or basmati both work beautifully (just avoid instant rice).
No chicken thighs? Bone-in chicken breasts work but cook faster, so keep an eye on them. Vegetarian? Swap in mushrooms or chickpeas—they soak up the flavors well. Out of fresh parsley? Cilantro or green onions add a nice fresh finish too. The broth can be vegetable if you’re avoiding meat, but chicken broth gives the best depth. If using low-sodium, you may need to adjust the salt to taste.
This keeps well in the fridge for up to 4 days—the flavors actually deepen overnight. Freeze leftovers (without the garnish) for up to 3 months. Reheat gently on the stove with a splash of broth to bring it back to life. The parsley and lemon garnish are best added fresh, so save those for serving day.
Why You’ll Love This Recipe
- One Pot Magic: I love that everything cooks together—just sear the chicken thighs, toss in the rice, broth, onion, and garlic, and let it simmer.
- Rich and Savory: The bone-in thighs and chicken broth create this deep, satisfying flavor that soaks right into the rice.
- Meal Prep Hero: This dish reheats beautifully, so I make a big batch for easy lunches all week.
- Budget Friendly: Honestly, it’s hard to beat the cost—chicken thighs and basic pantry staples stretch far without skimping on taste.
Step-by-Step Instructions for Chicken and Rice
This one-pot wonder comes together with minimal effort and maximum flavor.
Step 1: Sear the Bone-In Chicken Thighs
Heat the 2 tbsp olive oil in a large, heavy pot or Dutch oven over medium-high heat. Pat the 2 lb bone-in chicken thighs dry with paper towels to ensure a good sear. Season them generously with 1 tsp freshly ground black pepper and 1 tsp smoked paprika, pressing the spices into the skin for better adhesion.
Working in batches if necessary to avoid crowding, add the chicken thighs skin-side down. Sear for 5-6 minutes until the skin is deep golden brown and crispy. Flip and cook for another 3-4 minutes until the other side is lightly browned. Remove the chicken from the pot and set aside.
Step 2: Sauté the Aromatics
In the same pot, add the finely diced yellow onion, diced green bell pepper, and minced garlic cloves. Cook over medium heat for 4-5 minutes, stirring frequently, until the vegetables soften and the onion becomes translucent.
Stir in the 1 tsp dried thyme and cook for another 30 seconds until fragrant. This builds a flavorful base that will infuse the entire dish. Be careful not to let the garlic burn—it should just turn lightly golden.
Step 3: Toast the Rice and Deglaze
Add the 1.5 cups long-grain white rice to the pot and stir to coat it in the oil and aromatics. Toast for 1-2 minutes until the rice becomes slightly translucent at the edges. This step enhances the nutty flavor of the rice and prevents it from turning mushy.
Pour in the 3 cups chicken broth, 1 whole bay leaf, and remaining 1.5 tsp kosher salt. Stir well, scraping up any browned bits from the bottom of the pot—they’re packed with flavor. Bring the mixture to a gentle boil.
Step 4: Simmer and Finish
Return the chicken thighs to the pot, skin-side up, nestling them into the rice. Reduce the heat to low, cover, and let it simmer for 25-30 minutes. Avoid stirring during this time to prevent breaking up the rice. The dish is done when the rice is tender and the chicken reaches an internal temperature of 165°F.
Remove the pot from heat and let it sit covered for 5 minutes. This allows the rice to steam and absorb any remaining liquid. Discard the bay leaf before serving.
Step 5: Garnish and Serve
Squeeze the juice from the 1 whole lemon over the dish and sprinkle with the 0.25 cup chopped fresh flat-leaf parsley. Gently fluff the rice with a fork and serve the chicken on top. The bright acidity from the lemon and fresh parsley cuts through the richness of the chicken, balancing every bite.
Pro Tips For Making A Chef’S Life Chicken And Rice
- Brown the Thighs First: Sear the bone-in chicken thighs skin-side down in a hot pan for 5-7 minutes until golden—this builds flavor and keeps the meat juicy. I learned this the hard way when I skipped it and ended up with bland rice.
- Toast the Rice: Cook the long-grain white rice in the same pan after removing the chicken, stirring for 2 minutes until slightly nutty. Sounds weird, but it works and adds depth to the dish.
- Use Homemade Broth: Swap store-bought chicken broth for homemade if you can—it’s richer and makes a real difference. If not, at least use low-sodium to control the seasoning.
- Don’t Overcrowd the Pan: Cook the chicken in batches if needed to avoid steaming. After burning three batches, I finally figured out that crowded pans just boil the meat instead of browning it.
Storing and Reheating This a chefs life chicken and rice
Refrigerator Storage
Let this dish cool for no more than 2 hours before transferring to airtight containers. I use glass containers with locking lids to keep it fresh. Store in the fridge at 40°F or below for up to 4 days. The flavors actually deepen overnight. ❄️
Freezer Storage
For longer storage, freeze in quart-sized freezer bags for up to 3 months. Squeeze out excess air to prevent freezer burn. Leave 1 inch of headspace for expansion. Label with the date so you can track freshness.
Stovetop Reheating
This is my preferred method. Transfer the dish to a heavy pot, add ¼ cup chicken broth to prevent sticking, and heat over medium-low heat for 10-15 minutes. Stir occasionally and add a splash more broth if needed. 🔥
Microwave Reheating
For quick meals, microwave individual portions covered with a damp paper towel. Heat on 70% power for 2-3 minutes, stir, then continue in 1-minute intervals until reaching 165°F. Add a splash of water if it looks dry.
Garnish Fresh
Always add fresh garnishes like parsley and lemon juice after reheating. These brighten the dish and restore that fresh-cooked flavor. I keep a small stash of garnishes ready for this purpose.
Nutrition Facts
Frequently Asked Questions
Can I use boneless chicken thighs instead?
Yes, but reduce cooking time to 20-22 minutes. Boneless cooks faster and may dry out if overcooked. Keep an eye on the internal temp—it should reach 165°F.
Why toast the rice before adding liquid?
Toasting enhances the nutty flavor and prevents mushiness. It also helps the rice absorb the broth more evenly. Just 1-2 minutes is all it takes.
What if my rice is undercooked?
Add ¼ cup hot broth, cover, and simmer for 5-7 more minutes. Avoid stirring to keep the grains intact. Check the liquid level before adding more.
Can this be made in a slow cooker?
Yes, but sear the chicken first. Combine all ingredients in the slow cooker and cook on low for 4-5 hours. The texture will be softer than stovetop.

- Jollof Rice Sauce Recipe: West African Tomato and Spice Infusion - September 25, 2026
- Japanese Rice Soup Recipe: Umami-Rich Comfort in a Bowl - September 25, 2026
- Homemade Cream Of Rice Recipe: Silk-Smooth Breakfast in Minutes - September 25, 2026