
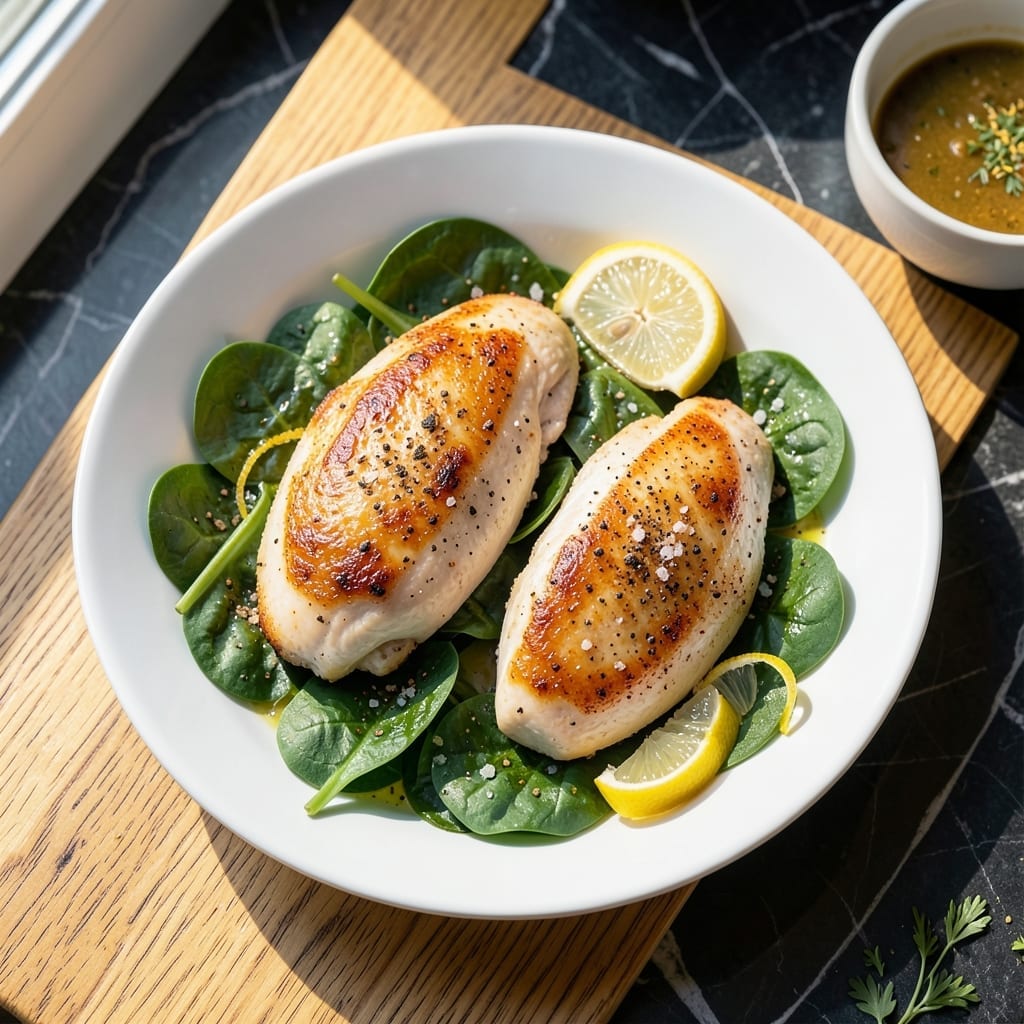
Achieving perfectly moist chicken breast in the air fryer comes down to precise timing and temperature control. This method delivers consistent results without the guesswork.
The secret is preheating the air fryer and using a simple seasoning blend that enhances natural flavors. Cooking at 375°F for 15 minutes ensures even doneness while retaining juiciness.
You’ll end up with tender, flavorful chicken that works for salads, sandwiches, or as a main course. The exterior develops a light golden crust while the inside stays succulent.
No complicated techniques—just a straightforward approach that works every time. The air fryer’s circulation guarantees even cooking without drying out the meat.
Ingredients for Airfry Chicken Breast
Simple seasonings and fresh chicken breast create this foolproof air-fried dish.
| Ingredient | Amount | Notes |
|---|---|---|
| Boneless Skinless Chicken Breasts 🍗 | 1 ½ lb | Uniform thickness for even cooking |
| Extra-Virgin Olive Oil 🫒 | 1 tbsp | Divided for seasoning and spraying |
| Kosher Salt 🧂 | 1 tsp | Diamond Crystal preferred for texture |
| Freshly Ground Black Pepper 🌶️ | ½ tsp | Coarse grind for best flavor |
| Garlic Powder 🧄 | 1 tsp | Not garlic salt substitute |
| Onion Powder 🧅 | 1 tsp | Enhances natural chicken flavor |
| Smoked Paprika 🌶️ | ½ tsp | Adds subtle smoky depth |
| Dried Oregano 🍃 | ½ tsp | Mediterranean oregano preferred |
| Dried Thyme 🌿 | ½ tsp | Rub between fingers to release oils |
| Lemon Juice 🍋 | 1 tbsp | Freshly squeezed for brightness |
| Cooking Spray 🫒 | 1 can | High smoke point oil preferred |
The chicken quality is paramount here. Boneless, skinless breasts with uniform thickness cook most evenly—look for air-chilled at Whole Foods or Trader Joe’s for superior texture. Pound thicker portions to match thinner ones (about 1-inch thick). The Diamond Crystal kosher salt provides the ideal texture for seasoning adhesion without over-salting.
Out of smoked paprika? Regular paprika plus a pinch of cayenne works in a pinch. Fresh garlic can replace garlic powder at 1 clove per 1/4 teaspoon. For a citrus variation, add 1/2 teaspoon lemon zest to the seasoning blend. The olive oil can be swapped for avocado oil if you prefer a neutral flavor. Avoid pre-ground black pepper—freshly ground makes a noticeable difference.
Pre-seasoned chicken keeps in the fridge for 12-24 hours before cooking. Store raw chicken on the bottom shelf to prevent cross-contamination. Cooked chicken stays moist when refrigerated in an airtight container for 3-4 days or frozen for 3 months.
Why You’ll Love This Recipe
- 20-Minute Meal: I toss the chicken with olive oil, salt, pepper, and garlic powder, then let the air fryer do the work. Honestly, it’s ready before I finish setting the table.
- Crispy Outside, Juicy Inside: The air fryer gives it that golden-brown edge while keeping the middle so tender. That garlic powder? It’s the secret to making every bite ridiculously good.
- Meal Prep Hero: I make a batch on Sunday and it’s my lunch protein all week—great in salads, wraps, or just as is. Between us, it reheats like a dream.
- Budget Stretcher: Chicken breasts are affordable, and this method uses just a drizzle of oil and basic seasonings. I’ll be real: it’s my go-to when I need to feed the family without breaking the bank.
Step-by-Step Instructions for Air Fryer Chicken Breast
This method ensures juicy, flavorful results with minimal effort and maximum precision.
Step 1: Prep the Chicken for Even Cooking
Begin by patting the 1.5 lb boneless skinless chicken breasts completely dry with paper towels. This removes excess moisture, which is essential for achieving a good sear and preventing steaming in the air fryer.
Trim any visible fat or connective tissue, then slice each breast horizontally to create cutlets of uniform thickness—about ¾ inch. This ensures even cooking throughout. I always pound thicker areas gently with a meat mallet to maintain consistent thickness.
Step 2: Season Generously for Maximum Flavor
In a small bowl, combine the 1 tsp kosher salt, 0.5 tsp freshly ground black pepper, 1 tsp garlic powder, 1 tsp onion powder, 0.5 tsp smoked paprika, 0.5 tsp dried oregano, and 0.5 tsp dried thyme. Rub this mixture evenly over all surfaces of the chicken, pressing it in firmly so it adheres well.
Drizzle the 1 tbsp extra-virgin olive oil over the seasoned chicken and rub to coat evenly. Finish by brushing each piece with 1 tbsp lemon juice for brightness. Let the chicken sit at room temperature for 10 minutes to allow the seasoning to penetrate.
Step 3: Preheat and Arrange in the Air Fryer
Preheat your air fryer to 375°F for 3 minutes. This step is often skipped but makes a significant difference in achieving a golden exterior. Lightly spray the air fryer basket with cooking spray to prevent sticking.
Arrange the chicken in a single layer, ensuring pieces don’t touch each other. If your air fryer is small, work in batches—overcrowding leads to uneven cooking and steaming rather than crisping. The chicken should sizzle slightly when placed in the preheated basket.
Step 4: Air Fry to Perfection
Cook the chicken at 375°F for 12 minutes, then flip each piece carefully with tongs. Cook for an additional 3-4 minutes until the internal temperature reaches 165°F on an instant-read thermometer.
The chicken is done when the exterior is golden brown and the juices run clear. For extra crispiness, I often air fry for 1 additional minute at 400°F after flipping. This final boost enhances the texture without drying out the meat.
Step 5: Rest and Serve
Transfer the chicken to a clean plate or cutting board and tent loosely with foil. Let it rest for 5 minutes before slicing or serving. This resting period allows the juices to redistribute, ensuring moist, tender meat.
Serve immediately while warm. The result should be juicy on the inside with a lightly crisped exterior, infused with the aromatic spices and bright citrus notes from the lemon juice. This method guarantees moist chicken every time, even in the leaner breast cuts.
Pro Tips For Making Airfry Chicken Breast
- Preheat the Airfryer: Always preheat for 3-5 minutes at 375°F—skipping this leads to uneven cooking and rubbery chicken. I learned this the hard way after pulling out dry, pale breasts more times than I’d like to admit.
- Pound Even Thickness: Use a rolling pin or the flat side of a knife to pound the breasts to 1-inch thickness. This guarantees even cooking so the thin ends don’t dry out while waiting for the thick parts to finish.
- Pat Dry First: Blot the chicken with paper towels before seasoning—excess moisture steams instead of sears, and nobody wants soggy skinless chicken. Sounds tedious, but it actually changes the outcome.
- Flip Halfway Through: After 6-7 minutes at 375°F, flip the breasts and cook another 5-6 minutes. This ensures both sides get that golden crust without overcooking the interior.
Perfect Pairings for This Recipe
Salad Pairings
This chicken pairs beautifully with a crisp kale Caesar salad—the hearty greens stand up to the protein. I toss 4 cups chopped kale with 2 tbsp Parmesan and creamy dressing. A simple cucumber-tomato salad with red onion and feta also complements the smoky, herby notes. 🥗
Sandwich Ideas
For lunch, pile sliced chicken on a toasted brioche bun with avocado, bacon, and pepper jack cheese. The buttery bun soaks up juices perfectly. A classic chicken pita with tzatziki and shredded lettuce offers a Mediterranean twist.
Wine Pairings
A chilled Sauvignon Blanc from New Zealand—like Kim Crawford—cuts through the richness with its citrus notes. For red lovers, a light Pinot Noir from Oregon pairs beautifully without overpowering. I always choose wines with bright acidity. 🍷
Side Dishes
Garlic mashed potatoes or roasted sweet potatoes make hearty companions. I roast sweet potatoes at 400°F for 25 minutes with olive oil and rosemary. For a lighter option, steamed green beans with lemon zest add freshness.
Nutrition Facts
Frequently Asked Questions
Can I use frozen chicken breasts?
Thaw completely in the fridge overnight first. Cooking from frozen leads to uneven doneness and dry spots. For best results, pat dry after thawing before seasoning.
Why is my chicken dry?
Overcooking is the main culprit. Always use a meat thermometer and pull at 165°F. Also, don’t skip the 5-minute rest after cooking to retain juices.
How do I make it crispier?
Lightly spray with oil before cooking and increase temp to 400°F for the last 1-2 minutes. Ensure pieces don’t touch in the basket for even browning.
Can I cook thicker breasts?
Pound them to ¾-inch thickness first or they’ll cook unevenly. Alternatively, increase cook time by 2-3 minutes per side and check temp.

- Jollof Rice Sauce Recipe: West African Tomato and Spice Infusion - September 25, 2026
- Japanese Rice Soup Recipe: Umami-Rich Comfort in a Bowl - September 25, 2026
- Homemade Cream Of Rice Recipe: Silk-Smooth Breakfast in Minutes - September 25, 2026