
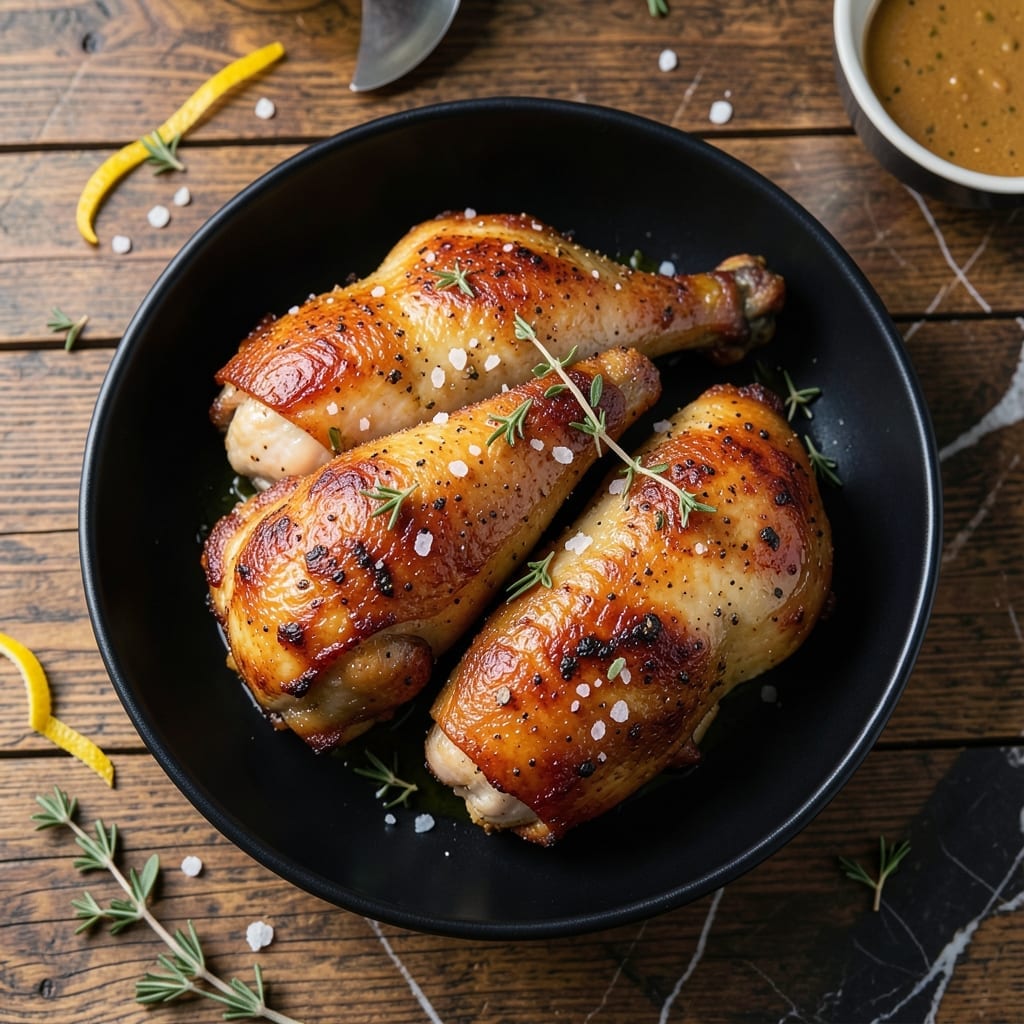
This air fryer method delivers crispy skin and juicy meat without the mess of deep frying. I developed this technique for busy weeknights when I needed restaurant-quality results in 25 minutes.
The key is patting the thighs completely dry before seasoning, which ensures maximum crispiness. A simple herb crust adds flavor without overpowering the natural taste of the chicken.
You’ll get perfectly cooked thighs with golden, shatteringly crispy skin and tender meat underneath. The air fryer circulates hot air evenly, so every piece comes out identical.
Serve with your favorite sides for a complete meal that tastes like it took hours. This method works with both bone-in and boneless thighs.
Ingredients for Airfryer Chicken Thigh
Pantry staples plus chicken thighs make this herb-crusted dish shine with minimal effort.
| Ingredient | Amount | Notes |
|---|---|---|
| Bone-In Chicken Thighs 🍗 | 2 lb | Skin-on, patted completely dry |
| Olive Oil 🫒 | 1 tbsp | Divided for brushing and mixing |
| Kosher Salt 🧂 | 1 ½ tsp | Diamond Crystal preferred for even coating |
| Black Pepper 🌶️ | 1 tsp | Freshly ground for best flavor |
| Garlic Powder 🧄 | 1 tsp | Not garlic salt for pure flavor |
| Onion Powder 🧅 | 1 tsp | Adds depth to herb crust |
| Dried Thyme 🌿 | 1 tsp | Crushed between fingers for release |
| Dried Rosemary 🌿 | 1 tsp | Finely chopped to avoid large pieces |
| Paprika 🌶️ | 1 tsp | Sweet or smoked variety works |
| Dried Parsley 🍃 | 1 tsp | For color and freshness in crust |
| Lemon Wedges 🍋 | 4 pieces | For serving and brightness |
| Fresh Thyme Sprigs 🌿 | 4 pieces | Garnish, optional but recommended |
The chicken thighs are non-negotiable—bone-in, skin-on gives you that shatteringly crispy result. I grab mine from Whole Foods or Costco for consistent quality. Look for pieces that are similar in size so they cook evenly. Pat them completely dry before seasoning (this is what makes the skin crisp up). The herb crust is simple but potent—don’t skip toasting the spices lightly in a dry pan first (worth the extra minute).
No dried thyme? Fresh at double the amount works, but pat it dry first. Swap rosemary for sage or oregano if that’s what’s in your cabinet. The paprika adds color more than heat, so skip it if you’re out. For extra crunch, mix in panko breadcrumbs with the herbs. Bone-out thighs work too, but reduce cook time by about 5 minutes (they dry out faster).
Leftovers keep 4 days in the fridge—reheat in the air fryer to revive the crispiness. Freezes well for 3 months (thaw overnight before reheating). The herb mix makes extra? Store in an airtight jar for 6 months (perfect for next time).
Why You’ll Love This Recipe
- Set It & Forget: I toss the thighs with olive oil, salt, pepper, and garlic powder, then the air fryer does all the work.
- Crispy, Juicy Magic: That skin gets impossibly crispy while the meat stays fall-off-the-bone tender—garlic powder makes every bite sing.
- Midweek MVP: Honestly, it’s my Tuesday night lifesaver when I need something fast and satisfying for the whole family.
- Budget-Friendly Batch: Bone-in thighs are cheap, and leftovers make killer tacos or salads the next day.
Step-by-Step Instructions for Air Fryer Herb-Crusted Chicken Thighs
Here’s how to achieve crispy skin and juicy meat with minimal effort and maximum flavor.
Step 1: Season the Chicken Thighs Generously
In a large bowl, combine the 2 lb Bone-In Chicken Thighs with 1 tbsp Olive Oil. I use my hands to ensure every piece is evenly coated—this helps the seasoning stick. Don’t be shy with the oil; it’s the foundation for that crispy skin we’re after.
In a separate small bowl, mix 1.5 tsp Kosher Salt, 1 tsp Black Pepper, 1 tsp Garlic Powder, 1 tsp Onion Powder, 1 tsp Dried Thyme, 1 tsp Dried Rosemary, 1 tsp Paprika, and 1 tsp Dried Parsley. Sprinkle this herb blend over the chicken, pressing it into the skin so it adheres well. The spices should create a visible, even crust on each thigh.
Step 2: Preheat and Arrange in the Air Fryer
Preheat your air fryer to 375°F for at least 5 minutes. This step is crucial—starting with a hot air fryer ensures the skin begins crisping immediately instead of steaming. Meanwhile, arrange the seasoned chicken thighs skin-side up in the air fryer basket in a single layer, leaving a little space between each piece for air circulation.
If your air fryer can’t fit all the thighs at once, cook them in batches. Overcrowding leads to uneven cooking and soggy skin. I like to place the bone-in chicken thighs with the thicker ends toward the back where the heat is most intense. This promotes even cooking throughout.
Step 3: Air Fry to Perfection
Cook the chicken thighs at 375°F for 12 minutes. Then, carefully flip each piece using tongs and cook for an additional 8-10 minutes. The skin should be deep golden brown and crispy, and the internal temperature should reach 165°F when checked with a meat thermometer.
Keep an eye on them during the last few minutes—air fryers can vary, and you want to pull them out just as the skin reaches its peak crispness. The juices should run clear when pierced with a knife, and the meat should pull away from the bone slightly.
Step 4: Rest and Serve
Transfer the cooked chicken thighs to a serving platter and let them rest for 5 minutes. This allows the juices to redistribute, ensuring every bite is moist and flavorful. I always tent them loosely with foil to keep them warm while they rest.
Serve the chicken thighs hot, garnished with 4 pieces Lemon Wedges and 4 pieces Fresh Thyme Sprigs for a pop of color and a bright, citrusy finish. The lemon wedges add the perfect zing to cut through the richness of the crispy skin and juicy meat.
Pro Tips For Making Airfryer Chicken Thigh
- Preheat the Airfryer: Always preheat to 400°F for 3-5 minutes—this guarantees crispy skin from the start, and I learned this the hard way after too many soggy batches.
- Pat Thighs Dry: Use paper towels to thoroughly dry the chicken thighs before seasoning; even a little moisture prevents that golden crust.
- Skip the Overcrowding: Leave at least half an inch between thighs in the basket, or they’ll steam instead of crisp—yes, even if it means cooking in batches.
- Rest Before Serving: Give the thighs 5 minutes on a plate after cooking to let the juices redistribute, or you’ll lose all that flavor to the cutting board.
Troubleshooting airfryer chicken thigh
Uneven Cooking
If some pieces cook faster than others, it’s likely because your air fryer has hot spots. I solve this by rotating the basket halfway through cooking and placing thicker pieces near the heating element. My Ninja Foodi has this issue, so I always check at the 12-minute mark. 💡
Soggy Skin Problem
This happens when there’s too much moisture in the basket. Pat the thighs extra dry with paper towels before seasoning, and don’t overcrowd. If needed, cook in batches. I learned this the hard way during my first BBQ contest season.
Seasoning Won’t Stick
The oil is your glue. Use 1 tbsp olive oil and rub it thoroughly into the skin. For extra adhesion, let the seasoned chicken rest for 10 minutes before cooking. Diamond Crystal kosher salt works best for even coating.
Undercooked Centers
Bone-in thighs need that full 20-22 minutes at 375°F. Always use a meat thermometer—165°F is your target. If unsure, return to the air fryer for 3-5 more minutes. I keep a ThermoWorks thermometer handy.
Excessive Smoke
This usually means your air fryer needs cleaning. Wipe down the basket and heating element with a damp cloth after each use. Also, avoid using smoked paprika if your model runs hot—it can burn and create smoke. 🌡️
Dry Meat
Overcooking is the culprit. Pull the thighs when they reach 165°F and let them rest. Bone-in thighs are forgiving, but boneless can dry out fast. I always set a timer for 18 minutes then check with my thermometer.
Nutrition Facts
Frequently Asked Questions
Should I use bone-in or boneless thighs?
Bone-in thighs work best for this recipe. They stay juicier during cooking and the bone helps conduct heat evenly. Boneless can be used but reduce cooking time by 5 minutes and watch closely to prevent drying out.
Can I cook from frozen?
Yes, but add 8-10 minutes to the total time. Cook at 375°F for 15 minutes first, then flip and continue until internal temperature reaches 165°F. Pat dry before seasoning for best results.
How do I know when they’re done?
Use a meat thermometer to check the thickest part reaches 165°F. The skin should be golden and crispy, and juices should run clear when pierced. Always let rest for 5 minutes before serving.
What if my air fryer is smaller?
Cook in batches to avoid overcrowding. This ensures proper air circulation for crispy skin. Keep cooked pieces warm in a 200°F oven while finishing the batch.

- Jollof Rice Sauce Recipe: West African Tomato and Spice Infusion - September 25, 2026
- Japanese Rice Soup Recipe: Umami-Rich Comfort in a Bowl - September 25, 2026
- Homemade Cream Of Rice Recipe: Silk-Smooth Breakfast in Minutes - September 25, 2026