
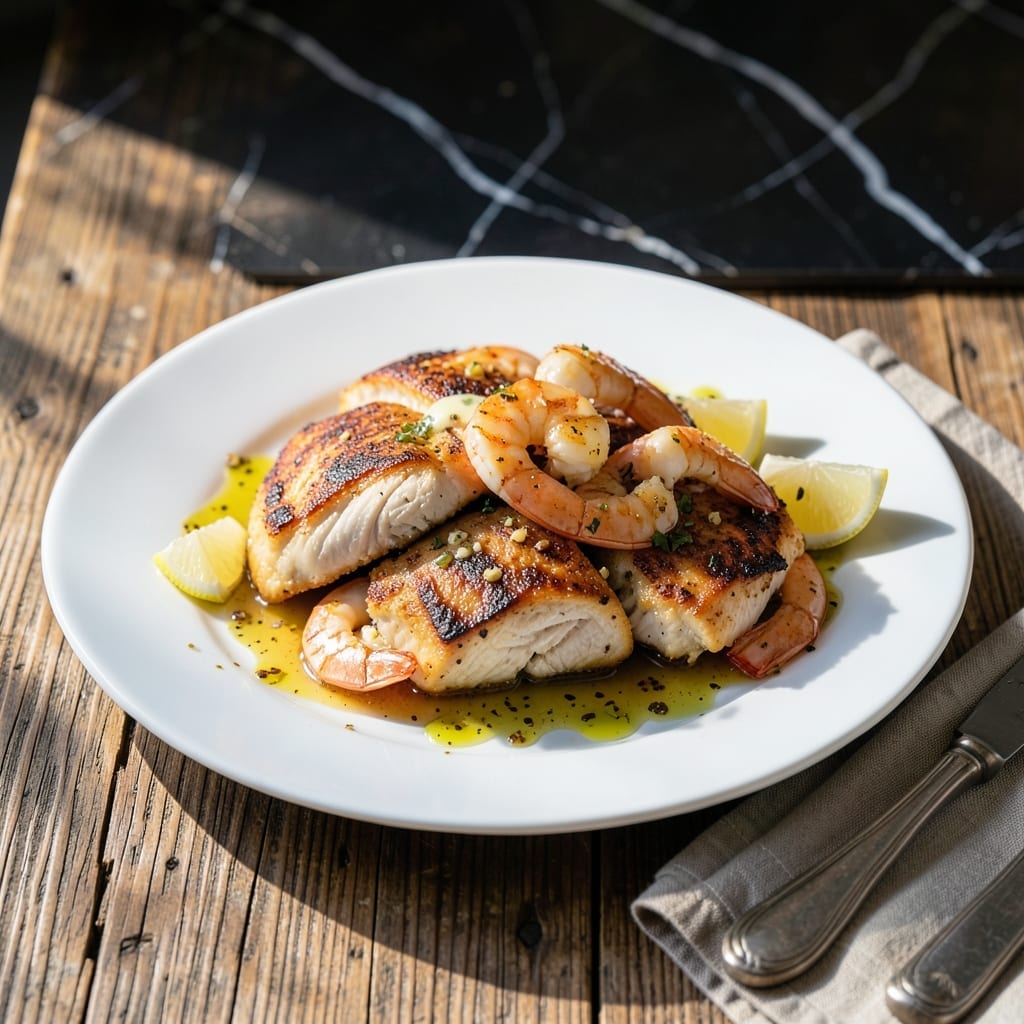
This copycat platter brings the restaurant experience home, recreating Applebee’s signature surf and turf with precision. The combination of tender chicken and perfectly cooked shrimp delivers the same satisfying flavors you’d expect from the original.
I’ve refined this recipe through multiple tests to ensure it matches the restaurant version in both taste and presentation. The key is using simple techniques that anyone can master in their own kitchen.
You’ll achieve juicy chicken and succulent shrimp with a buttery, garlicky finish that ties everything together. The dish comes together in under 30 minutes with minimal effort.
Serve with the traditional sides for a complete meal that tastes just like the restaurant favorite. This version stays true to the original while being easy to prepare at home.
Ingredients for Applebee’s Chicken and Shrimp
Surf and turf magic starts with these fresh, flavorful staples ready in minutes.
| Ingredient | Amount | Notes |
|---|---|---|
| Boneless, Skinless Chicken Breasts 🍗 | 1 ½ lb | Pounded to even thickness |
| Large Shrimp 🍤 | 1 lb | Peeled and deveined, tails on |
| Unsalted Butter 🧈 | ½ cup | Melted for sauce |
| Garlic Cloves 🧄 | 6 cloves | Minced finely |
| Olive Oil 🫒 | 2 tbsp | Divided for cooking |
| Lemon Juice 🍋 | 2 tbsp | Freshly squeezed |
| Chicken Broth 🥣 | ½ cup | Low-sodium preferred |
| Dried Parsley 🌿 | 1 tsp | For garnish |
| Paprika 🌶️ | 1 tsp | Sweet or smoked variety |
| Salt 🧂 | 1 tsp | Kosher or sea salt |
| Black Pepper 🌶️ | ½ tsp | Freshly ground preferred |
| All-Purpose Flour 🌾 | ¼ cup | For dredging chicken |
| Worcestershire Sauce 💧 | 1 tbsp | Adds depth to shrimp |
| Lemon Zest 🍋 | 1 tsp | From one lemon |
The shrimp and chicken quality can’t be faked here. Wild-caught shrimp (16/20 count) and air-chilled chicken breasts from Whole Foods or Costco give you that restaurant-grade texture. Look for shrimp with a slight sweet smell (never fishy) and chicken that’s pale pink, not gray. If buying frozen shrimp, thaw overnight in the fridge—it makes all the difference in texture.
No Worcestershire? Soy sauce plus a dash of lemon gets you close (though anchovies are traditional, so skip if avoiding). Fresh garlic is non-negotiable—jarred just doesn’t have the punch. If you’re out of chicken broth, water plus bouillon cube works. The butter can be swapped for olive oil, but you’ll lose that rich, restaurant-style finish.
Leftovers keep 3-4 days in the fridge (store shrimp and chicken separately). Reheat gently—shrimp overcooks fast. The butter sauce? Make extra and freeze for up to 3 months. Always bring shrimp to room temp before cooking (worth the 10 minutes).
Why You’ll Love This Recipe
- One Pan Wonder: I sear the shrimp and chicken together in butter and garlic—one skillet, minimal mess, maximum flavor.
- Garlic Butter Magic: The combo of melted butter, fresh garlic, and olive oil makes every bite ridiculously good.
- Date Night Winner: I’ve served this for casual dinners and special occasions—it’s my go-to when I want to impress without stressing.
- Leftovers? No Problem: Honestly, it tastes even better the next day—if there’s any left after the first serving.
Step-by-Step Instructions for Chicken and Shrimp Surf and Turf
Here’s how to nail that classic restaurant flavor right in your own kitchen.
Step 1: Prep the Chicken for Even Cooking
Pound the 1.5 lb boneless, skinless chicken breasts to an even ½-inch thickness using a meat mallet. This ensures they cook through without drying out. Season both sides generously with salt, black pepper, and paprika.
Dredge the chicken lightly in the 0.25 cup all-purpose flour, shaking off any excess. The flour creates a light crust that helps lock in moisture. Let the floured chicken rest for 5 minutes while you prep the shrimp—this helps the coating adhere better during cooking.
Step 2: Sauté the Shrimp with Bold Flavor
In a large skillet, heat 1 tbsp olive oil over medium-high heat. Add the 1 lb large shrimp and cook for 2-3 minutes per side until they turn opaque pink. Sprinkle with 0.5 tsp black pepper during cooking.
Just before removing the shrimp from the pan, add 1 tbsp Worcestershire sauce and 1 tsp lemon zest. Toss to coat evenly—this adds that signature depth of flavor. Transfer the shrimp to a plate and tent with foil to keep warm.
Step 3: Cook the Chicken to Golden Perfection
In the same skillet, add the remaining 1 tbsp olive oil and heat over medium-high heat. Add the floured chicken and cook for 4-5 minutes per side until golden brown and the internal temperature reaches 165°F.
Don’t crowd the pan—if necessary, cook in batches to avoid steaming the chicken. The crust should be crispy and deeply colored when it’s ready. Transfer the cooked chicken to the plate with the shrimp.
Step 4: Create the Garlic Butter Sauce
Reduce the heat to medium and add the minced 6 cloves garlic cloves to the skillet. Cook for 30 seconds until fragrant, then pour in the 0.5 cup chicken broth, 2 tbsp lemon juice, and 0.5 cup unsalted butter.
Simmer for 2-3 minutes, stirring constantly, until the sauce thickens slightly and turns a rich golden color. The garlic should be soft but not browned. Taste and adjust seasoning if needed—this sauce ties the whole dish together.
Step 5: Plate and Garnish for Restaurant-Style Presentation
Return the chicken and shrimp to the skillet, spooning the sauce over them to coat evenly. Let everything warm through for 1-2 minutes. The shrimp should glisten with sauce, and the chicken should absorb some of that garlicky goodness.
Transfer to serving plates and garnish with 1 tsp dried parsley for a pop of color. Serve immediately while hot—the sauce should be glossy and coat every piece beautifully. This is copycat cooking at its finest.
Pro Tips For Making Applebee’S Chicken And Shrimp
- Dry the Shrimp: Pat the shrimp completely dry with paper towels before cooking—this prevents steaming and guarantees a proper sear. I learned this the hard way after serving rubbery shrimp more times than I’d like to admit.
- Butter Last: Add the unsalted butter at the very end of cooking the chicken and shrimp to prevent it from burning. About 1 tablespoon per portion is enough to enrich the garlic sauce without turning bitter.
- Don’t Overcrowd: Cook the chicken and shrimp in batches if needed—crowding the pan drops the temperature and turns your beautiful sear into a sad boil. Sounds tedious, but it’s the difference between restaurant-quality and “meh.”
- Mince Garlic Fine: Finely mince the garlic cloves instead of pressing them—it distributes the flavor more evenly and avoids those overpowering bites that can ruin a dish. My grandmother swore by this, and she was right.
Pro Cooking Tips for This Dish
Perfect Chicken Texture
Pounding the chicken to ½-inch thickness is non-negotiable for even cooking. I use a heavy meat mallet and cover the chicken with plastic wrap to prevent tearing. Let the floured chicken rest for 5 minutes—this helps the coating crisp up beautifully. 💡
Shrimp Timing Precision
Shrimp cook fast—2-3 minutes per side is all you need at medium-high heat. Watch for the color change to opaque pink, then remove immediately. Overcooking is the biggest mistake here, turning them rubbery instead of tender.
Sauce Consistency
Simmer the sauce for 2-3 minutes until it coats the back of a spoon. If it thickens too much, add a splash of chicken broth. I use a wooden spoon to scrape up those flavorful browned bits from the pan.
Pan Management
Don’t crowd the pan—cook chicken in batches if needed. The crust won’t form properly if the pan isn’t hot enough. I prefer a heavy stainless steel skillet for even heat distribution. 🔥
Resting Technique
Let the shrimp rest tented with foil while cooking the chicken. This keeps them warm without drying out. The residual heat continues cooking slightly, so pull them off just before they’re fully done.
Final Touch
Return everything to the pan for 1-2 minutes to marry the flavors. The sauce should glisten and coat each piece generously. I always garnish with dried parsley for that classic Applebee’s look.
Nutrition Facts
Frequently Asked Questions
Can I use frozen shrimp for this dish?
Yes, but thaw them overnight in the fridge first. Pat completely dry before cooking to prevent steaming. Never thaw at room temperature—it affects texture.
What if my chicken is thicker than ½-inch?
Pound it thinner or butterfly it to ensure even cooking. Thicker pieces may burn outside before reaching 165°F inside. Use a meat mallet for best results.
How do I prevent the sauce from breaking?
Keep heat at medium and stir constantly. If it separates, remove from heat and whisk vigorously. Adding a splash of cold broth can help re-emulsify.
Can I make this ahead of time?
Cook chicken and shrimp separately, then refrigerate. Reheat gently in the sauce for 2-3 minutes to maintain texture. Avoid microwaving—it makes shrimp rubbery.

- Jollof Rice Sauce Recipe: West African Tomato and Spice Infusion - September 25, 2026
- Japanese Rice Soup Recipe: Umami-Rich Comfort in a Bowl - September 25, 2026
- Homemade Cream Of Rice Recipe: Silk-Smooth Breakfast in Minutes - September 25, 2026