
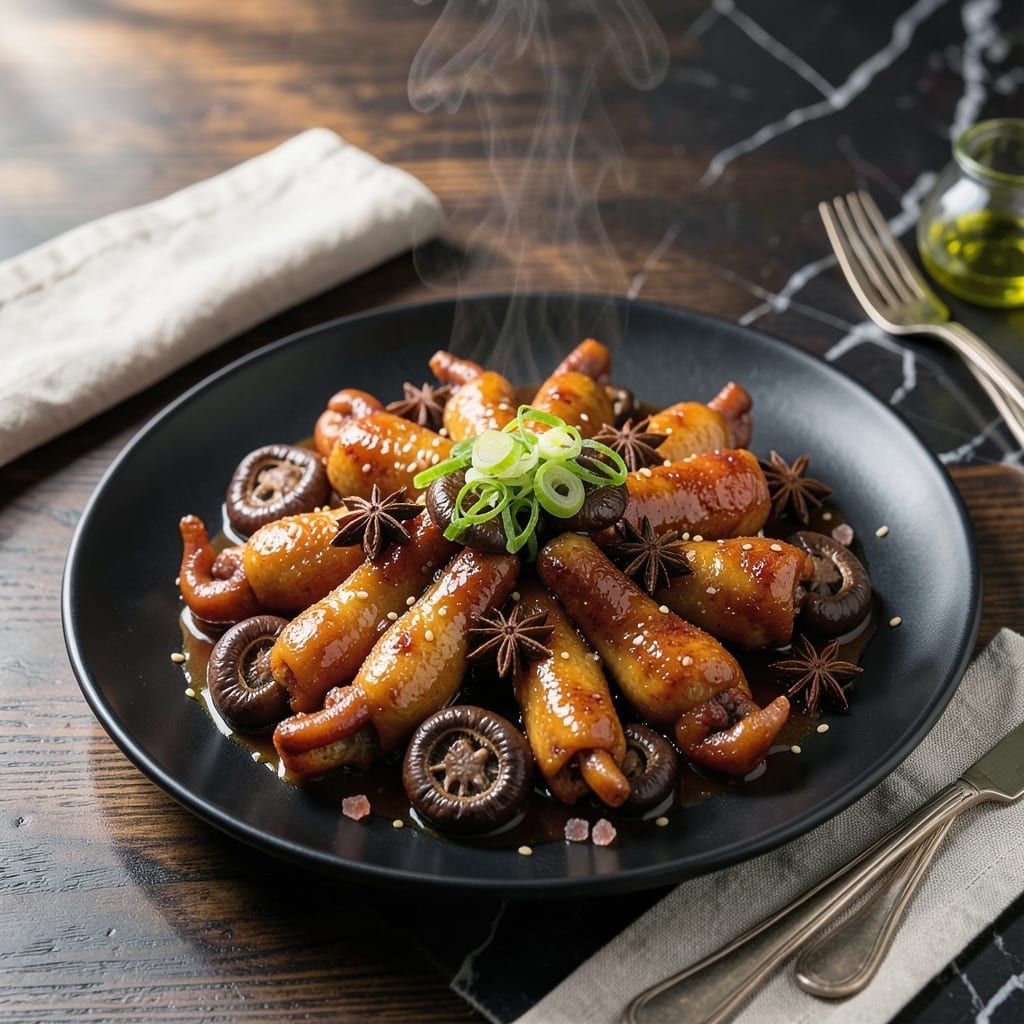
This traditional dim sum delicacy transforms humble chicken feet into a collagen-rich dish with tender, gelatinous texture. I developed this recipe after tasting authentic versions in Cantonese restaurants, determined to recreate that perfect balance of flavors at home.
The secret lies in the double-cooking process: first blanching to remove impurities, then braising in a fragrant sauce. This method ensures the skin becomes silky while the bones release their natural gelatin. The aroma of star anise and soy sauce fills the kitchen as it simmers.
You’ll end up with pieces that are sticky, slightly chewy, and packed with umami depth. The sauce reduces to a glossy glaze that clings to every bite. It’s a dish that rewards patience with restaurant-quality results.
Serve as part of a dim sum spread or as a unique appetizer. Here’s how to make it properly.
Ingredients for Asian Chicken Feet
Authentic dim sum requires just a few specialty ingredients and careful preparation.
| Ingredient | Amount | Notes |
|---|---|---|
| Chicken Feet 🍗 | 1 ½ lb | Cleaned, nails removed |
| Soy Sauce 🍶 | ½ cup | Dark soy for color |
| Light Soy Sauce 🍶 | ¼ cup | For salty depth |
| Rock Sugar 🍬 | ¼ cup | Or substitute granulated |
| Star Anise ⭐ | 2 whole | For aromatic braise |
| Dried Shiitake Mushrooms 🍄 | 4 pieces | Soaked, sliced |
| Garlic Cloves 🧄 | 6 cloves | Smashed, peeled |
| Ginger Slices 🌿 | 6 slices | Fresh, thinly cut |
| Shaoxing Wine 🍷 | 2 tbsp | Dry sherry works too |
| Sesame Oil 🫒 | 1 tbsp | Toasted for aroma |
| Green Onions 🧅 | 3 whole | Cut into 2-inch pieces |
| Black Peppercorns ⚫ | 1 tsp | Whole, not ground |
| Bay Leaves 🍃 | 2 pieces | Dried, for braising |
| Water 💧 | 4 cups | For blanching and braising |
The chicken feet are everything here. Asian markets are your best bet—look for yellow, unblemished feet with minimal odor. Ask the butcher to clean and remove nails (or do it yourself with kitchen shears). Freshness matters more than size, so avoid anything with a sour smell. I’ve had luck at H Mart and larger Vietnamese grocers when my usual spot is out.
No Shaoxing wine? Dry sherry at a 1:1 ratio works in a pinch. Can’t find rock sugar? Granulated sugar dissolved in a splash of water gets you close. Star anise is non-negotiable for that signature aroma, but if you’re stuck, a pinch of five-spice powder (sparingly) can approximate the complexity. The mushrooms add umami—fresh shiitake work too, just halve the amount.
Blanched feet keep in the fridge for 2 days before cooking. The finished dish tastes even better the next day once the flavors meld. Store in an airtight container in the fridge for up to 5 days, or freeze for 3 months. Reheat gently to preserve that silky texture.
Why You’ll Love This Recipe
- Set and Forget: I toss everything into the pot—chicken feet, soy sauces, rock sugar, star anise—and let it simmer while I do laundry.
- Sweet-Savory Magic: That rock sugar caramelizes with the soy sauces into this glossy, finger-licking glaze I can’t resist.
- Party Crowd Pleaser: I serve this at gatherings and watch everyone go back for seconds, even the picky eaters.
- Budget Stretcher: A pound of chicken feet costs pennies, and this recipe turns them into a showstopping dish that feeds six.
Step-by-Step Instructions for Asian Chicken Feet
This method ensures tender, flavorful results with a perfect balance of sweet and savory notes.
Step 1: Blanch the Chicken Feet
Begin by placing the 1.5 lb Chicken Feet in a large pot and covering them with cold 4 cups Water. Bring to a boil over high heat, then reduce to a simmer for 5 minutes.
This blanching step removes impurities and helps tighten the skin for a better texture. You’ll notice the water becoming cloudy—this is normal. Drain the chicken feet and rinse them under cold water to remove any residue.
Step 2: Prepare the Aromatic Braising Liquid
In a clean pot, combine the 0.5 cup Soy Sauce, 0.25 cup Light Soy Sauce, 0.25 cup Rock Sugar, 2 whole Star Anise, 4 pieces Dried Shiitake Mushrooms, 6 cloves Garlic Cloves, 6 slices Ginger Slices, 2 tbsp Shaoxing Wine, 1 tbsp Sesame Oil, 3 whole Green Onions, 1 tsp Black Peppercorns, and 2 pieces Bay Leaves.
Add the 4 cups Water and bring to a gentle simmer over medium heat. Stir until the rock sugar dissolves completely, creating a fragrant, balanced braising liquid.
Step 3: Braise the Chicken Feet
Add the blanched chicken feet to the pot, ensuring they are fully submerged in the liquid. If needed, add a bit more water to cover. Bring back to a simmer, then reduce the heat to low.
Cover and braise for 1.5 to 2 hours, stirring occasionally, until the chicken feet are tender and the liquid has reduced slightly. The feet should be soft enough to pierce easily with a fork, and the sauce will have deepened in color and flavor.
Step 4: Reduce and Finish
Once the chicken feet are tender, increase the heat to medium-high and let the liquid reduce for an additional 10-15 minutes. This concentrates the sauce, coating the feet in a glossy, flavorful glaze.
Remove from heat and let the chicken feet sit in the sauce for 10 minutes to absorb the final layers of flavor. The sauce should be rich, aromatic, and slightly sticky, clinging to the chicken feet beautifully.
Pro Tips For Making Asian Chicken Feet
- Blanch First: Always blanch the chicken feet in boiling water for 3-5 minutes before braising—I learned this the hard way after my first batch had a weird aftertaste.
- Balance the Sauces: Use a 1:1 ratio of soy sauce to light soy sauce, or the dish will be either too dark or too salty. Sounds simple, but it actually changes the outcome.
- Skip the Shortcuts: Don’t replace rock sugar with granulated; the slow dissolve of rock sugar gives the sauce its signature glossy texture.
- Simmer Low and Slow: Keep the heat just below a boil when braising with star anise—high heat makes the spices bitter and the meat tough.
Dietary Considerations for This Dish
Gluten-Free Adaptation
This recipe is naturally gluten-free if you use tamari instead of regular soy sauce. I recommend San-J tamari—it has the same depth of flavor without wheat. Always check labels, as some brands add wheat to their tamari.
Low-Carb Friendly
The natural sugars in this dish come from the rock sugar and vegetables. To reduce carbs, cut the sugar by half and add 1 tsp stevia to maintain sweetness. The chicken feet themselves are very low-carb, with most calories coming from protein and collagen. 💪
Dairy-Free by Default
There are no dairy products in this traditional preparation. The rich, silky texture comes entirely from the collagen in the chicken feet and the slow braising process. No substitutions are needed for those avoiding dairy.
Allergen Considerations
Chicken feet are a shellfish-free protein, making this a good option for shellfish allergies. However, those with soy allergies should replace soy sauce with coconut aminos at a 1:1 ratio. Be aware that some Asian markets process chicken feet near shellfish.
Keto Modifications
For keto diets, follow the low-carb suggestions and increase the braising time to 2.5 hours for maximum collagen extraction. The sauce will be slightly less sweet but still deeply flavorful. I’ve served this to keto friends with rave reviews.
Pregnancy Note
While chicken feet are safe to eat during pregnancy, ensure they’re fully cooked to 165°F internal temperature. The slow braise guarantees this. Some pregnant women avoid star anise due to its mild uterine stimulant properties, so omit it if concerned. 💡
Nutrition Facts
Frequently Asked Questions
Where can I find chicken feet for this dish?
Check your local Asian market or butcher shop. They often sell them fresh or frozen. Ask for cleaned feet with nails already removed to save prep time.
Can I make this in a slow cooker?
Yes! After blanching, transfer everything to a slow cooker and cook on low for 6-8 hours. The texture will be just as tender, though the sauce may need reducing afterward.
Why do my chicken feet turn out tough?
This usually means they didn’t cook long enough. The collagen needs 1.5-2 hours of gentle braising to break down properly. Avoid boiling vigorously, which can toughen the skin.
How do I know when they’re done?
Test with a fork—they should pierce easily through the thickest part. The skin will appear translucent and the sauce will have reduced to a glossy consistency.

- Jollof Rice Sauce Recipe: West African Tomato and Spice Infusion - September 25, 2026
- Japanese Rice Soup Recipe: Umami-Rich Comfort in a Bowl - September 25, 2026
- Homemade Cream Of Rice Recipe: Silk-Smooth Breakfast in Minutes - September 25, 2026