
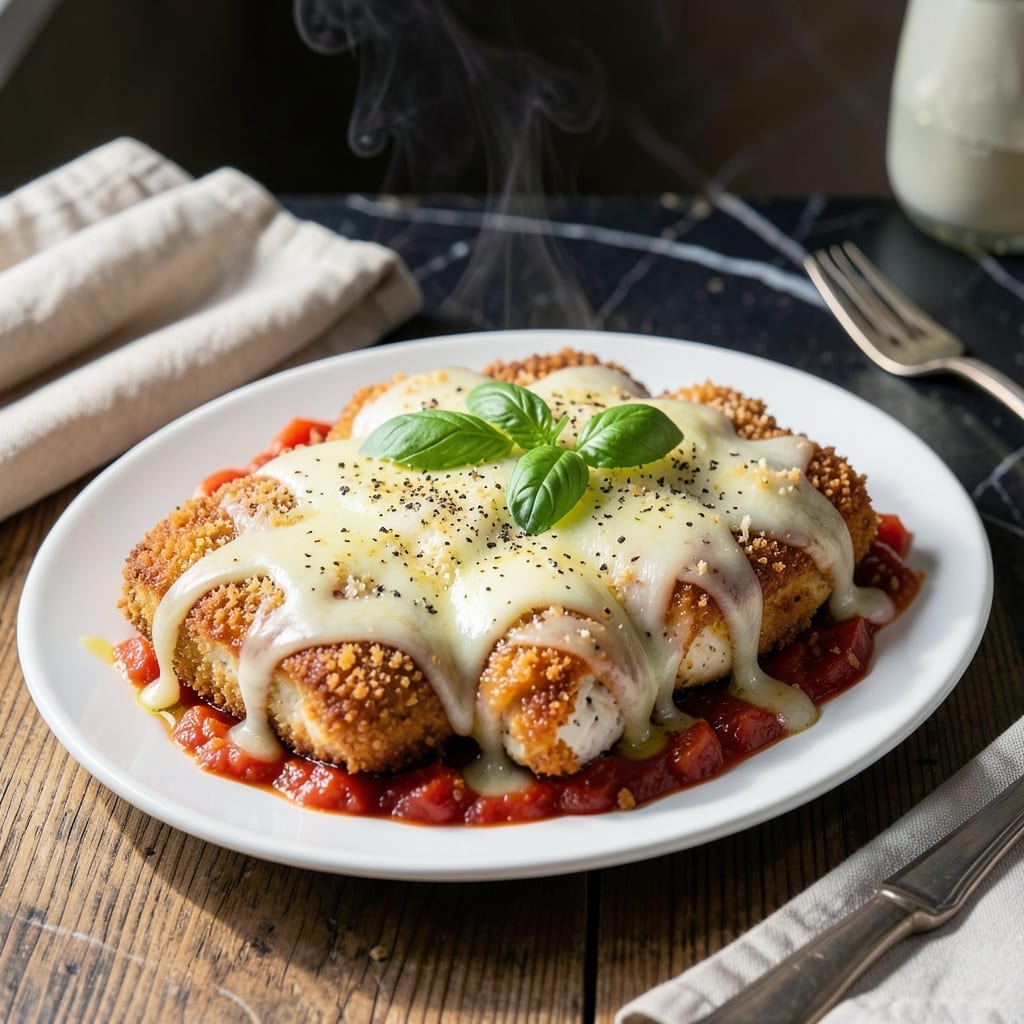
This baked chicken parm delivers the crispy texture you crave without the fryer. A three-cheese blend creates that golden, bubbling topping we all love.
I’ve perfected this method to ensure the coating stays crispy even under the melted cheese. The key is baking at a high temperature to seal in the texture.
You’ll get tender chicken, a rich tomato sauce, and a perfectly browned cheese layer in every bite. It’s a foolproof way to achieve restaurant-quality results at home.
Serve with pasta or a fresh salad for a complete meal. Here’s how to make it right.
Ingredients for Baked Chicken Parmigiana
Three cheeses, crispy coating, and a rich tomato sauce make this dish unforgettable.
| Ingredient | Amount | Notes |
|---|---|---|
| Chicken Breasts 🍗 | 1 ½ lb | Boneless, skinless, pounded thin |
| All-Purpose Flour 🌾 | 1 cup | For dredging chicken |
| Large Eggs 🥚 | 2 whole | Beaten for egg wash |
| Italian Breadcrumbs 🍞 | 1 ½ cups | Panko works too |
| Parmesan Cheese 🧀 | ½ cup | Freshly grated from block |
| Mozzarella Cheese 🧀 | 8 oz | Shredded from block |
| Provolone Cheese 🧀 | 4 oz | Sliced or shredded |
| Marinara Sauce 🍅 | 2 cups | Homemade or quality jarred |
| Olive Oil 🫒 | ½ cup | For frying chicken |
| Garlic Cloves 🧄 | 3 cloves | Minced for sauce |
| Dried Basil 🌿 | 1 tsp | Or fresh basil chopped |
| Dried Oregano 🍃 | 1 tsp | Mediterranean variety preferred |
| Salt 🧂 | 1 tsp | Kosher or sea salt |
| Black Pepper 🌶️ | ½ tsp | Freshly ground preferred |
| Fresh Parsley 🌿 | ¼ cup | Chopped, for garnish |
The cheese blend is everything here. Whole Foods has great Parmesan wedges you can grate fresh—pre-shredded just doesn’t melt the same. For the mozzarella and provolone, block cheese shredded at home beats pre-bagged every time. The breadcrumbs need to be fine for that even, crispy crust. Progresso or store-brand Italian breadcrumbs work perfectly.
No marinara on hand? Crushed tomatoes plus Italian seasoning gets you close in a pinch. Fresh garlic is non-negotiable for me (the jarred stuff lacks punch), but garlic powder at half the amount works if you’re desperate. Want extra crisp? Swap regular breadcrumbs for panko—just press it on extra hard so it sticks. The parsley garnish? Skip if you must, but it adds that fresh finish.
Assemble just before baking—the breading gets soggy if it sits. Leftovers keep 3-4 days in the fridge, but the crust softens. Reheat in the oven or air fryer to crisp it back up. Freezes well for 2 months if you’re meal-prepping.
Why You’ll Love This Recipe
- One Pan Magic: I love that this comes together with just a sheet pan—dredge, bread, bake, and minimal cleanup.
- That Crispy Crust: The Italian breadcrumbs and parmesan create this golden, crunchy coating that gives way to juicy chicken every single time.
- Weeknight Hero: Honestly, it’s my go-to for busy evenings when I need something hearty that still feels special.
- Leftovers? Yes Please: Between us, it tastes even better the next day—toss the extras into a sandwich or salad for lunch.
Step-by-Step Instructions for Baked Chicken Parmigiana
Here’s my foolproof method for achieving that perfect crispy coating with a gooey three-cheese center.
Step 1: Prep and Bread the Chicken Breasts
Start by pounding the 1.5 lb Chicken Breasts to an even ½-inch thickness between plastic wrap. This ensures even cooking and prevents dry spots. Pat them completely dry with paper towels—moisture is the enemy of crispy breading.
Set up a breading station: 1 cup All-Purpose Flour mixed with 1 tsp Salt and 0.5 tsp Black Pepper in one bowl, beaten 2 whole Large Eggs in another, and 1.5 cups Italian Breadcrumbs combined with 0.5 cup Parmesan Cheese in the third. Dredge each breast in flour, then egg, then breadcrumbs, pressing firmly so the coating adheres.
Step 2: Pan-Fry to Golden Perfection
Heat 0.5 cup Olive Oil in a large skillet over medium-high heat until shimmering. Carefully place the breaded chicken in the pan—you should hear a satisfying sizzle. Cook for 3-4 minutes per side until the coating turns deep golden brown and crispy.
Don’t crowd the pan, or the temperature will drop and the breading will steam instead of fry. Transfer the chicken to a paper towel-lined plate to drain excess oil. This quick fry sets the crust before baking, ensuring it stays crispy under the sauce.
Step 3: Layer with Sauce and Cheeses
Spread 1 cup of the 2 cups Marinara Sauce in a baking dish. Arrange the fried chicken breasts in a single layer. Spoon the remaining 1 cup Marinara Sauce over each piece, letting it pool slightly around the edges.
Sprinkle 8 oz Mozzarella Cheese evenly over the chicken, then layer 4 oz Provolone Cheese on top. For extra flavor, I like to mix in 1 tsp Dried Basil and 1 tsp Dried Oregano with the marinara before spreading it. The herbs infuse the sauce with that classic Italian aroma.
Step 4: Bake Until Bubbly and Melty
Preheat your oven to 375°F. Bake the chicken for 20-25 minutes until the cheese is completely melted, bubbly, and starting to turn light golden brown in spots. You’ll see the edges of the marinara sauce caramelizing slightly—that’s how you know it’s ready.
If the cheese isn’t browning enough, broil for 1-2 minutes at the end, watching closely to avoid burning. The internal temperature of the chicken should reach 165°F, but with thin-cut breasts and the initial frying, this is usually achieved by the time the cheese melts.
Step 5: Rest and Garnish for Serving
Let the dish rest for 5 minutes after removing it from the oven. This allows the cheeses to set slightly so they don’t all slide off when you serve it. The resting time also lets the flavors meld together beautifully.
Sprinkle with 0.25 cup Fresh Parsley just before serving for a pop of color and freshness. Serve immediately while the cheese is still gooey and the breading maintains its crispness. Every bite should deliver that perfect contrast of textures—crispy outside, tender inside, with that stretchy cheese pull.
Pro Tips For Making Baked Chicken Parmigiana
- Pound the Chicken: Use a meat mallet to flatten the breasts to an even 1/2-inch thickness—this guarantees even cooking and prevents dry, chewy edges. I learned this the hard way after pulling out rubbery chicken from the center of thick cuts.
- Double-Dredge for Crisp: After the egg wash, dip the chicken back into the flour, then the breadcrumbs again. Sounds tedious, but it creates that extra-crunchy crust that holds up to the sauce and cheese.
- Skip the Cold Cheese: Let your Parmesan sit at room temperature for 20 minutes before grating—it melts more smoothly and clings better to the breading. Cold cheese just sits in clumps and slides right off.
- Bake on a Rack: Place a wire rack on your baking sheet so air circulates under the chicken. This keeps the bottom from getting soggy, and you’ll actually get crispiness all the way around.
Make-Ahead Tips for This Recipe
Prep Ahead Strategy
You can bread the chicken up to 24 hours in advance. Place breaded pieces on a wire rack set over a baking sheet, cover loosely with plastic wrap, and refrigerate. This keeps the coating dry and crispy-ready. I always prep mine the night before for stress-free cooking. 💡
Sauce Preparation
Make the marinara sauce up to 3 days ahead and store it in an airtight container in the fridge. The flavors deepen as it sits. If using store-bought, doctor it up with 1 tsp dried basil and 1 tsp dried oregano for extra depth.
Cheese Prep
Shred the 8 oz mozzarella and 0.5 cup Parmesan the day before and store in separate containers. This saves time and ensures even melting. Pre-shredded cheese works in a pinch, but fresh shreds melt better.
Assembly Timing
Assemble the dish 1-2 hours before baking to prevent the breading from getting soggy. Cover with foil and keep refrigerated until ready to bake. This timing ensures the coating stays crispy when baked.
Freezing for Later
Fully baked and cooled chicken parm freezes beautifully for up to 2 months. Wrap individual portions tightly in plastic wrap and aluminum foil to prevent freezer burn. Reheat directly from frozen in a 375°F oven for 30-40 minutes. 🔥
Reheating Tips
For best results, reheat in the oven at 350°F for 15-20 minutes until the internal temperature reaches 165°F. This revives the crispy coating better than the microwave. Add a sprinkle of fresh parsley to finish.
Nutrition Facts
Frequently Asked Questions
Can I use chicken tenders instead of breasts?
Yes! Chicken tenders work perfectly and often require less pounding. Reduce cooking time by 2-3 minutes per side when frying since they’re thinner. They’ll cook through faster in the oven too.
Why did my breading fall off?
This usually happens if the chicken wasn’t dry before breading or the oil wasn’t hot enough. Press the breadcrumbs firmly onto each piece and ensure the oil reaches medium-high heat before frying.
Can I make this gluten-free?
Swap the flour for cornstarch and use gluten-free breadcrumbs. Many brands offer pre-made gluten-free panko that works great. Double-check all cheese labels for additives.

- Jollof Rice Sauce Recipe: West African Tomato and Spice Infusion - September 25, 2026
- Japanese Rice Soup Recipe: Umami-Rich Comfort in a Bowl - September 25, 2026
- Homemade Cream Of Rice Recipe: Silk-Smooth Breakfast in Minutes - September 25, 2026